ASUSTOR NAS – MAIL SERVER
https://www.asustor.com/online/College_topic?topic=269
COURSE OBJECTIVES
Upon completion of this course you should be able to:
1.Send and receive mail using Mail Server on your ASUSTOR NAS
PREREQUISITES
Course Prerequisites:
None
Students are expected to have a working knowledge of:
Mail servers and domain names
OUTLINE
1. Introduction to Mail Server 2. Configuring Your NAS
2.1 Signing up for an email domain name
2.4 Configuring port forwarding for Mail Server
3.1 Enabling and configuring SMTP
3.1.1 Adding multiple SMTP domain names
3.1.2 Sending email via a third party SMTP relay server
3.2 Enabling and configuring IMAP/POP3
3.3.2 Configuring the black and white list for Mail Server
3.4 Configuring Mail Server aliases
3.8 Configuring personalized settings in Mail Server
4. Using Thunderbird to Send and Receive Mail
5. Using Outlook to Send and Receive Mail
1. Introduction to Mail Server
Installing ASUSTOR’s Mail Server can allow your ASUSTOR NAS to become Mail Server that supports SMTP, IMAP and POP3 protocols and is able to send and receive Email. You can centralize management of accounts, backup emails, provide personalized settings such as automatic forwarding and automatic responses. Additionally, you can also use software such as Thunderbird or Outlook to send, receive and manage your mail.

2. Configuring Your NAS
2.1 Signing up for an email domain name
STEP 1 -In the example below we sign up for a dedicated domain name with no-ip.com and then add a hostname (asustorwoody.ddns.net). If you don't want to use no-ip.com, you can also use CloudID.myasustor.com and apply for let's encrypt. https://www.asustor.com/online/College_topic?topic=324
-Set the IP address as the NAS’s WAN IP (example: 36.226.187.21). From the ADM desktop, you can select [Settings]>[Manual Connect]>[DDNS]>[Network Status] to find your NAS’s current WAN IP.

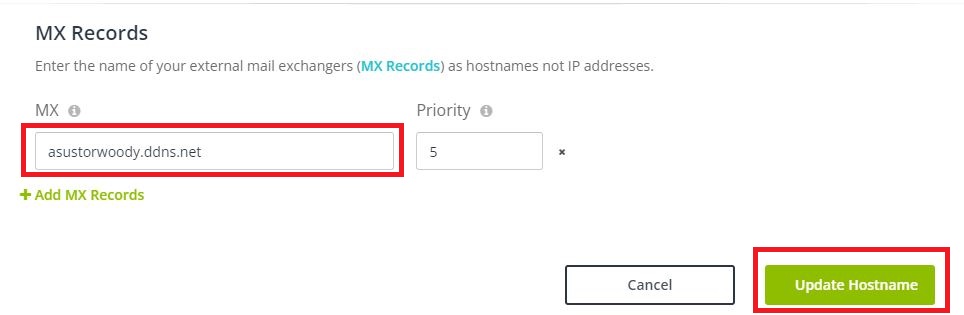
STEP 2
-Enter the domain name that you have signed up for into the MX Record field as shown in the graphic below. After entering your domain name, click on[Update Hostname].
Note 1: You must sign up for a domain name or be using DDNS service in order for Mail Server to send and receive email. You can also use CloudID.myasustor.com and apply for let's encrypt. https://www.asustor.com/online/College_topic?topic=324
Note 2: You must create an MX record (mail exchanger record) in your domain name in order for Mail Server to send and receive email.
2.2 Enabling DDNS service -Log in to ADM and select[Settings]from the desktop. -Select[Manual Connect]>[DDNS].
-Select the[Enable DDNS service]checkbox. You can also use CloudID.myasustor.com and apply for let's encrypt. https://www.asustor.com/online/College_topic?topic=324

2.3 Installing Mail Server
STEP 1
-Log in to ADM and open[App Central].
-Select[ASUSTOR Apps]>[Mail Server]and then click on the install button.

2.4 Configuring port forwarding for Mail Server
STEP 1
-Select[Settings]>[Ease of Access]>[EZ-Router]>[Port Forwarding]>[Add].
-Set up port forwarding for the services indicated in the graphic below and then click on[OK]. You might need to set up Port Forwarding in Router as well.

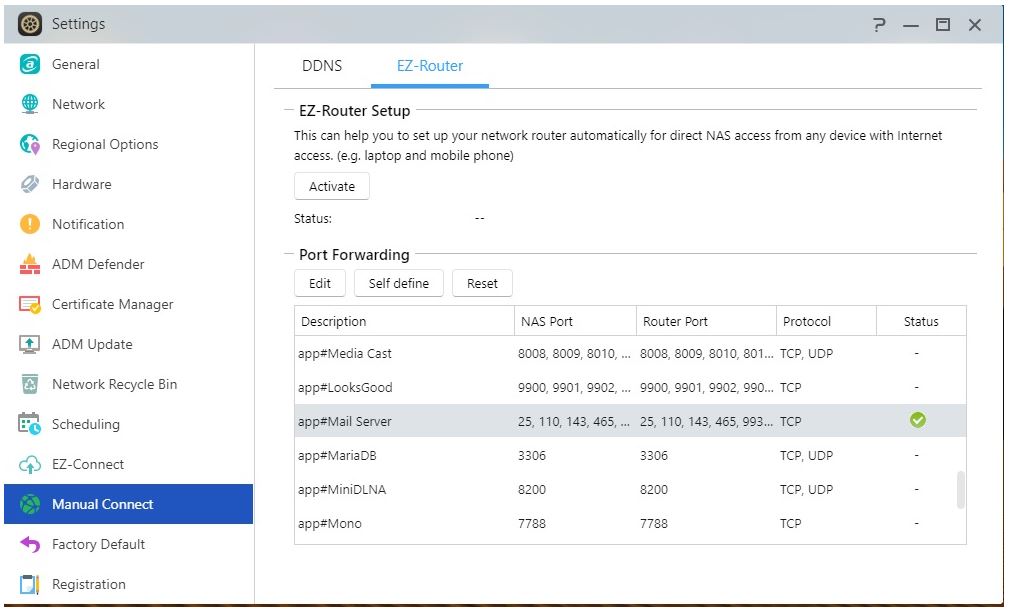
Note: All Mail Server related ports are listed in the chart below:
| Mail Server Service | Default Port Number |
|---|---|
| SMTP | 25 |
| SMTP-SSL | 465 |
| POP3 | 110 |
| POP3s (SSL/TLS) | 995 |
| IMAP | 143 |
| IMAPs (SSL/TLS) | 993 |
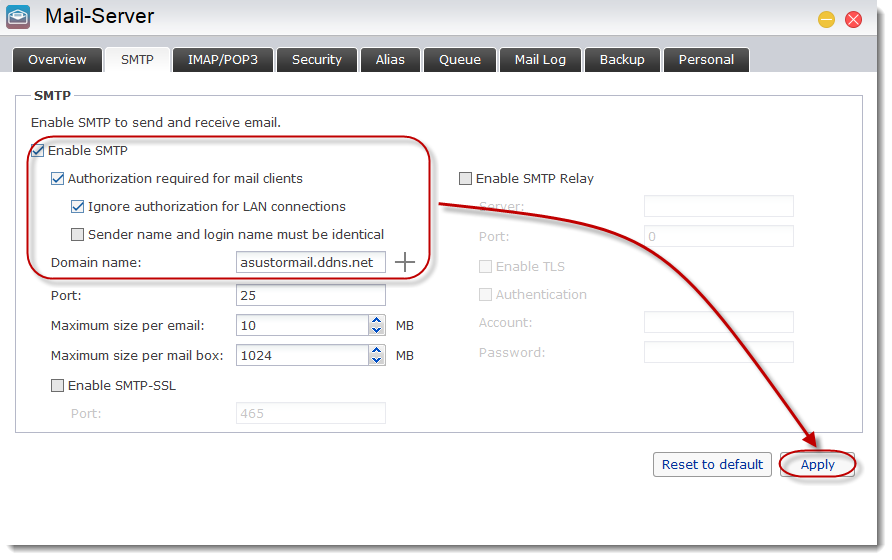
3. Configuring Mail Server 3.1 Enabling and configuring SMTP
STEP 1
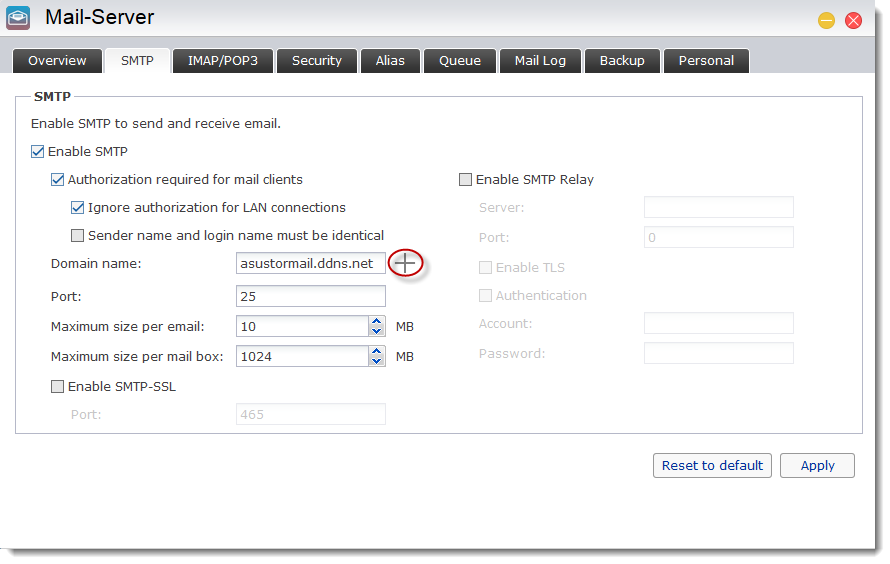
-Select the[SMTP]tab and then select the[Enable SMTP]checkbox.
-Enter your domain name (asustormail.ddns.net in our example) and then click on[Apply]. You can also use the previous [asustorwoody.ddns.net ] or CloudID.myasustor.com.
Note 4: The maximum size of a single email item is 50MB.
Note 5: The maximum capacity of a single email account is 100GB.
3.1.1 Adding multiple SMTP domain names
STEP 1
Click on the[ + ]button as shown in the graphic below.
The [Domain] window should now appear. Click on the[+]button.

-Enter your domain name and then click[OK]. In our example we enter asustorwoody.ddns.net.
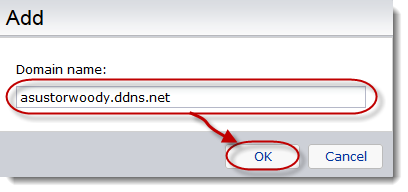
-You can now see your newly added domain name in the [Domain] window.
-Click on[OK].

3.1.2 Sending email via a third party SMTP relay server
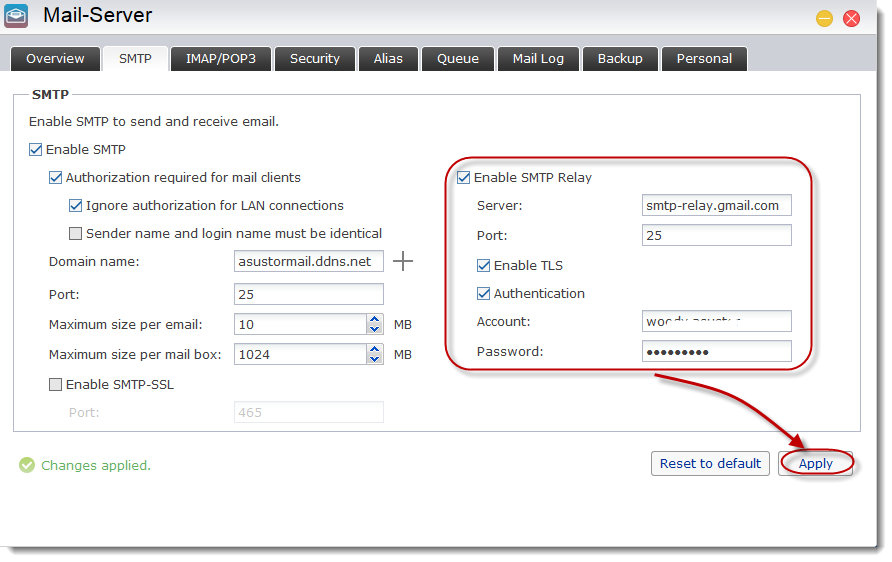
Most Internet service providers will block or return email sent from unknown domains. If you cannot send email from your domain, you must send email via other SMTP servers.
STEP 1 -Select the[Enable SMTP Relay]checkbox and then fill in the required fields.
-Click on[Apply]once you are done.
3.2 Enabling and configuring IMAP/POP3
-You can enable [POP3], [POP3 (SSL/TLS)], [IMAP] or [IMAPs (SSL/TLS)] to keep all your emails on the mail server or download them to your own email software (e.g., Thunderbird, etc.)

3.3 Security
3.3.1 Spam filter
STEP 1
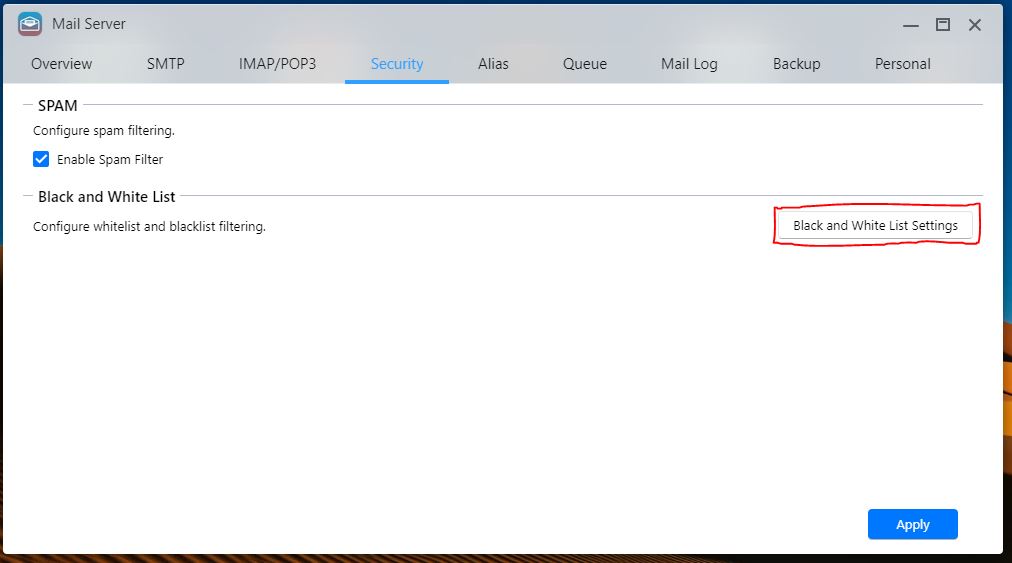
-To enable the spam filter, select the[Security]tab and then select the[Enable Spam Filter]checkbox. Click on[Apply]once you are done.

3.3.2 Configuring the black and white list for Mail Server
STEP 1
-Under the[Security]tab, click on the[Black and White List Settings]button.
STEP 2
-Click on the[+]button to add to the Black and White List.

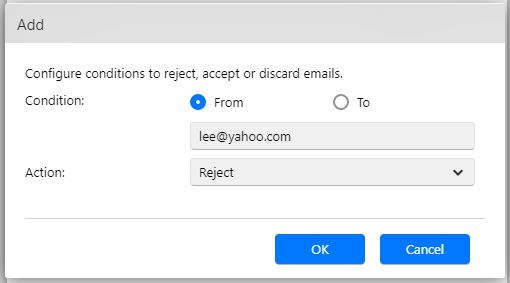
STEP 3
-Configure a condition and an action and then click on[OK]once you are done.
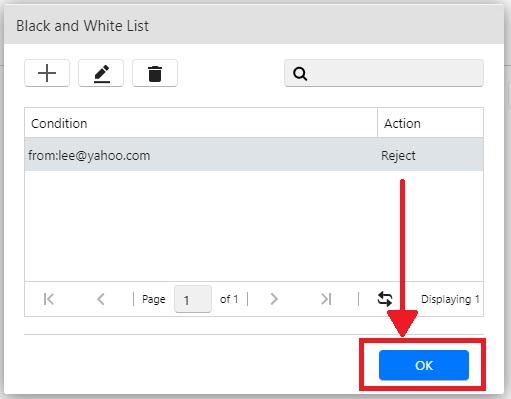
STEP 4 -You will now be able to see your newly added condition and action in the Black and White List.
-Click on[OK].
3.4 Configuring Mail Server aliases
You can create an alias to combine multiple email addresses into one. You can select the members of an alias from your ASUSTOR NAS’s users and groups.
STEP 1
-Under the[Alias]tab, click on the[Add]button.

STEP 2
-Enter an alias name and then select users or groups to add to the alias. Click on[OK]once you are done.

3.5 Queue Under the [Queue] tab, you will able to inspect all items in the mail queue. The date, sender, receiver, size and status of each item will be shown here. You can also search through and export (CSV file) the queue.
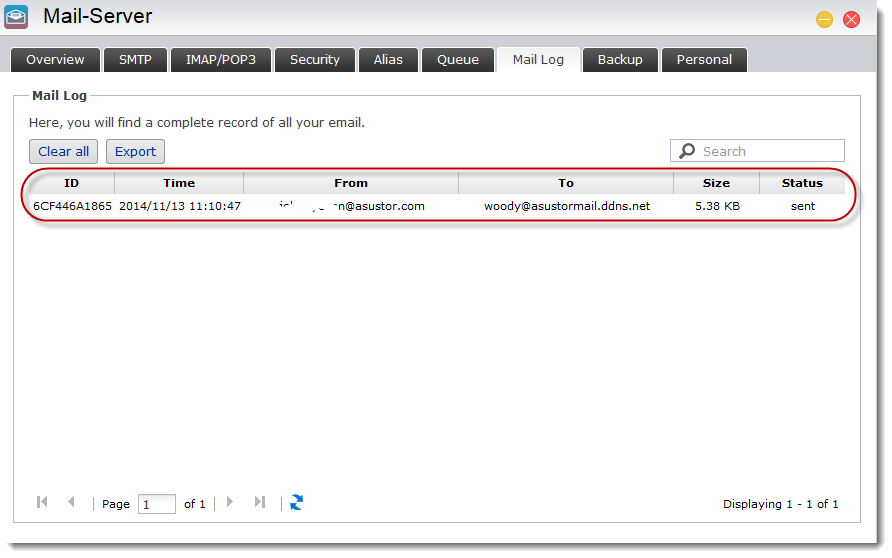
3.6 Mail Log
Under the [Mail Log] tab you will be able to find a complete record of all sent and received email including the time, sender, receiver, size and status of each item. You can also search through and export (CSV file) the mail log.
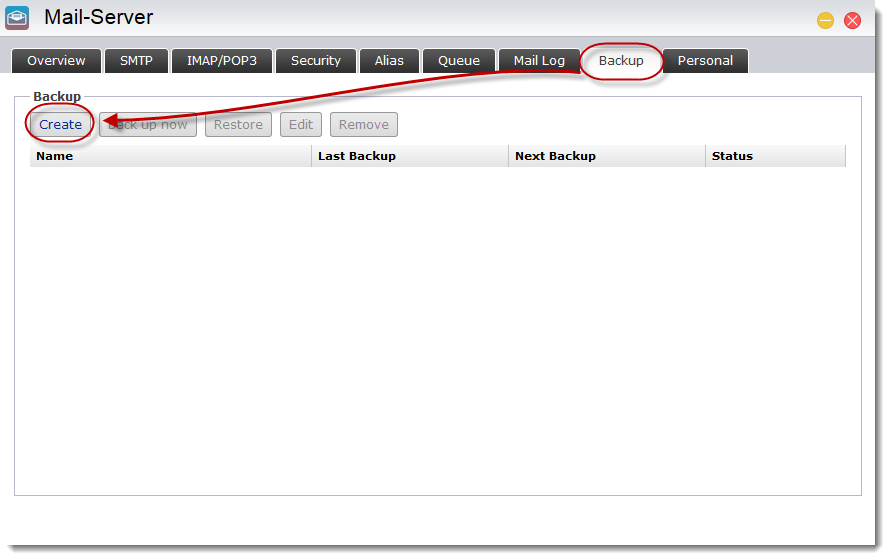
3.7 Backing up your email
STEP 1
-Under the[Backup]tab, click on the[Create]button to create a new backup job.
STEP 2
-Select the destination folder that you wish to back up to and then click on[Next].

STEP 3
-Select either the[Back up now]or[Scheduled backup]checkbox and then click on[Next].

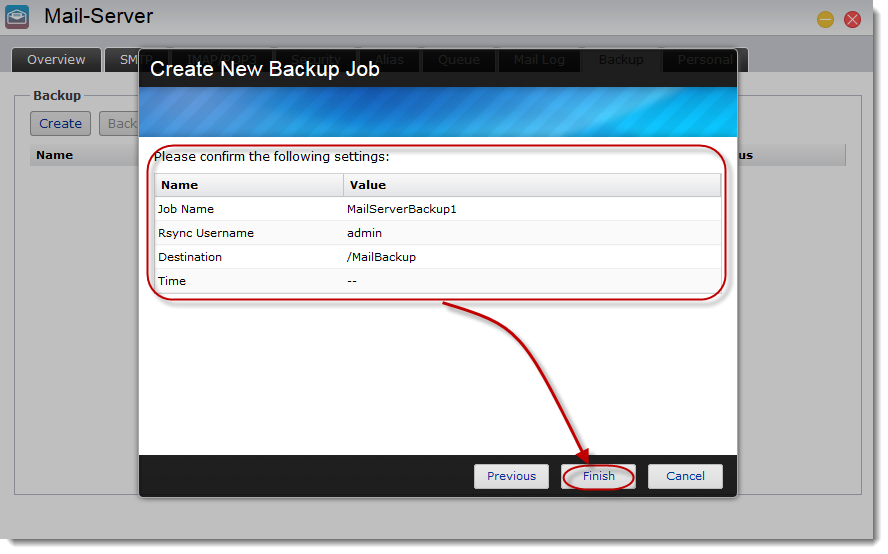
STEP 4
-Confirm the settings that you have configured and then click on[Finish]once you are done.
3.8 Configuring personalized settings in Mail Server
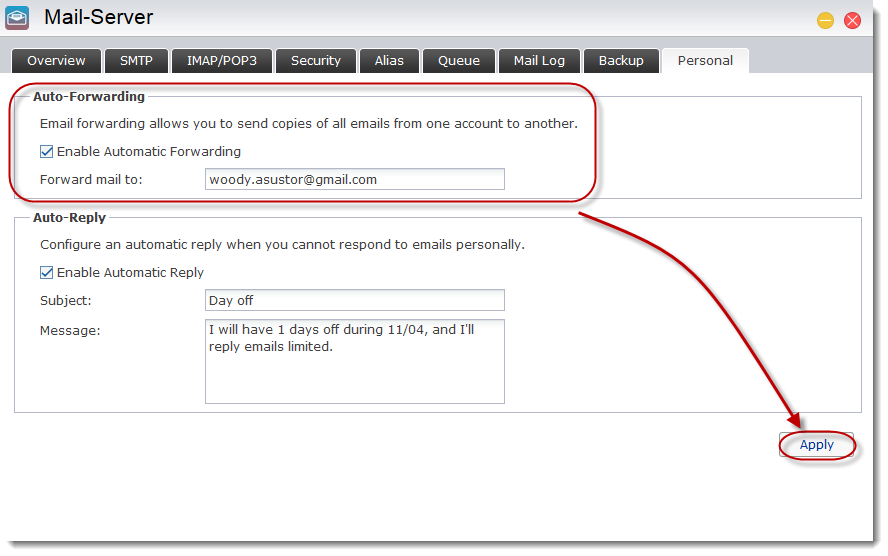
Configuring Auto-Forwarding
STEP 1
-Under the[Personal]tab, select the[Enable Automatic Forwarding]checkbox, enter the email address that you want email forwarded to and then click on[Apply].
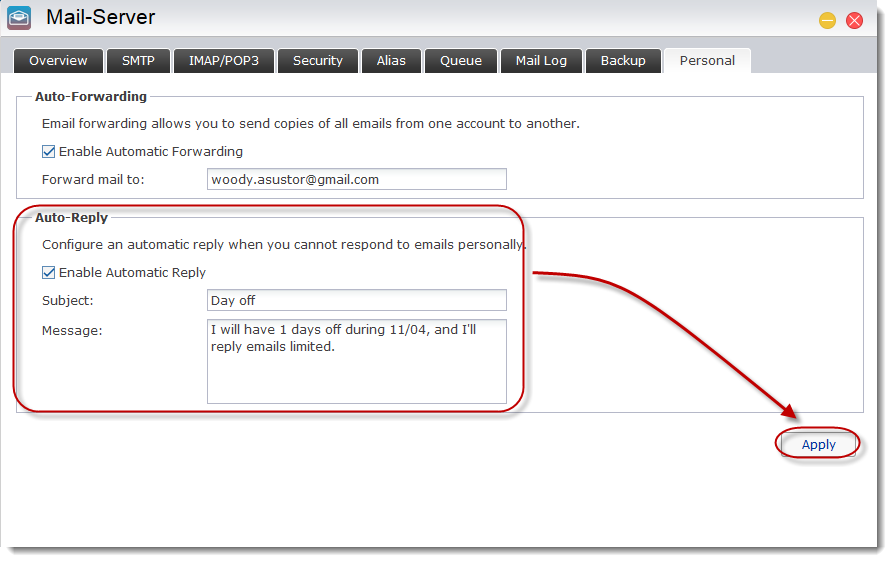
Configuring Auto-Reply
STEP 1
Under the[Personal]tab, select the[Enable Automatic Reply]checkbox, enter a subject and message and then click on[Apply].
4. Using Thunderbird to Send and Receive Mail
STEP 1
-Click on[Email].


STEP 2
-Click on the[Skip this and use my existing email]button.
STEP 3
-Fill out the fields for your name, email address and password and then click on[Continue].
[Name]: Type any words you want. [Email address]: You can use NAS account plus@DDNS hostname. For example, admin@asustorwoody.ddns.net. Or admin@dqe01.myasustor.com if you want to use it with myasustor.com. [Password]: If you use a NAS account, please enter a NAS account password.

STEP 4
-Select either[IMAP]or[POP3]to connect to Mail Server on your ASUSTOR NAS and then click on[Done].

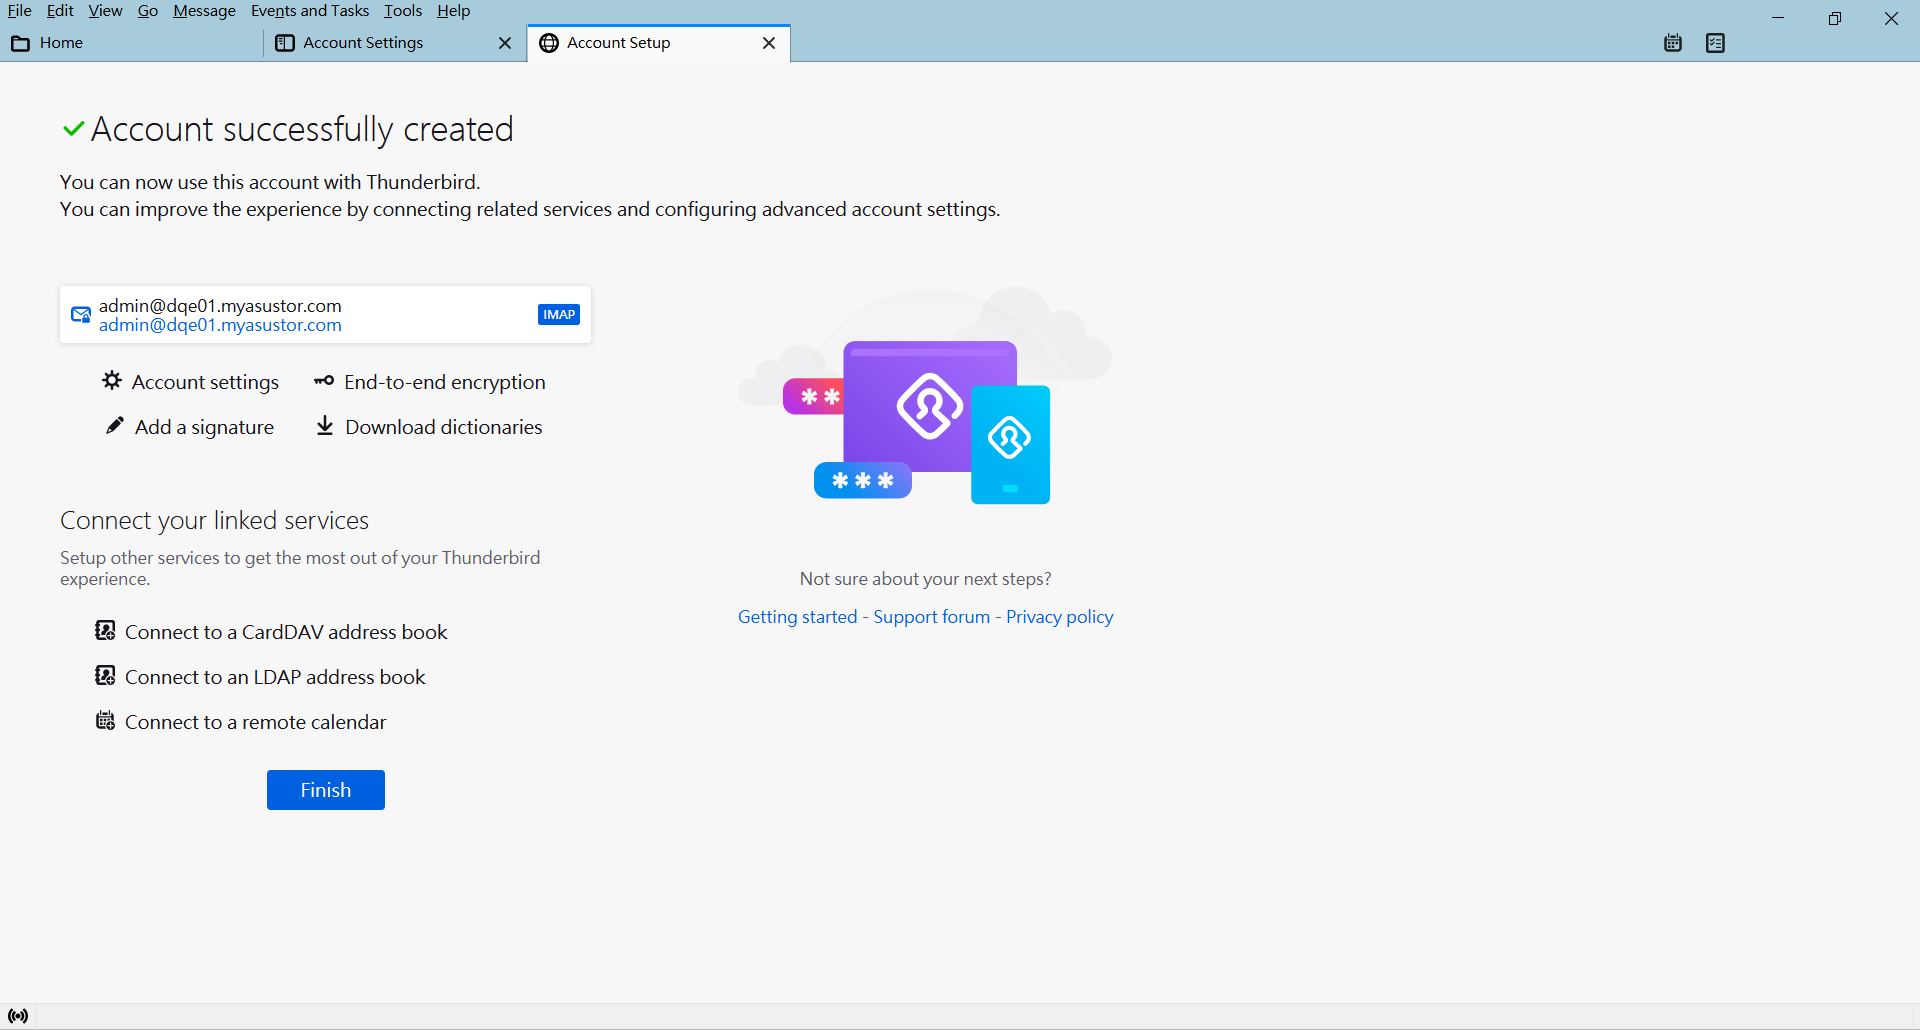
-You can now use Thunderbird to send and receive email.

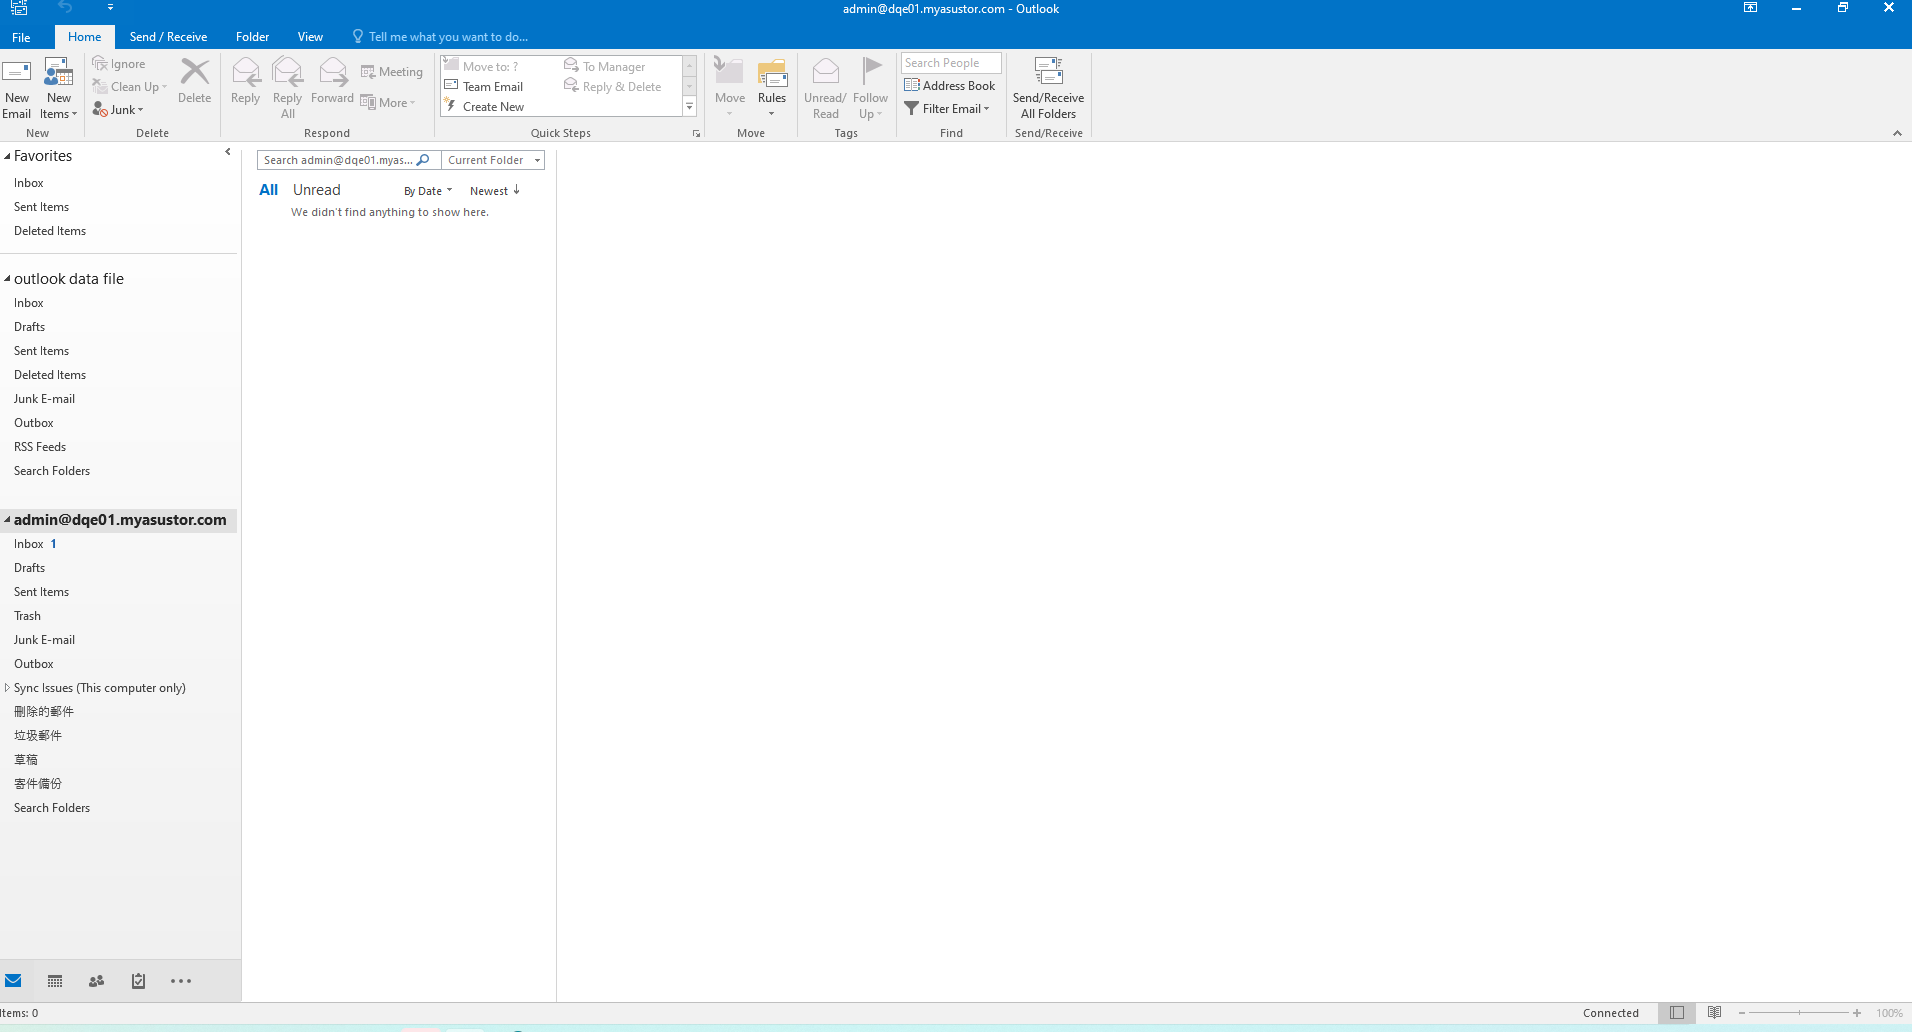
*5. Using Outlook to Send and Receive Mail*
STEP 1
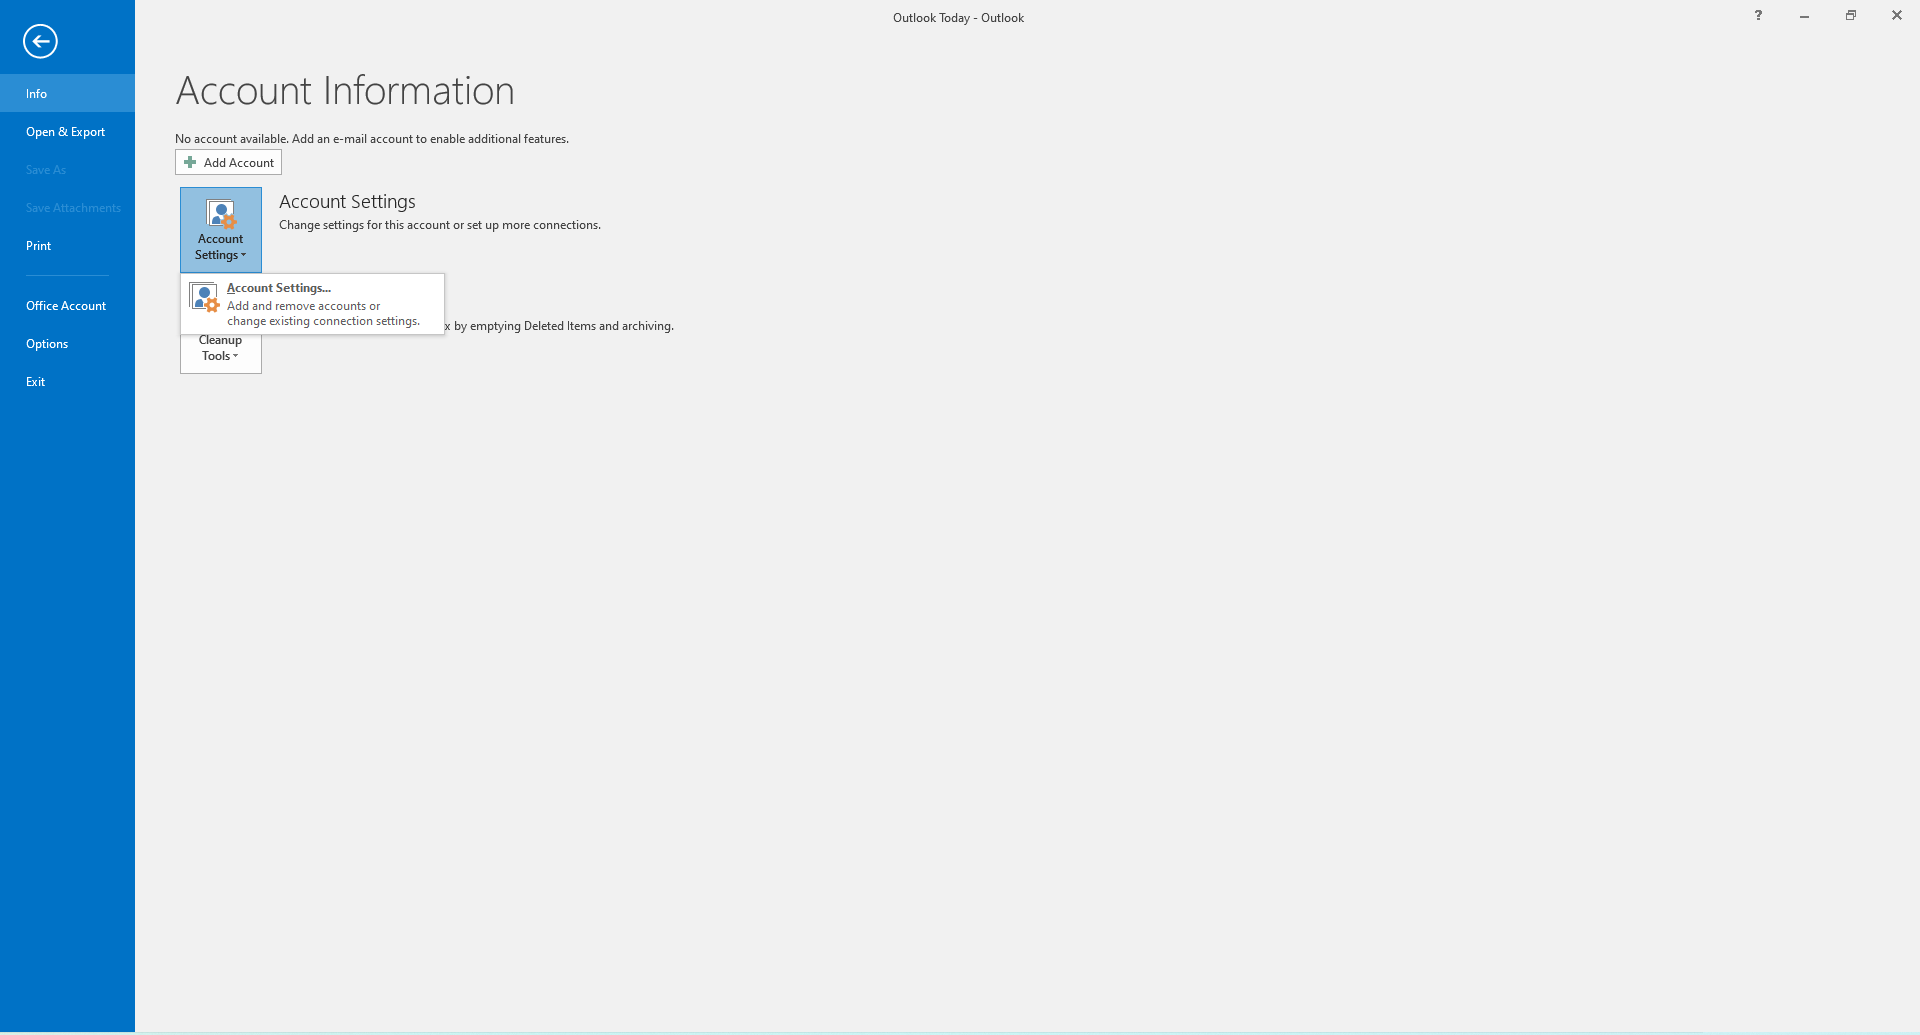
-Click on[Info].

STEP 2
-Click on[Account Settings].
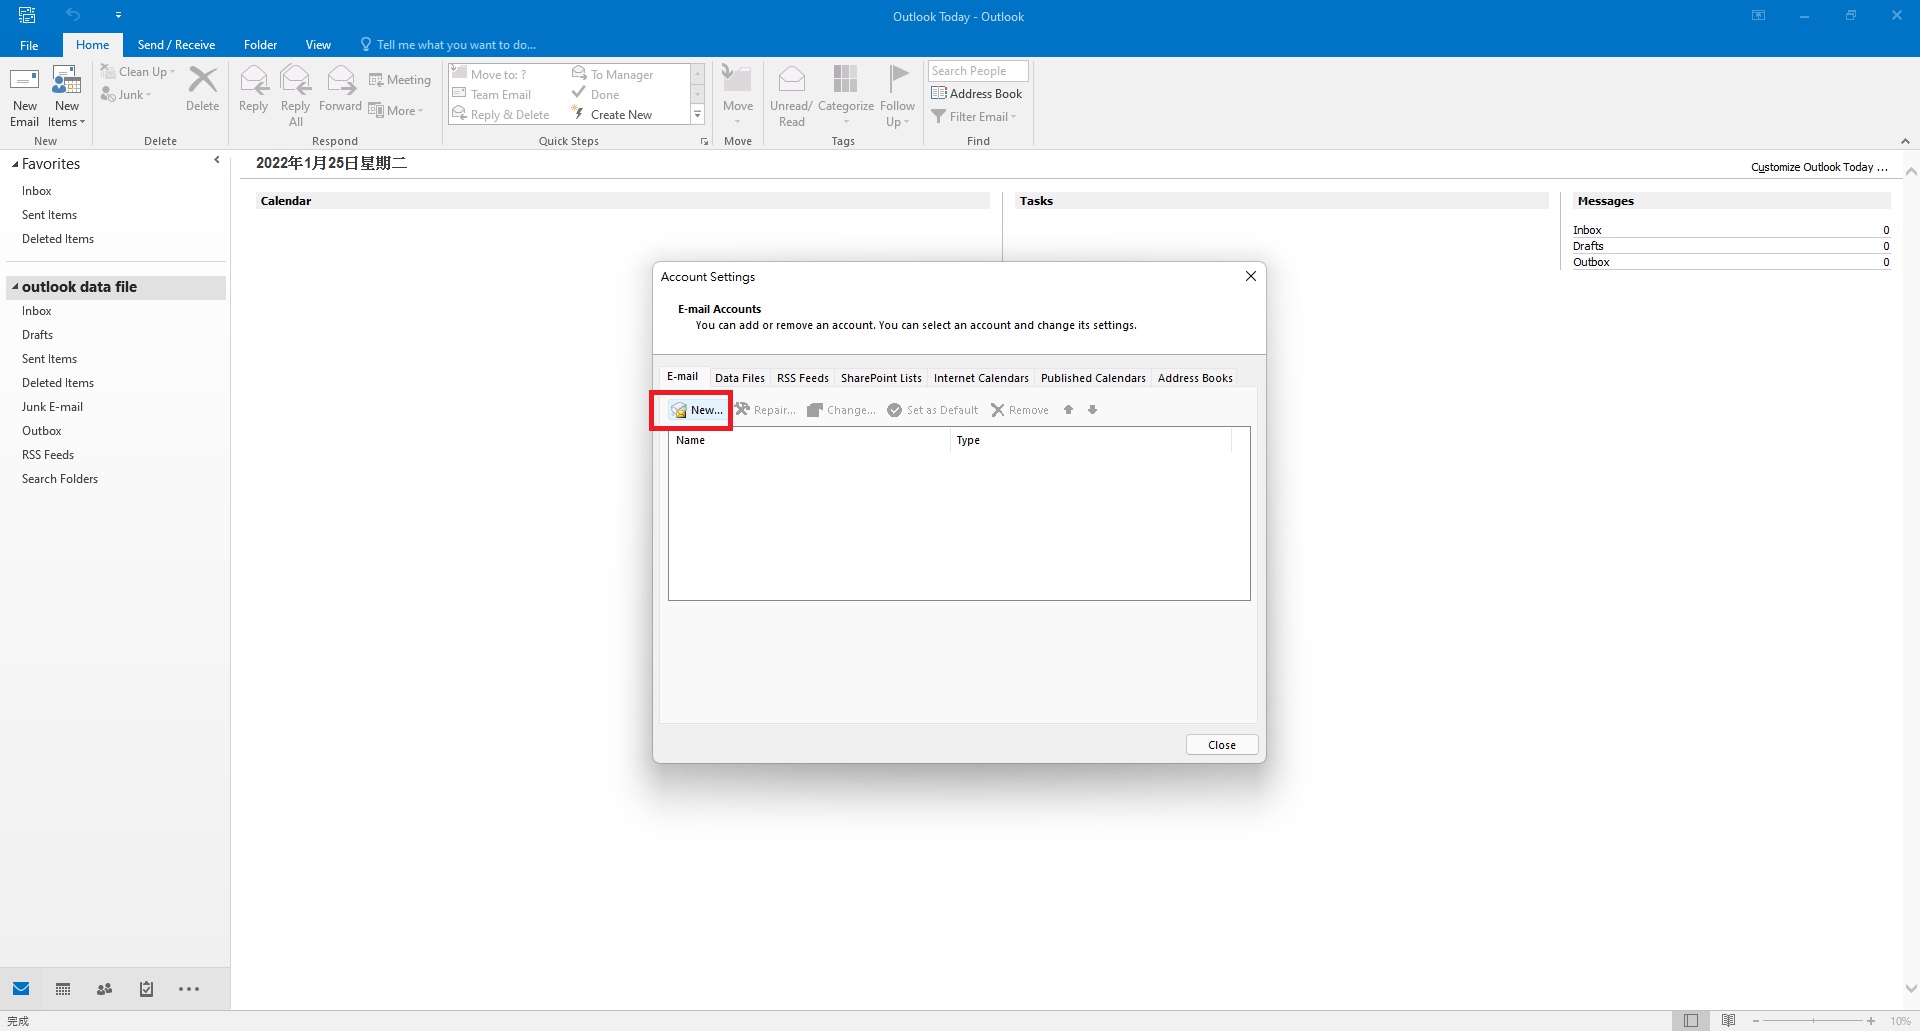
STEP 3
-Click on[New].
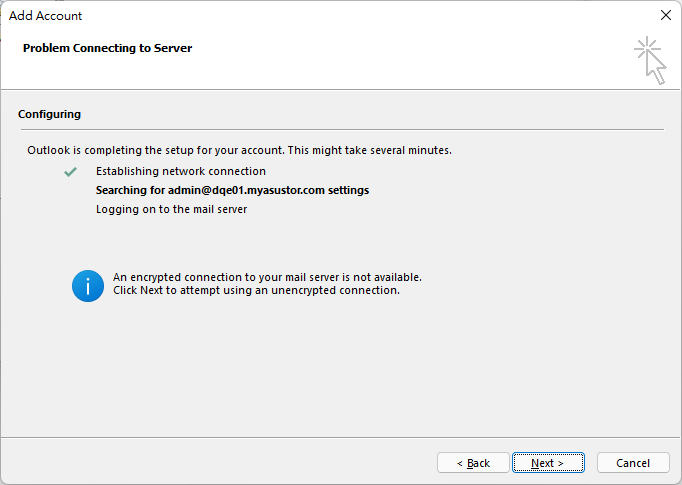
STEP 4
-Fill out the fields for your name, email address and password and then click on[Continue].
[Name]: Type any words you want. [Email address]: You can use NAS account plus@DDNS hostname. For example, admin@asustorwoody.ddns.net. Or admin@dqe01.myasustor.com if you want to use it with myasustor.com. [Password]: If you use a NAS account, please enter a NAS account password.

STEP 5
-You can now use Outlook to send and receive email.