
https://kinsta.com/blog/wordpress-rest-api/
The Complete Guide to WordPress REST API Basics
Rachel McCollin, February 2, 2021
The WordPress REST API is in the process of changing WordPress. You may not have noticed, as a lot of it is under the hood, but the implications of the REST API make a huge difference to the future of WordPress, both in terms of its codebase and its uses.
If you haven’t worked with the WordPress REST API, you might be wondering just what it is. So let’s kick off by looking at what the REST API is.
Table of ContentsWhat is the WordPress REST API?Understanding the WordPress REST APIHow to Access the WordPress REST APIOverview of WordPress REST API CommandsWhen Not to Use the WordPress REST APIReal-World Applications using the WordPress REST API
What is the WordPress REST API?
The WordPress REST API is an interface that developers can use to access WordPress from outside the WordPress installation itself. You access it using JavaScript, which means it can be used to create interactive websites and apps.
REST stands for Representational State Transfer and API stands for Application Programming Interface. Let’s take a look at what each of those means.
What is an Application Programming Interface (API)?
An Application Programming Interface, or API, is defined as:
“An interface or communication protocol between a client and a server intended to simplify the building of client-side software.”
If you aren’t familiar with APIs, that may not help very much. To put it more simply, an API is a set of code that allows one system to interact (or “interface”) with another. If you’ve ever added a Google map to your WordPress site, you’ve used Google’s Maps API, which allows your WordPress site to interface with Google Maps.
These systems don’t need to be completely separate. WordPress already has multiple APIs, for things like plugins, settings, and shortcodes. These can be used by plugin and theme developers to interact with WordPress core and make things happen (like creating shortcodes and adding settings screens to the WordPress admin).
The difference with the REST API is that it allows systems outside your WordPress installation itself to interact with WordPress, which is where the REST part comes in.
What is Representational State Transfer (REST)?
Representational State Transfer, or REST, provides standards that web systems can use to interface with each other. Without REST, two systems wouldn’t be able to understand each other and so send data back and forth.
For an application to be RESTful, it must conform to five principles:
- Uniform interface. The URLs used to access resources in the system have to be uniform, consistent, and accessible via a common approach such as GET (more of which shortly).
- Client-server. Client applications and server applications must be separate, so they can be developed independently of each other. If the server-side technology (i.e. WordPress) changes, the server-side application (an app, for example) must still be able to access it via the same simple method.
- Stateless. The server doesn’t change state when a new request is made using the API. It doesn’t store the requests that have been made.
- Cacheable. All resources must be cacheable, to improve speed and conformance to web standards. Caching can be implemented on the server or client-side.
- Layered system. A RESTful system lets you use multiple layers to access it, storing data in intermediate servers if it needs to. The server can’t tell if the final client is directly connected to it.
All of these constraints relate to web pages and applications and govern the way an application can interface with the API.
What Does This Mean for WordPress?
Putting REST and API together means that the WordPress REST API is a set of code designed to make it possible for other systems to interface with WordPress and that it’s built in a way that ensures these systems will understand each other.
It means that a third-party website or a mobile app, for example, can access your WordPress database, fetch data from it, and add data to it.
There are a number of implications and uses for this, though.
Understanding the WordPress REST API
The WordPress REST API was developed in response to changes in the way websites and apps are developed and a need to open up WordPress more widely.
Background to the WordPress REST API
The WordPress REST API was released as part of core in version 4.7 in December 2016, but it was around as a plugin before then.
It’s designed to support a range of applications built on WordPress and to transform WordPress from a content management system to an application platform.
It’s used extensively by WordPress.com, whose JavaScript-based interface uses the REST API to interface with the WordPress database. It’s also used by the Gutenberg editing interface, which became part of core in 2019.
The REST API widens the range of applications that WordPress can be used for. While a content management system excels at running a complex website, an application platform can also be used to power web-based single-page applications or SPAs (if you’ve ever used Google docs, you’ve used one of those).
In these, the content is refreshed when the user takes action, instead of loading new pages. Because it uses JavaScript (a client-side language) instead of PHP (a server-side language), it can make things happen in the user’s browser without having to constantly send requests to the server.
Implications for WordPress Users and Developers
If you’re a user and/or developer working with WordPress, the REST API has a number of implications.
For users, these include:
- Changes to the interface, including the Gutenberg editor.
- Changes and improvements to the WordPress mobile app.
- Self-hosted WordPress admin screens looking more like WordPress.com screens over time.
For developers, there are wider implications and possibilities:
- The ability to create SPAs using the REST API, pulling data in from WordPress but looking very different from WordPress.
- The ability to integrate WordPress with other frontend technologies and systems.
- The ability to develop with WordPress if you’re a frontend developer who doesn’t write PHP.
- For PHP developers, an increasing need to expand your skills to include JavaScript.
- Specific changes such as the need to build Gutenberg blocks instead of meta boxes in page and post editing screens.
Over time, the WordPress REST API will mean that more of WordPress core will be written in JavaScript and not PHP. If you’re a WordPress developer, this means you will need to learn JavaScript.
How to Access the WordPress REST API
How do you access the WordPress REST API?
To access the WP-REST API, you’ll need to access your site via the command line. With WordPress, this is called WP-CLI. You don’t do any of this via your admin screens or by directly accessing the code on your site.
Let’s take a look at how you get started.
Accessing WP-REST via WP-CLI
WP-CLI is the WordPress Command Line Interface. It lets you access and work with WordPress via the Command Line Interface (CLI) on your computer. WP-CLI is pre-installed with all Kinsta hosting plans.
To access the CLI, open Terminal on a Mac or in Linux, or Command Prompt in Windows.

Terminal on Mac
To access a remote site, you need to SSH to your server to access it via WP-CLI (Can’t connect via SSH? Learn how to fix the SSH “Connection Refused” Error).
To access a local site, you simply need to use the correct directory structure from the command line. It’s a good idea to experiment with the REST API on a local test site before trying it on a live site.
You’ll need to specifically access the REST API for your site, like this:
http://yoursite.com/wp-json/wp/v2
You can then add elements after this to access certain types of data, which we’ll look at in more detail shortly. These elements are called endpoints.
Authentication
Once you’ve accessed your site, you may need to go through authentication. Some endpoints are public and don’t require authentication, while others do.
You’re not logging into your site admin here: the REST API does things a bit differently.
To be able to authenticate your site via WP-CLI, you’ll need to install an authentication plugin. For development installations, the Basic Auth plugin does the job and is straightforward to work with.
However, for live sites, you should use a more robust form of authentication such as the JWT Authentication plugin, which uses JSON Web Token and is more secure.
You can then use the command line to access data and include authentication.
The example below uses curl to test the connection to WordPress. It will output a list of draft posts.
curl -X GET --user username:password -i http://yoursite.com/wp-json/wp/v2/posts?status=draft
Draft posts aren’t public information, so you need authentication to access them. But if you’re looking for data that is public, you don’t need authentication. So to retrieve a list of posts which have been published, you could use:
curl -X GET http://yoursite.com/wp-json/wp/v2/posts
This would fetch all published posts because those are public.
Overview of WordPress REST API Commands
Once you’ve accessed your site and you know how to use authentication (and indeed whether you need to), you’ll need to use one of a range of commands to interact with your site.
The commands you’ll need to use are:
GETretrieves a resource such as a post or some other data.POSTadds a resource to the server, such as a post, attachment or another resource.PUTcan be used to edit or update a resource that’s already on the server.DELETEremoves a resource from the server. Use it with care!
Let’s take a look at each of these in turn.
GET
The GET command is probably the most commonly used: it retrieves data. The example below (which you use once you’ve successfully accessed your site) would fetch a list of all published pages in your site:
GET http://yoursite.com/wp-json/wp/v2/posts/?status=published
Note that I haven’t included the full path to your site in the line above as you’ve already accessed that using WP-CLI.
Having retrieved that data, you can use it to inform your next step. You might delete one of those posts, edit it, or update it. You could simply output posts to your web app.
Let’s say you wanted to fetch the latest post. You’d use this:
GET http://yoursite.com/wp-json/wp/v2/posts/?per_page=1
There are a number of arguments you can use when working with posts. See the WordPress REST API Handbook for more.
POST
Use POST to add new data or resources to your site.
Want to know how we increased our traffic over 1000%?
Join 20,000+ others who get our weekly newsletter with insider WordPress tips!
So, for example, if you wanted to create a post, you would start by using a POST command:
POST http://yoursite.com/wp-json/wp/v2/posts/
This would create a new empty draft post.
You can then update the post by using a PUT command to edit it.
With a POST command, you can also add other resources other than posts, including attachments and other post types.
To add a page to your site, you might use something like this:
POST http://yoursite.com/wp-json/wp/v2/posts/pages
This would create an empty page in just the same way as you would create an empty post.
PUT
The PUT command lets you edit an existing resource, including posts.
Let’s say you have a number of draft posts on your site. You want to check them and update one to make it published.
You could start by fetching a list of all the draft posts:
POST http://yoursite.com/wp-json/wp/v2/posts/?status="draft"
The system will give you a list of all current draft posts. You can change the status of one of them using its ID:
PUT http://yoursite.com/wp-json/wp/v2/posts/567
This accesses that post and allows you to edit it. You can then change its status using the status argument:
{
"status" = "publish"
}
Or you could add content to the post and publish it:
{
"status" = "publish"
"content" = "content here"
}
The server will return a 200 - OK status telling you the PUT request has successfully edited the post.
DELETE
The DELETE command does what you would expect: it deletes a resource. By default, if you use it to delete a post it will put it in the trash instead of permanently deleting it.
So if you wanted to move the post you just created to the trash, you would use this:
DELETE http://yoursite.com/wp-json/wp/v2/posts/567
However, if you wanted to bypass the trash and delete it permanently, you would use the force argument:
Tired of experiencing issues with your WordPress site? Get the best and fastest hosting support with Kinsta! Check out our plans
DELETE http://yoursite.com/wp-json/wp/v2/posts/567?force=true
This permanently deletes the post with no option to undo, so it should be used with caution.
When Not to Use the WordPress REST API
The WordPress REST API won’t always be the right approach to developing a website or app. Here are some considerations you should be aware of before using it for development:
Compatibility
If your app is going to be used on devices that don’t run JavaScript or by users who are likely to have it turned off, then it won’t run if you’re using the REST API.
A WordPress site coded in PHP will output HTML so it won’t suffer from this problem. Devices that don’t use JavaScript are getting rarer but if you are developing specifically for those, the REST API won’t work.
Similarly, if your users are likely to turn JavaScript off, then working with the REST API will cause problems. Some users turn off JavaScript in their browsers for accessibility or security reasons.
Accessibility
Sites or apps developed using JavaScript aren’t always as accessible as those output in HTML.
This is largely because of the way JavaScript is used to deliver dynamic content which may not play nicely with screen readers and may cause problems for people with visual impairments or photosensitive epilepsy.
Using the REST API to access your WordPress site and output data in a form that is designed to be accessible means you can overcome these problems, but it is worth checking your site for accessibility while you’re developing it.
SEO
Single Page Applications, which refresh frequently, can sometimes cause SEO issues. This is because content that isn’t delivered when the page is first output may not be indexed by search engines.
Google and other search engines are catching up with the fact that many websites now are SPA-powered and are indexing them appropriately. But it does pay to do a thorough SEO audit of any site you develop using the REST API.
How to Disable the WordPress REST API
If you don’t want applications to be able to access data from your site using the REST API, you can disable it. Remember that public data could be accessible by anyone, not just you.
To do this, you can install the Disable WP REST API plugin. This disables the REST API for anyone who isn’t logged in to your site.
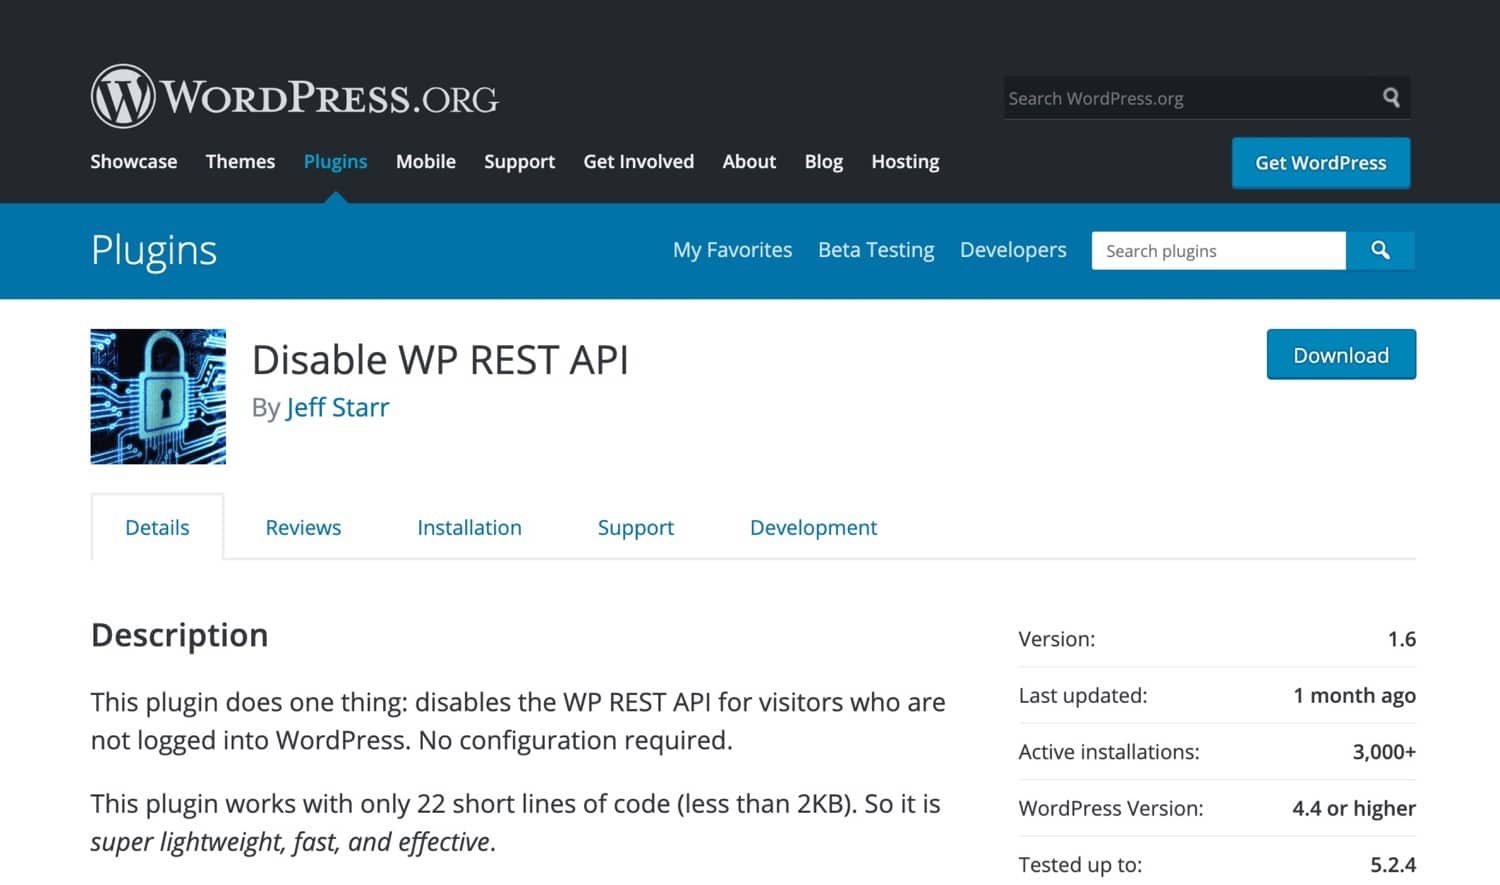
Disable WP REST API plugin
Alternatively, you can add some code to your theme’s functions file or write your own plugin. It’s better to write a plugin as this isn’t theme-specific functionality.
In your plugin, add just two lines:
add_filter( 'json_enabled', '__return_false' );
add_filter( 'json_jsonp_enabled', '__return_false' );
This will completely disable the REST API for your site. It may have knock-on effects for your admin screens so make sure everything works OK once you’ve added it.
Real-World Applications using the WordPress REST API
The REST API presents some exciting possibilities for the future of WordPress. Here are some examples of applications and sites using the WordPress REST API to create SPAs or to link WordPress to other sites and technologies.
WordPress.com
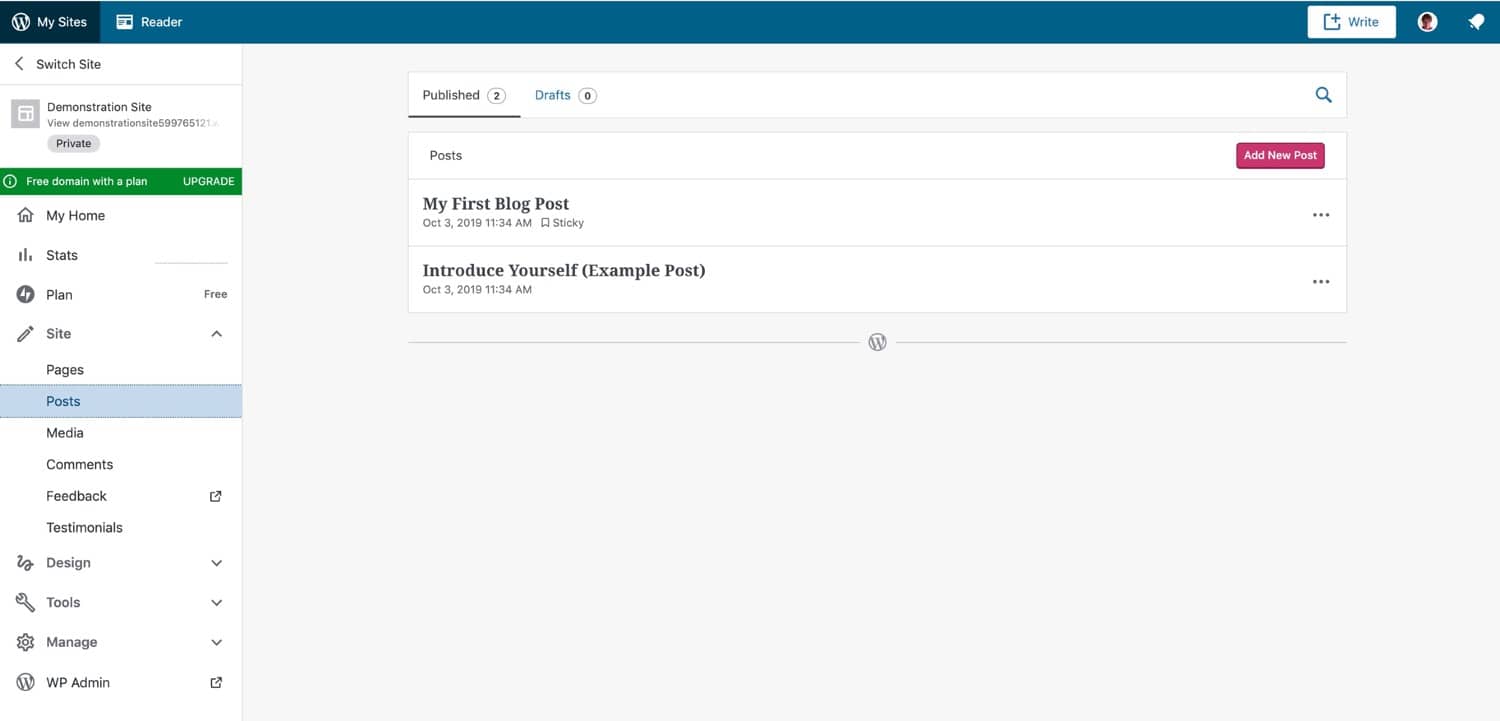
WordPress.com interface
The WordPress.com admin screens are built entirely using the REST API to provide a SPA that users interact with to manage their site.
This makes for dynamic communication between the interface and the server and results in a user-friendly interface that WordPress.org is likely to mimic in time.
The Block Editor (Gutenberg)
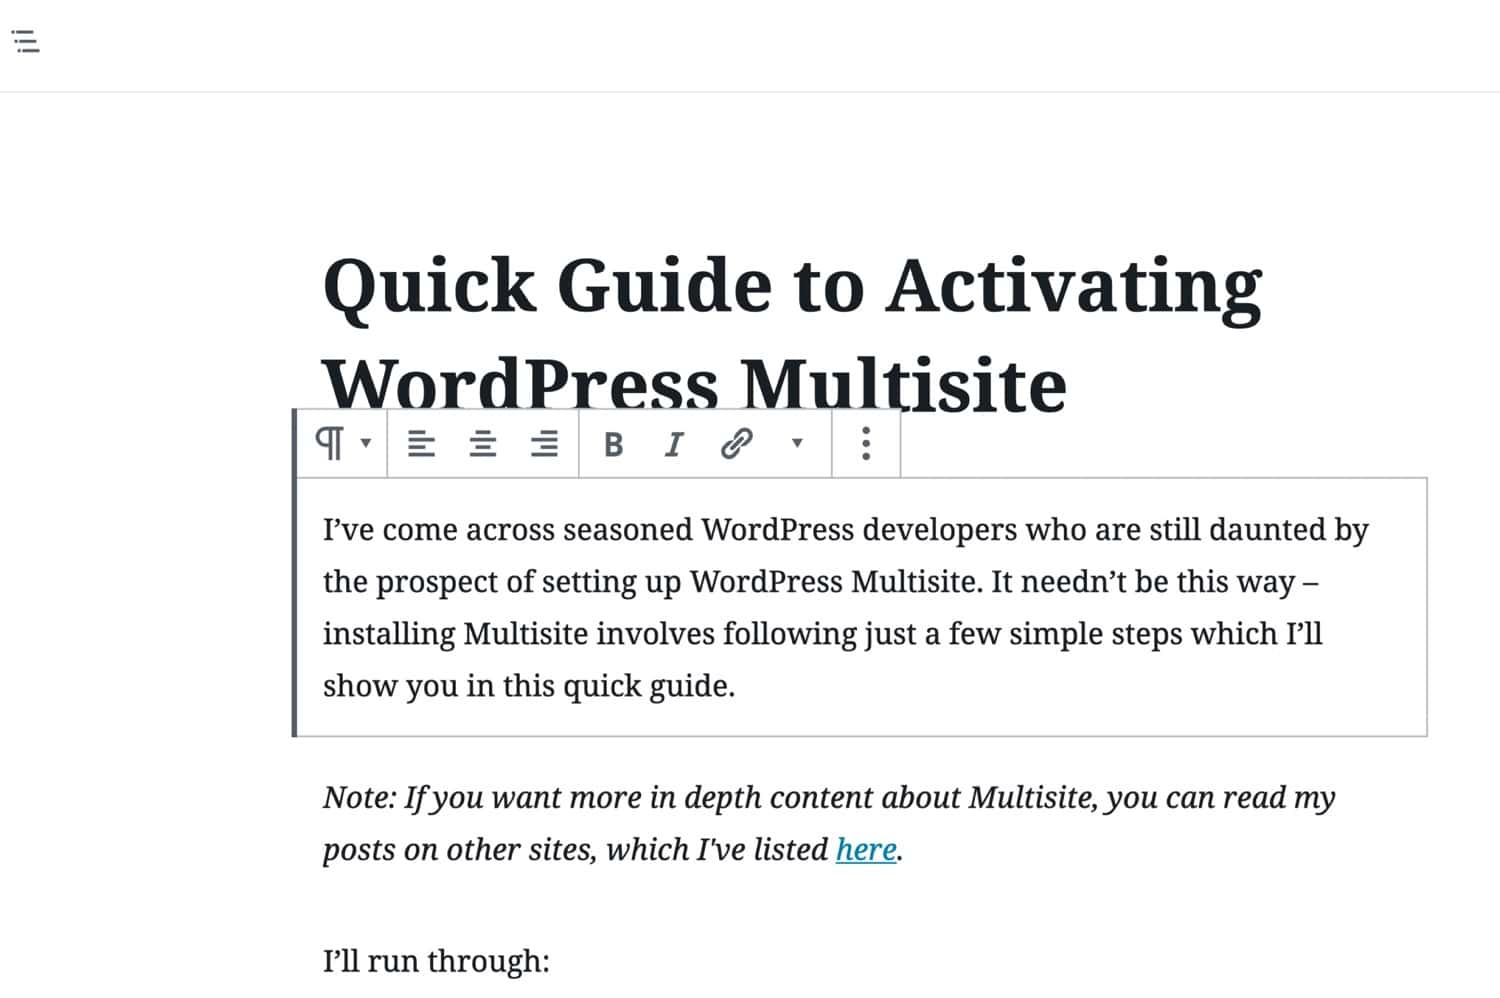
The Gutenberg editor
Also in the WordPress admin screens, but this time in self-hosted WordPress as well, the Gutenberg block editor makes use of the REST API to communicate with your database and create blocks.
For post types to work with the Gutenberg editor, they must have the REST API enabled. Which means that if you’re registering a custom post type and using Gutenberg, you’ll need to add the following line to enable the block editor for that post type:
"show_in_rest" = true;
Event Espresso
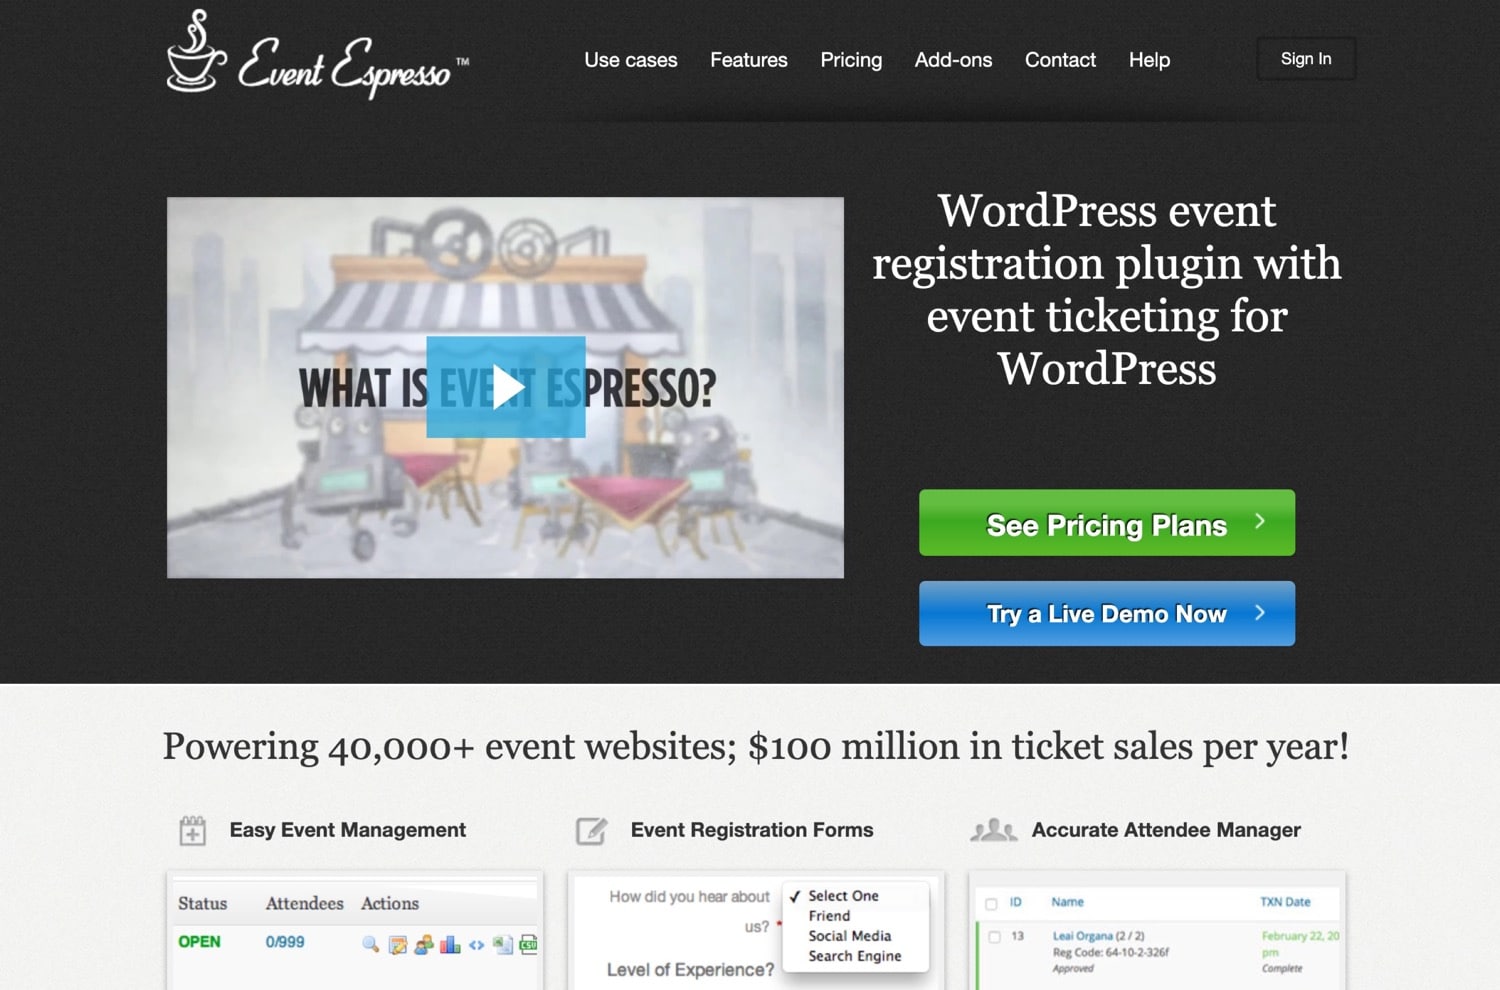
Event Espresso
Event Espresso is a WordPress plugin that lets users organize and publicize events. It makes use of the REST API so that users can access data from it from outside of WordPress. This means you can build mobile apps or SPAs to manage your events.
UsTwo

UsTwo
UsTwo is a digital agency whose site was built using the REST API as a Single Page Application. This combines a front-end built using React with a backend powered by WordPress (suggested reading: Your Guide to Starting and Running a Successful WordPress Agency).
The content of their single page is modular, with a structure that’s different from a standard WordPress page. To make this work, they use a custom page builder plugin that lets their team add modular content to the site.
USA Today

USA Today
USA Today’s website was rebuilt using the WordPress REST API integration with existing systems and modules in the site.
The REST API allowed for the site’s content to be pushed to other outlets such as Facebook Instant Articles and Apple News, using JSON. They also wrote an online social game for their sports section, built using JavaScript.
Summary
The WordPress REST API presents some exciting challenges but also interesting opportunities for both WordPress users and developers. It’s the future of WordPress and is likely to radically change the way we develop with WordPress and the way we use it.
What’s your take on REST API? Have you used it for some of your projects? Tell us in the comment section below!
[su_tab-]
Adding REST API Support For Custom Content Types
The REST API can create routes for custom post types and custom taxonomies inside of the wp/v2 namespace, using the same controllers as the default post type or taxonomy term controllers. Alternatively, you can use your own controllers and namespace. This document will cover using the default controllers for your custom content type’s API routes. This is the easiest way and ensures the highest chance of compatibility with third parties.
Registering A Custom Post Type With REST API Support #Registering A Custom Post Type With REST API Support
When registering a custom post type, if you want it to be available via the REST API you should set 'show_in_rest' => true in the arguments passed to register_post_type. Setting this argument to true will add a route in the wp/v2 namespace.
  /**
 * Register a book post type, with REST API support
 *
 * Based on example at: https://codex.wordpress.org/Function_Reference/register_post_type
 */
add_action( 'init', 'my_book_cpt' );
function my_book_cpt() {
    $args = array(
      'public'       => true,
      'show_in_rest' => true,
      'label'        => 'Books'
    );
    register_post_type( 'book', $args );
}
You can optionally set the rest_base argument to change the base url, which will otherwise default to the post type’s name. In the example below, “books” is used as the value of rest_base. This will make the URL for the route wp-json/wp/v2/books instead of wp-json/wp/v2/book/, which would have been the default.
In addition, you can pass an argument for rest_controller_class. This class must be a subclass of WP_REST_Controller. By default, WP_REST_Posts_Controller is used as the controller. If you are using a custom controller, then you likely will not be within the wp/v2 namespace.
Here is an example of registering a post type, with full labels, support for the REST API, a customized rest_base, and explicit registry of the default controller:
/**
 * Register a book post type, with REST API support
 *
 * Based on example at: https://codex.wordpress.org/Function_Reference/register_post_type
 */
add_action( 'init', 'my_book_cpt' );
function my_book_cpt() {
  $labels = array(
    'name'               => _x( 'Books', 'post type general name', 'your-plugin-textdomain' ),
    'singular_name'      => _x( 'Book', 'post type singular name', 'your-plugin-textdomain' ),
    'menu_name'          => _x( 'Books', 'admin menu', 'your-plugin-textdomain' ),
    'name_admin_bar'     => _x( 'Book', 'add new on admin bar', 'your-plugin-textdomain' ),
    'add_new'            => _x( 'Add New', 'book', 'your-plugin-textdomain' ),
    'add_new_item'       => __( 'Add New Book', 'your-plugin-textdomain' ),
    'new_item'           => __( 'New Book', 'your-plugin-textdomain' ),
    'edit_item'          => __( 'Edit Book', 'your-plugin-textdomain' ),
    'view_item'          => __( 'View Book', 'your-plugin-textdomain' ),
    'all_items'          => __( 'All Books', 'your-plugin-textdomain' ),
    'search_items'       => __( 'Search Books', 'your-plugin-textdomain' ),
    'parent_item_colon'  => __( 'Parent Books:', 'your-plugin-textdomain' ),
    'not_found'          => __( 'No books found.', 'your-plugin-textdomain' ),
    'not_found_in_trash' => __( 'No books found in Trash.', 'your-plugin-textdomain' )
  );

  $args = array(
    'labels'             => $labels,
    'description'        => __( 'Description.', 'your-plugin-textdomain' ),
    'public'             => true,
    'publicly_queryable' => true,
    'show_ui'            => true,
    'show_in_menu'       => true,
    'query_var'          => true,
    'rewrite'            => array( 'slug' => 'book' ),
    'capability_type'    => 'post',
    'has_archive'        => true,
    'hierarchical'       => false,
    'menu_position'      => null,
    'show_in_rest'       => true,
    'rest_base'          => 'books',
    'rest_controller_class' => 'WP_REST_Posts_Controller',
    'supports'           => array( 'title', 'editor', 'author', 'thumbnail', 'excerpt', 'comments' )
  );

  register_post_type( 'book', $args );
}
If you are using a custom rest_controller_class, then the REST API is unable to automatically determine the route for a given post. In this case, you can use the rest_route_for_post filter to provide this information. This allows for your custom post type to be properly formatted in the Search endpoint and enables automated discovery links.
function my_plugin_rest_route_for_post( $route, $post ) {
    if ( $post->post_type === 'book' ) {
        $route = '/wp/v2/books/' . $post->ID;
    }

    return $route;
}
add_filter( 'rest_route_for_post', 'my_plugin_rest_route_for_post', 10, 2 );
Registering A Custom Taxonomy With REST API Support #Registering A Custom Taxonomy With REST API Support
Registering a custom taxonomy with REST API support is very similar to registering a custom post type: pass 'show_in_rest' => true in the arguments passed to register_taxonomy. You may optionally pass rest_base to change the base url for the taxonomy’s routes.
The default controller for taxonomies is WP_REST_Terms_Controller. You may modify this with the rest_controller_class if you choose to use a custom controller.
Here is an example of how to register a custom taxonomy with REST API support:
/**
 * Register a genre post type, with REST API support
 *
 * Based on example at: https://codex.wordpress.org/Function_Reference/register_taxonomy
 */
add_action( 'init', 'my_book_taxonomy', 30 );
function my_book_taxonomy() {

  $labels = array(
    'name'              => _x( 'Genres', 'taxonomy general name' ),
    'singular_name'     => _x( 'Genre', 'taxonomy singular name' ),
    'search_items'      => __( 'Search Genres' ),
    'all_items'         => __( 'All Genres' ),
    'parent_item'       => __( 'Parent Genre' ),
    'parent_item_colon' => __( 'Parent Genre:' ),
    'edit_item'         => __( 'Edit Genre' ),
    'update_item'       => __( 'Update Genre' ),
    'add_new_item'      => __( 'Add New Genre' ),
    'new_item_name'     => __( 'New Genre Name' ),
    'menu_name'         => __( 'Genre' ),
  );

  $args = array(
    'hierarchical'          => true,
    'labels'                => $labels,
    'show_ui'               => true,
    'show_admin_column'     => true,
    'query_var'             => true,
    'rewrite'               => array( 'slug' => 'genre' ),
    'show_in_rest'          => true,
    'rest_base'             => 'genre',
    'rest_controller_class' => 'WP_REST_Terms_Controller',
  );

  register_taxonomy( 'genre', array( 'book' ), $args );

}
If you are using a custom rest_controller_class, then the REST API is unable to automatically determine the route for a given term. In this case, you can use the rest_route_for_term filter to provide this information. This allows for your custom taxonomy to be properly formatted in the Search endpoint and enables automated discovery links.
function my_plugin_rest_route_for_term( $route, $term ) {
    if ( $term->taxonomy === 'genre' ) {
        $route = '/wp/v2/genre/' . $term->term_id;
    }

    return $route;
}
add_filter( 'rest_route_for_term', 'my_plugin_rest_route_for_term', 10, 2 );
Adding REST API Support To Existing Content Types #Adding REST API Support To Existing Content Types
If you need to add REST API support for a custom post type or custom taxonomy you do not control, for example a theme or plugin you are using, you can use the register_post_type_args filter hook that exists since WordPress version 4.6.0.
/**
 * Add REST API support to an already registered post type.
 */
add_filter( 'register_post_type_args', 'my_post_type_args', 10, 2 );

function my_post_type_args( $args, $post_type ) {

    if ( 'book' === $post_type ) {
        $args['show_in_rest'] = true;

        // Optionally customize the rest_base or rest_controller_class
        $args['rest_base']             = 'books';
        $args['rest_controller_class'] = 'WP_REST_Posts_Controller';
    }

    return $args;
}
For custom taxnomies it is almost the same. You can use the register_taxonomy_args filter that exists since WordPress version 4.4.0.
/**
 * Add REST API support to an already registered taxonomy.
 */
add_filter( 'register_taxonomy_args', 'my_taxonomy_args', 10, 2 );

function my_taxonomy_args( $args, $taxonomy_name ) {

    if ( 'genre' === $taxonomy_name ) {
        $args['show_in_rest'] = true;

        // Optionally customize the rest_base or rest_controller_class
        $args['rest_base']             = 'genres';
        $args['rest_controller_class'] = 'WP_REST_Terms_Controller';
    }

    return $args;
}
Custom Link Relationships #Custom Link Relationships
Taxonomies & custom post types have a built-in association within WordPress, but what if you want to establish a link between two custom post types? This is not supported formally within WordPress itself, but we can create our own connections between arbitrary content types using the _link relation.
https://developer.wordpress.org/rest-api/extending-the-rest-api/adding-custom-endpoints/
ADDING CUSTOM ENDPOINTS
The WordPress REST API is more than just a set of default routes. It is also a tool for creating custom routes and endpoints. The WordPress front-end provides a default set of URL mappings, but the tools used to create them (e.g. the Rewrites API, as well as the query classes: WP_Query, WP_User, etc) are also available for creating your own URL mappings, or custom queries.
This document details how to create a totally custom route, with its own endpoints. We’ll first work through a short example, then expand it out to the full controller pattern as used internally.
Bare Basics #Bare Basics
So you want to add custom endpoints to the API? Fantastic! Let’s get started with a simple example.
Let’s start with a simple function that looks like this:
<?php
/**
 * Grab latest post title by an author!
 *
 * @param array $data Options for the function.
 * @return string|null Post title for the latest, * or null if none.
 */
function my_awesome_func( $data ) {
  $posts = get_posts( array(
    'author' => $data['id'],
  ) );

  if ( empty( $posts ) ) {
    return null;
  }

  return $posts[0]->post_title;
}
To make this available via the API, we need to register a route. This tells the API to respond to a given request with our function. We do this through a function called register_rest_route, which should be called in a callback on rest_api_init to avoid doing extra work when the API isn’t loaded.
We need to pass in three things to register_rest_route: the namespace, the route we want, and the options. We’ll come back to the namespace in a bit, but for now, let’s pick myplugin/v1. We’re going to have the route match anything with /author/{id}, where {id} is an integer.
<?php
add_action( 'rest_api_init', function () {
  register_rest_route( 'myplugin/v1', '/author/(?P<id>\d+)', array(
    'methods' => 'GET',
    'callback' => 'my_awesome_func',
  ) );
} );
Right now, we’re only registering the one endpoint for the route. The term “route” refers to the URL, whereas “endpoint” refers to the function behind it that corresponds to a method and a URL (for more information, see the Glossary).
For example, if your site domain is example.com and you’ve kept the API path of wp-json, then the full URL would be http://example.com/wp-json/myplugin/v1/author/(?P\d+).
Each route can have any number of endpoints, and for each endpoint, you can define the HTTP methods allowed, a callback function for responding to the request and a permissions callback for creating custom permissions. In addition you can define allowed fields in the request and for each field specify a default value, a sanitization callback, a validation callback, and whether the field is required.
Namespacing #Namespacing
Namespaces are the first part of the URL for the endpoint. They should be used as a vendor/package prefix to prevent clashes between custom routes. Namespaces allows for two plugins to add a route of the same name, with different functionality.
Namespaces in general should follow the pattern of vendor/v1, where vendor is typically your plugin or theme slug, and v1 represents the first version of the API. If you ever need to break compatibility with new endpoints, you can then bump this to v2.
The above scenario, two routes with the same name, from two different plugins, requires all vendors to use a unique namespace. Failing to do so is analogous to a failure to use a vendor function prefix, class prefix and/ or class namespace in a theme or plugin, which is very very bad.
An added benefit of using namespaces is that clients can detect support for your custom API. The API index lists out the available namespaces on a site:
{
  "name": "WordPress Site",
  "description": "Just another WordPress site",
  "url": "http://example.com/",
  "namespaces": [
    "wp/v2",
    "vendor/v1",
    "myplugin/v1",
    "myplugin/v2",
  ]
}
If a client wants to check that your API exists on a site, they can check against this list. (For more information, see the Discovery guide.)
Arguments #Arguments
By default, routes receive all arguments passed in from the request. These are merged into a single set of parameters, then added to the Request object, which is passed in as the first parameter to your endpoint:
<?php
function my_awesome_func( WP_REST_Request $request ) {
  // You can access parameters via direct array access on the object:
  $param = $request['some_param'];

  // Or via the helper method:
  $param = $request->get_param( 'some_param' );

  // You can get the combined, merged set of parameters:
  $parameters = $request->get_params();

  // The individual sets of parameters are also available, if needed:
  $parameters = $request->get_url_params();
  $parameters = $request->get_query_params();
  $parameters = $request->get_body_params();
  $parameters = $request->get_json_params();
  $parameters = $request->get_default_params();

  // Uploads aren't merged in, but can be accessed separately:
  $parameters = $request->get_file_params();
}
(To find out exactly how parameters are merged, check the source of WP_REST_Request::get_parameter_order(); the basic order is body, query, URL, then defaults.)
Normally, you’ll get every parameter brought in unaltered. However, you can register your arguments when registering your route, which allows you to run sanitization and validation on these.
If the request has the Content-type: application/json header set and valid JSON in the body, get_json_params() will return the parsed JSON body as an associative array.
Arguments are defined as a map in the key args for each endpoint (next to your callback option). This map uses the name of the argument of the key, with the value being a map of options for that argument. This array can contain a key for default, required, sanitize_callback and validate_callback.
default: Used as the default value for the argument, if none is supplied.required: If defined as true, and no value is passed for that argument, an error will be returned. No effect if a default value is set, as the argument will always have a value.validate_callback: Used to pass a function that will be passed the value of the argument. That function should return true if the value is valid, and false if not.sanitize_callback: Used to pass a function that is used to sanitize the value of the argument before passing it to the main callback.
Using sanitize_callback and validate_callback allows the main callback to act only to process the request, and prepare data to be returned using the WP_REST_Response class. By using these two callbacks, you will be able to safely assume your inputs are valid and safe when processing.
Taking our previous example, we can ensure the parameter passed in is always a number:
<?php
add_action( 'rest_api_init', function () {
  register_rest_route( 'myplugin/v1', '/author/(?P<id>\d+)', array(
    'methods' => 'GET',
    'callback' => 'my_awesome_func',
    'args' => array(
      'id' => array(
        'validate_callback' => function($param, $request, $key) {
          return is_numeric( $param );
        }
      ),
    ),
  ) );
} );
You could also pass in a function name to validate_callback, but passing certain functions like is_numeric directly will not only throw a warning about having extra parameters passed to it, but will also return NULL causing the callback function to be called with invalid data. We hope to eventually solve this problem in WordPress core.
We could also use something like 'sanitize_callback' => 'absint' instead, but validation will throw an error, allowing clients to understand what they’re doing wrong. Sanitization is useful when you would rather change the data being input rather than throwing an error (such as invalid HTML).
Return Value #Return Value
After your callback is called, the return value is then converted to JSON, and returned to the client. This allows you to return basically any form of data. In our example above, we’re returning either a string or null, which are automatically handled by the API and converted to JSON.
Like any other WordPress function, you can also return a WP_Error instance. This error information will be passed along to the client, along with a 500 Internal Service Error status code. You can further customise your error by setting the status option in the WP_Error instance data to a code, such as 400 for bad input data.
Taking our example from before, we can now return an error instance:
<?php
/**
 * Grab latest post title by an author!
 *
 * @param array $data Options for the function.
 * @return string|null Post title for the latest,
 * or null if none.
 */
function my_awesome_func( $data ) {
  $posts = get_posts( array(
    'author' => $data['id'],
  ) );

  if ( empty( $posts ) ) {
    return new WP_Error( 'no_author', 'Invalid author', array( 'status' => 404 ) );
  }

  return $posts[0]->post_title;
}
When an author doesn’t have any posts belonging to them, this will return a 404 Not Found error to the client:
HTTP/1.1 404 Not Found

[{
   "code": "no_author",
   "message": "Invalid author",
   "data": { "status": 404 }
}]
For more advanced usage, you can return a WP_REST_Response object. This object “wraps” normal body data, but allows you to return a custom status code, or custom headers. You can also add links to your response. The quickest way to use this is via the constructor:
<?php
$data = array( 'some', 'response', 'data' );

// Create the response object
$response = new WP_REST_Response( $data );

// Add a custom status code
$response->set_status( 201 );

// Add a custom header
$response->header( 'Location', 'http://example.com/' );
When wrapping existing callbacks, you should always use rest_ensure_response() on the return value. This will take raw data returned from an endpoint and automatically turn it into a WP_REST_Response for you. (Note that WP_Error is not converted to a WP_REST_Response to allow proper error handling.)
Importantly, a REST API route’s callback should always return data; it shouldn’t attempt to send the response body itself. This ensures that the additional processing that the REST API server does, like handling linking/embedding, sending headers, etc… takes place. In other words, don’t call die( wp_json_encode( $data ) ); or wp_send_json( $data ). As of WordPress 5.5, a _doing_it_wrong notice is issued if the wp_send_json() family of functions is used during a REST API request.
Return a WP_REST_Response or WP_Error object from your callback when using the REST API.
Permissions Callback #Permissions Callback
You must also register a permissions callback for the endpoint. This is a function that checks if the user can perform the action (reading, updating, etc) before the real callback is called. This allows the API to tell the client what actions they can perform on a given URL without needing to attempt the request first.
This callback can be registered as permission_callback, again in the endpoint options next to your callback option. This callback should return a boolean or a WP_Error instance. If this function returns true, the response will be processed. If it returns false, a default error message will be returned and the request will not proceed with processing. If it returns a WP_Error, that error will be returned to the client.
The permissions callback is run after remote authentication, which sets the current user. This means you can use current_user_can to check if the user that has been authenticated has the appropriate capability for the action, or any other check based on current user ID. Where possible, you should always use current_user_can; instead of checking if the user is logged in (authentication), check whether they can perform the action (authorization).
Once you register a permission_callback, you will need to authenticate your requests (for example by including a nonce parameter) or you will receive a rest_forbidden error. See Authentication for more details.
Continuing with our previous example, we can make it so that only editors or above can view this author data. We can check a number of different capabilities here, but the best is edit_others_posts, which is really the core of what an editor is. To do this, we just need a callback here:
<?php
add_action( 'rest_api_init', function () {
  register_rest_route( 'myplugin/v1', '/author/(?P<id>\d+)', array(
    'methods' => 'GET',
    'callback' => 'my_awesome_func',
    'args' => array(
      'id' => array(
        'validate_callback' => 'is_numeric'
      ),
    ),
    'permission_callback' => function () {
      return current_user_can( 'edit_others_posts' );
    }
  ) );
} );
Note that the permission callback also receives the Request object as the first parameter, so you can do checks based on request arguments if you need to.
As of WordPress 5.5, if a permission_callback is not provided, the REST API will issue a _doing_it_wrong notice.
The REST API route definition for myplugin/v1/author is missing the required permission_callback argument. For REST API routes that are intended to be public, use __return_true as the permission callback.
If your REST API endpoint is public, you can use __return_true as the permission callback.
<?php
add_action( 'rest_api_init', function () {
  register_rest_route( 'myplugin/v1', '/author/(?P<id>\d+)', array(
    'methods' => 'GET',
    'callback' => 'my_awesome_func',
    'permission_callback' => '__return_true',
  ) );
} );
Discovery #Discovery
If you’d like to enable Resource Discovery for your custom endpoint, you can do so using the rest_queried_resource_route filter. For example, consider a custom query var my-route that contains the id of your custom resource. The following code snippet would add a discovery link whenever the my-route query var is used.
function my_plugin_rest_queried_resource_route( $route ) {
    $id = get_query_var( 'my-route' );
    if ( ! $route && $id ) {
        $route = '/my-ns/v1/items/' . $id;
    }

    return $route;
}
add_filter( 'rest_queried_resource_route', 'my_plugin_rest_queried_resource_route' );
Note: If your endpoint is describing a custom post type or custom taxonomy you will most likely want to be using the rest_route_for_post or rest_route_for_term filters instead.
The Controller Pattern #The Controller Pattern
The controller pattern is a best practice for working with complex endpoints with the API.
It is recommended that you read “Extending Internal Classes” before reading this section. Doing so will familiarize you with the patterns used by the default routes, which is the best practice. While it is not required that the class you use to process your request extends the WP_REST_Controller class or a class that extends it, doing so allows you to inherit work done in those classes. In addition, you can rest assured that you’re following best practices based on the controller methods you’re using.
At their core, controllers are nothing more than a set of commonly named methods to match up with REST conventions, along with some handy helpers. Controllers register their routes in a register_routes method, respond to requests with get_items, get_item, create_item, update_item and delete_item, and have similarly named permission check methods. Following this pattern will ensure you don’t miss any steps or functionality in your endpoints.
To use controllers, you first need to subclass the base controller. This gives you a base set of methods, ready for you to add your own behaviour into.
Once we’ve subclassed the controller, we need to instantiate the class to get it working. This should be done inside of a callback hooked into rest_api_init, which ensures we only instantiate the class when we need to. The normal controller pattern is to call $controller->register_routes() inside this callback, where the class can then register its endpoints.
Examples #Examples
The following is a “starter” custom route:
<?php

class Slug_Custom_Route extends WP_REST_Controller {

  /**
   * Register the routes for the objects of the controller.
   */
  public function register_routes() {
    $version = '1';
    $namespace = 'vendor/v' . $version;
    $base = 'route';
    register_rest_route( $namespace, '/' . $base, array(
      array(
        'methods'             => WP_REST_Server::READABLE,
        'callback'            => array( $this, 'get_items' ),
        'permission_callback' => array( $this, 'get_items_permissions_check' ),
        'args'                => array(

        ),
      ),
      array(
        'methods'             => WP_REST_Server::CREATABLE,
        'callback'            => array( $this, 'create_item' ),
        'permission_callback' => array( $this, 'create_item_permissions_check' ),
        'args'                => $this->get_endpoint_args_for_item_schema( true ),
      ),
    ) );
    register_rest_route( $namespace, '/' . $base . '/(?P<id>[\d]+)', array(
      array(
        'methods'             => WP_REST_Server::READABLE,
        'callback'            => array( $this, 'get_item' ),
        'permission_callback' => array( $this, 'get_item_permissions_check' ),
        'args'                => array(
          'context' => array(
            'default' => 'view',
          ),
        ),
      ),
      array(
        'methods'             => WP_REST_Server::EDITABLE,
        'callback'            => array( $this, 'update_item' ),
        'permission_callback' => array( $this, 'update_item_permissions_check' ),
        'args'                => $this->get_endpoint_args_for_item_schema( false ),
      ),
      array(
        'methods'             => WP_REST_Server::DELETABLE,
        'callback'            => array( $this, 'delete_item' ),
        'permission_callback' => array( $this, 'delete_item_permissions_check' ),
        'args'                => array(
          'force' => array(
            'default' => false,
          ),
        ),
      ),
    ) );
    register_rest_route( $namespace, '/' . $base . '/schema', array(
      'methods'  => WP_REST_Server::READABLE,
      'callback' => array( $this, 'get_public_item_schema' ),
    ) );
  }

  /**
   * Get a collection of items
   *
   * @param WP_REST_Request $request Full data about the request.
   * @return WP_Error|WP_REST_Response
   */
  public function get_items( $request ) {
    $items = array(); //do a query, call another class, etc
    $data = array();
    foreach( $items as $item ) {
      $itemdata = $this->prepare_item_for_response( $item, $request );
      $data[] = $this->prepare_response_for_collection( $itemdata );
    }

    return new WP_REST_Response( $data, 200 );
  }

  /**
   * Get one item from the collection
   *
   * @param WP_REST_Request $request Full data about the request.
   * @return WP_Error|WP_REST_Response
   */
  public function get_item( $request ) {
    //get parameters from request
    $params = $request->get_params();
    $item = array();//do a query, call another class, etc
    $data = $this->prepare_item_for_response( $item, $request );

    //return a response or error based on some conditional
    if ( 1 == 1 ) {
      return new WP_REST_Response( $data, 200 );
    } else {
      return new WP_Error( 'code', __( 'message', 'text-domain' ) );
    }
  }

  /**
   * Create one item from the collection
   *
   * @param WP_REST_Request $request Full data about the request.
   * @return WP_Error|WP_REST_Response
   */
  public function create_item( $request ) {
    $item = $this->prepare_item_for_database( $request );

    if ( function_exists( 'slug_some_function_to_create_item' ) ) {
      $data = slug_some_function_to_create_item( $item );
      if ( is_array( $data ) ) {
        return new WP_REST_Response( $data, 200 );
      }
    }

    return new WP_Error( 'cant-create', __( 'message', 'text-domain' ), array( 'status' => 500 ) );
  }

  /**
   * Update one item from the collection
   *
   * @param WP_REST_Request $request Full data about the request.
   * @return WP_Error|WP_REST_Response
   */
  public function update_item( $request ) {
    $item = $this->prepare_item_for_database( $request );

    if ( function_exists( 'slug_some_function_to_update_item' ) ) {
      $data = slug_some_function_to_update_item( $item );
      if ( is_array( $data ) ) {
        return new WP_REST_Response( $data, 200 );
      }
    }

    return new WP_Error( 'cant-update', __( 'message', 'text-domain' ), array( 'status' => 500 ) );
  }

  /**
   * Delete one item from the collection
   *
   * @param WP_REST_Request $request Full data about the request.
   * @return WP_Error|WP_REST_Response
   */
  public function delete_item( $request ) {
    $item = $this->prepare_item_for_database( $request );

    if ( function_exists( 'slug_some_function_to_delete_item' ) ) {
      $deleted = slug_some_function_to_delete_item( $item );
      if ( $deleted ) {
        return new WP_REST_Response( true, 200 );
      }
    }

    return new WP_Error( 'cant-delete', __( 'message', 'text-domain' ), array( 'status' => 500 ) );
  }

  /**
   * Check if a given request has access to get items
   *
   * @param WP_REST_Request $request Full data about the request.
   * @return WP_Error|bool
   */
  public function get_items_permissions_check( $request ) {
    //return true; <--use to make readable by all
    return current_user_can( 'edit_something' );
  }

  /**
   * Check if a given request has access to get a specific item
   *
   * @param WP_REST_Request $request Full data about the request.
   * @return WP_Error|bool
   */
  public function get_item_permissions_check( $request ) {
    return $this->get_items_permissions_check( $request );
  }

  /**
   * Check if a given request has access to create items
   *
   * @param WP_REST_Request $request Full data about the request.
   * @return WP_Error|bool
   */
  public function create_item_permissions_check( $request ) {
    return current_user_can( 'edit_something' );
  }

  /**
   * Check if a given request has access to update a specific item
   *
   * @param WP_REST_Request $request Full data about the request.
   * @return WP_Error|bool
   */
  public function update_item_permissions_check( $request ) {
    return $this->create_item_permissions_check( $request );
  }

  /**
   * Check if a given request has access to delete a specific item
   *
   * @param WP_REST_Request $request Full data about the request.
   * @return WP_Error|bool
   */
  public function delete_item_permissions_check( $request ) {
    return $this->create_item_permissions_check( $request );
  }

  /**
   * Prepare the item for create or update operation
   *
   * @param WP_REST_Request $request Request object
   * @return WP_Error|object $prepared_item
   */
  protected function prepare_item_for_database( $request ) {
    return array();
  }

  /**
   * Prepare the item for the REST response
   *
   * @param mixed $item WordPress representation of the item.
   * @param WP_REST_Request $request Request object.
   * @return mixed
   */
  public function prepare_item_for_response( $item, $request ) {
    return array();
  }

  /**
   * Get the query params for collections
   *
   * @return array
   */
  public function get_collection_params() {
    return array(
      'page'     => array(
        'description'       => 'Current page of the collection.',
        'type'              => 'integer',
        'default'           => 1,
        'sanitize_callback' => 'absint',
      ),
      'per_page' => array(
        'description'       => 'Maximum number of items to be returned in result set.',
        'type'              => 'integer',
        'default'           => 10,
        'sanitize_callback' => 'absint',
      ),
      'search'   => array(
        'description'       => 'Limit results to those matching a string.',
        'type'              => 'string',
        'sanitize_callback' => 'sanitize_text_field',
      ),
    );
  }
}
A simple guide to adding a WP REST API controller
https://jacobmartella.com/2017/12/22/simple-guide-adding-wp-rest-api-controller/
The WP REST API has been the hot thing in WordPress since it was rolled into core in WordPress 4.7 a year ago.
It’s helped bring WordPress closer to where the internet is today, and it’s allowed people to do really cool things with their websites.
The REST API comes with the basic routes already set up, like posts, pages, comments, etc. But creating custom routes for custom data types can be a bit of a pain. And while the REST API team has some basic code up in the codex on how to create a new route, I didn’t find much other help in how to create and set up a custom REST controller.
So that’s going to change with this tutorial on how . It’s going to be basic, but sometimes basic is the best. I’ll walk you through how to set up the class and permissions and create, read, update and delete items.
Let’s get started.
Setting up the class and setting permissions
All right, so the first thing we need to do is add the controller class and get it set up so we can start adding code to make it work with our data. Below I have the base REST controller for teams in my Sports Bench plugin. I’ve hollowed out all of the functions that create, read, update and delete teams. We’ll worry about that later.
https://gist.github.com/ViewFromTheBox/bd5b3bf85dd396fcba1689efecfe5505
So once you’ve got this set up, let’s go through what you’ve just pasted. This is a subclass of the WP_REST_Controller, which is how you add your custom route and set it up for use in the REST API.
Next, change the route name and endpoint. The route name is similar to the wp/v2/ that you see in the regular REST API. Change that to you plugin slug or something custom. Then the base is the name of the data we’re getting. So for my plugin, that’s obviously going to be sportsbench for the route and teams for the base.
The next set of interesting information is the permissions checks. Since teams are going to be front-facing data always, I’ve made the check for getting item(s) return true so that you don’t have to be logged in to get that info. Otherwise, you must have edit access to be able to create, update and delete. You can change that to whatever you want.
Other basic functions we need
With that out of the way, let’s look at three other functions in here that we’ll need globally in our class.
https://gist.github.com/ViewFromTheBox/41c53819c70e4a9a60854afdf7f08f0a
So let’s walk through what we’ve just pasted into our code.
In the prepare_item_for_database function, essentially we’re sanitizing the data so that it’s able to go into the database nice and clean. Then the prepare_item_for_response escapes our data that we’re going to be sending to the client. You don’t need to worry about anything that’s related specifically to teams, so the first three lines of that function will work for you.
Next, we put into an array the parameters that the client can search for. So with teams, you can search for team name, team location, team division and so on and so forth. We’ll also be using these in the next section.
Finally, we set the item schema. To be honest, I’m still not quite sure what this does, but I would suggest at least putting the primary key or ID for the data item. Now, let’s get to the super fun stuff.
Getting item(s)
So now that we’ve got the basics out of the way, let’s start doing some cool things. The next set of functions is how we are going to get the teams or teams.
https://gist.github.com/ViewFromTheBox/f9a390bc4b82fa84bd33bb562307b61a
So the get_teams and get_team functions are super simple. Essentially, we take the data, we pass that to another function. If that function returns data, we send it to the client. Otherwise, we send an error.
The sports_bench_get_team function returns a single team, although I’m using the team class to run the MySQL to grab the data. So you’ll to use MySQL or your own custom class that does that for you.
And finally, the sports_bench_get_teams function runs through all of the potential parameters and sees if the client has included them. Then it creates the appropriate MySQL so that we can run it and grab all of the teams that fit those parameter and return it. Do note that you need those isset() functions in the if statements to avoid errors being thrown.
I should note that the Sports Bench specific functions can be inside the get functions, or you can put them into your own custom functions.
Creating items
So now we know how to get items, so let’s create some items to get.
https://gist.github.com/ViewFromTheBox/fe4d13914ac9e7c74462bfdbf8dc5d79
The functions above are super simple. Like the get_items and get_item functions, the create_item is pretty basic. We take the data, send it to a function to create the item and then return whether it was successful or not.
As for the function to actually add the item, first we’re going to check the database to see if it’s already there. If it is, we’re going to suggest to the client to update the item instead. If it’s not, then we’ll run the MySQL to insert it into the table. See, very easy.
Updating items
Now now that we have items and can read them, let’s add the ability to update those items. After all, data doesn’t stay the same for long.
https://gist.github.com/ViewFromTheBox/20391ec862e4615d51b5cc6d770cb71a
Again, the update_item function is super simple. We take the data, pass it to another function and then send the result to the client.
As for the function actually updating the data, we again run a check to see if the item is in the database. If it’s not, then we’ll direct the client to add the item instead. If it is, then we run the MySQL to update the item. Simple as that.
Deleting items
And finally, let’s take care of deleting items. Like everything else, this is going to be pretty easy.
https://gist.github.com/ViewFromTheBox/2ca56ba8e825649c919f88109d54e35b
Again, the delete_item function passes the data to our other function and then returns the result to the client. Meanwhile, our other function runs a check to see if the item is in the database. If it’s not, we return an error to the client. If it is, we simply delete it. See, very simple once again.
Hooking it into code
Now there’s one more thing left to do: hook this new file into our plugin. So here’s how to do that.
https://gist.github.com/ViewFromTheBox/e6b9d27e514e25336a91a2a87b28ea43
The main thing is to load in our REST API controller class and then initialize it and run the register_routes method. And once we do that, our controller will be usable.
In conclusion
So as you can see, once you go through the code methodically, creating a custom WP REST API controller is very simple. You can find the gist of the Sports Bench team REST controller on my GitHub to use as a guide for your own REST controller.
Even after a year since it’s inclusion into core, I’m still really excited to see what people can do with the REST API. I’ve tried recreating this site with the REST API and VueJS, but I’ve run into other plugins that don’t quite support
REST API ISSUES
What is the WordPress REST API?
A REST API is generally a standardized method that many applications on the Internet use to communicate between server and client. WordPress v4.7 introduced the WordPress REST API, which allows modern WordPress plugins to use this standard method for communication instead of the WordPress specific way of communication.
How can I enable the WordPress REST API in my website?
The WordPress REST API is enabled by default in your WordPress website. It is a standard method of communication and there is no additional risk to have it activated compared to other methods how WordPress plugins communicate between client and server. But some WordPress plugins allow you as WordPress admin to disable the REST API. The reason for deactivation is usually the desire for better performance or security concerns. For both aspects, however, disabling the REST API is usually not a suitable means.
We know the following plugins that allow you to disable the REST API. By default, none of these plugins disable the REST API, but they can optionally disable it:
- Wordfence
- iThemes Security (formerly Better WP Security)
- All In One WP Security & Firewall
- Sucuri Security
- Titan Anti-spam & Security
- Cerber Security, Anti-spam & Malware Scan
- Shield Security
- WP Hide & Security Enhancer
- BulletProof Security
- Disable REST API
- NinjaFirewall (WP Edition)
- Hide My WP Ghost
- Perfmatters
- Swift Performance
- Clearfy
- WP Oath Server
- Password Protected
Additionally, you can restrict access to the REST API in your web server configuration (usually Apache2 or NGINX). This can be done intentionally or accidentally by rejecting requests that start with /wp-json/.
How do I know if the unreachable REST API is my issue?
You can easily check if an unreachable REST API is the problem when you see only a loading animation in a devowl.io WordPress plugin. Just follow these steps:
- Open a new tab where you access your website.
- Right-click into the web page to open the panel “Inspect” (Google Chrome) or “Inspect Element” (Mozilla Firefox). Here you can go to the “Console” tab.
- Now open the page on which you see the loading animation that does not disappear.
- In the console, you should see an entry marked red as an error, which indicates an error 401, 403, 404 or 500 (depending on your plugin/configuration to disable the REST API).
If you see an error like this, you need to make sure that the WordPress REST API is reachable again.
I do not want to enable the REST API in general, but for your plugin. Is this possible?
This depends on the configuration of the plugin you use to restrict access to the REST API. For example, with Cerber Security, Anti-spam & Malware Scan you can disable the REST API using namespaces. Each plugin that uses the WordPress REST API must register a namespace in which all endpoints are registered. For example, if you access /wp-json/realmedialibrary/v1 in your WordPress REST API, the namespace is called realmedialibrary/v1.
We use for the devowl.io WordPress plugins the following namespaces:
- Real Media Library:
realmedialibrary/v1 - Real Physical Media:
real-physical-media/v1 - Real Category Management:
real-category-library/v1 - Real Thumbnail Generator:
real-thumbnail-generator/v1 - Real Custom Post Order:
real-custom-post-order/v1 - Real Cookie Banner:
real-cookie-banner/v1(must be available for everyone, not only for logged-in users)
I am using a plugin like “JWT Auth”. Is it compatible?
If you need to use a plugin like JWT Auth you also need to whitelist our plugins. In case of JWT Auth, you have to read the section “Whitelisting Endpoints” in its README file and add our plugins to the allowed endpoints. The endpoints can be found in the paragraph above.
Permalinks are broken
If you use Apache2 as web server, the .htaccess file defines how URLs of your website look like. This file is created automatically and sometimes manipulated by plugins. If something went wrong with the creation, this can also be a reason why the WP REST API can no longer be accessible.
So, you can rewrite the rules in the .htaccess file:
-
Go to Settings > Permalinks in your WordPress backend.
-
Save the unchanged settings. Saving will trigger the rules to be rewrittenWhat is the WordPress REST API?
A REST API is generally a standardized method that many applications on the Internet use to communicate between server and client. WordPress v4.7 introduced the WordPress REST API, which allows modern WordPress plugins to use this standard method for communication instead of the WordPress specific way of communication.
How can I enable the WordPress REST API in my website?
The WordPress REST API is enabled by default in your WordPress website. It is a standard method of communication and there is no additional risk to have it activated compared to other methods how WordPress plugins communicate between client and server. But some WordPress plugins allow you as WordPress admin to disable the REST API. The reason for deactivation is usually the desire for better performance or security concerns. For both aspects, however, disabling the REST API is usually not a suitable means.
We know the following plugins that allow you to disable the REST API. By default, none of these plugins disable the REST API, but they can optionally disable it:
- Wordfence
- iThemes Security (formerly Better WP Security)
- All In One WP Security & Firewall
- Sucuri Security
- Titan Anti-spam & Security
- Cerber Security, Anti-spam & Malware Scan
- Shield Security
- WP Hide & Security Enhancer
- BulletProof Security
- Disable REST API
- NinjaFirewall (WP Edition)
- Hide My WP Ghost
- Perfmatters
- Swift Performance
- Clearfy
- WP Oath Server
- Password Protected
Additionally, you can restrict access to the REST API in your web server configuration (usually Apache2 or NGINX). This can be done intentionally or accidentally by rejecting requests that start with
/wp-json/.How do I know if the unreachable REST API is my issue?
You can easily check if an unreachable REST API is the problem when you see only a loading animation in a devowl.io WordPress plugin. Just follow these steps:
- Open a new tab where you access your website.
- Right-click into the web page to open the panel “Inspect” (Google Chrome) or “Inspect Element” (Mozilla Firefox). Here you can go to the “Console” tab.
- Now open the page on which you see the loading animation that does not disappear.
- In the console, you should see an entry marked red as an error, which indicates an error 401, 403, 404 or 500 (depending on your plugin/configuration to disable the REST API).
If you see an error like this, you need to make sure that the WordPress REST API is reachable again.
I do not want to enable the REST API in general, but for your plugin. Is this possible?
This depends on the configuration of the plugin you use to restrict access to the REST API. For example, with Cerber Security, Anti-spam & Malware Scan you can disable the REST API using namespaces. Each plugin that uses the WordPress REST API must register a namespace in which all endpoints are registered. For example, if you access
/wp-json/realmedialibrary/v1in your WordPress REST API, the namespace is calledrealmedialibrary/v1.We use for the devowl.io WordPress plugins the following namespaces:
- Real Media Library:
realmedialibrary/v1 - Real Physical Media:
real-physical-media/v1 - Real Category Management:
real-category-library/v1 - Real Thumbnail Generator:
real-thumbnail-generator/v1 - Real Custom Post Order:
real-custom-post-order/v1 - Real Cookie Banner:
real-cookie-banner/v1(must be available for everyone, not only for logged-in users)
I am using a plugin like “JWT Auth”. Is it compatible?
If you need to use a plugin like JWT Auth you also need to whitelist our plugins. In case of JWT Auth, you have to read the section “Whitelisting Endpoints” in its README file and add our plugins to the allowed endpoints. The endpoints can be found in the paragraph above.
Permalinks are broken
If you use Apache2 as web server, the
.htaccessfile defines how URLs of your website look like. This file is created automatically and sometimes manipulated by plugins. If something went wrong with the creation, this can also be a reason why the WP REST API can no longer be accessible.So, you can rewrite the rules in the
.htaccessfile:- Go to Settings > Permalinks in your WordPress backend.
- Save the unchanged settings. Saving will trigger the rules to be rewritten
https://wordpress.org/plugins/jwt-auth/
Enabling REST with JWAUTH plugin
Description
WordPress JSON Web Token Authentication allows you to do REST API authentication via token. It is a simple, non-complex, and easy to use. This plugin probably is the most convenient way to do JWT Authentication in WordPress.
- Support & question: WordPress support forum
- Reporting plugin’s bug: GitHub issues tracker
- Discord channel also available for faster response.
ENABLE PHP HTTP AUTHORIZATION HEADER
SHARED HOSTS
Most shared hosts have disabled the HTTP Authorization Header by default.
To enable this option you’ll need to edit your .htaccess file by adding the following:
RewriteEngine on
RewriteCond %{HTTP:Authorization} ^(.*)
RewriteRule ^(.*) - [E=HTTP_AUTHORIZATION:%1]
WPENGINE
To enable this option you’ll need to edit your .htaccess file by adding the following (see this issue):
SetEnvIf Authorization "(.*)" HTTP_AUTHORIZATION=$1
CONFIGURATION
CONFIGURATE THE SECRET KEY
The JWT needs a secret key to sign the token. This secret key must be unique and never be revealed.
To add the secret key, edit your wp-config.php file and add a new constant called JWT_AUTH_SECRET_KEY.
define('JWT_AUTH_SECRET_KEY', 'your-top-secret-key');
You can use a string from here
CONFIGURATE CORS SUPPORT
This plugin has the option to activate CORs support.
To enable the CORs Support edit your wp-config.php file and add a new constant called JWT_AUTH_CORS_ENABLE
define('JWT_AUTH_CORS_ENABLE', true);
NAMESPACE AND ENDPOINTS
When the plugin is activated, a new namespace is added.
/jwt-auth/v1
Also, two new POST endpoints are added to this namespace.
/wp-json/jwt-auth/v1/token
/wp-json/jwt-auth/v1/token/validate
REQUESTING/ GENERATING TOKEN
/wp-json/jwt-auth/v1/token
To generate token, submit a POST request to this endpoint. With username and password as the parameters.
It will validates the user credentials, and returns success response including a token if the authentication is correct or returns an error response if the authentication is failed.
SAMPLE OF SUCCESS RESPONSE WHEN TRYING TO GENERATE TOKEN:
{
    "success": true,
    "statusCode": 200,
    "code": "jwt_auth_valid_credential",
    "message": "Credential is valid",
    "data": {
        "token": "eyJ0eXAiOiJKV1QiLCJhbGciOiJIUzI1NiJ9.eyJpc3MiOiJodHRwczpcL1wvcG9pbnRzLmNvdXZlZS5jby5pZCIsImlhdCI6MTU4ODQ5OTE0OSwibmJmIjoxNTg4NDk5MTQ5LCJleHAiOjE1ODkxMDM5NDksImRhdGEiOnsidXNlciI6eyJpZCI6MX19fQ.w3pf5PslhviHohmiGF-JlPZV00XWE9c2MfvBK7Su9Fw",
        "id": 1,
        "email": "contactjavas@gmail.com",
        "nicename": "contactjavas",
        "firstName": "Bagus Javas",
        "lastName": "Heruyanto",
        "displayName": "contactjavas"
    }
}
SAMPLE OF ERROR RESPONSE WHEN TRYING TO GENERATE TOKEN:
{
    "success": false,
    "statusCode": 403,
    "code": "invalid_username",
    "message": "Unknown username. Check again or try your email address.",
    "data": []
}
Once you get the token, you must store it somewhere in your application. It can be:
– using cookie
– or using localstorage
– or using a wrapper like localForage or PouchDB
– or using local database like SQLite or Hive
– or your choice based on app you develop
Then you should pass this token as Bearer Authentication header to every API call. The header format is:
Authorization: Bearer your-generated-token
and here’s an example:
"Authorization: Bearer eyJ0eXAiOiJKV1QiLCJhbGciOiJIUzI1NiJ9.eyJpc3MiOiJodHRwczpcL1wvcG9pbnRzLmNvdXZlZS5jby5pZCIsImlhdCI6MTU4ODQ5OTE0OSwibmJmIjoxNTg4NDk5MTQ5LCJleHAiOjE1ODkxMDM5NDksImRhdGEiOnsidXNlciI6eyJpZCI6MX19fQ.w3pf5PslhviHohmiGF-JlPZV00XWE9c2MfvBK7Su9Fw";
The jwt-auth will intercept every call to the server and will look for the authorization header, if the authorization header is present, it will try to decode the token and will set the user according with the data stored in it.
If the token is valid, the API call flow will continue as always.
WHITELISTING ENDPOINTS
Every call to the server (except the token creation some default whitelist) will be intercepted. However, you might need to whitelist some endpoints. You can use jwt_auth_whitelist filter to do it. Please simply add this filter directly (without hook). Or, you can add it to plugins_loaded. Adding this filter inside init (or later) will not work.
If you’re adding the filter inside theme and the whitelisting doesn’t work, please create a small 1 file plugin and add your filter there.
add_filter( 'jwt_auth_whitelist', function ( $endpoints ) {
    return array(
        '/wp-json/custom/v1/webhook/*',
        '/wp-json/custom/v1/otp/*',
        '/wp-json/custom/v1/account/check',
        '/wp-json/custom/v1/register',
    );
} );
DEFAULT WHITELISTED ENDPOINTS
We whitelist some endpoints by default. This is to prevent error regarding WordPress & WooCommerce. These are the default whitelisted endpoints (without trailing *** char):
// Whitelist some endpoints by default (without trailing * char).
$default_whitelist = array(
    // WooCommerce namespace.
    $rest_api_slug . '/wc/',
    $rest_api_slug . '/wc-auth/',
    $rest_api_slug . '/wc-analytics/',

    // WordPress namespace.
    $rest_api_slug . '/wp/v2/',
);
You might want to remove or modify the existing default whitelist. You can use jwt_auth_default_whitelist filter to do it. Please simply add this filter directly (without hook). Or, you can add it to plugins_loaded. Adding this filter inside init (or later) will not work.
If you’re adding the filter inside theme and the it doesn’t work, please create a small 1 file plugin and add your filter there. It should fix the issue.
add_filter( 'jwt_auth_default_whitelist', function ( $default_whitelist ) {
    // Modify the $default_whitelist here.
    return $default_whitelist;
} );
VALIDATING TOKEN
You likely don’t need to validate the token your self. The plugin handle it for you like explained above.
But if you want to test or validate the token manually, then send a POST request to this endpoint (don’t forget to set your Bearer Authorization header):
/wp-json/jwt-auth/v1/token/validate
VALID TOKEN RESPONSE:
{
    "success": true,
    "statusCode": 200,
    "code": "jwt_auth_valid_token",
    "message": "Token is valid",
    "data": []
}
ERRORS
If the token is invalid an error will be returned. Here are some samples of errors:
NO SECRET KEY
{
    "success": false,
    "statusCode": 403,
    "code": "jwt_auth_bad_config",
    "message": "JWT is not configurated properly.",
    "data": []
}
NO HTTP_AUTHORIZATION HEADER
{
    "success": false,
    "statusCode": 403,
    "code": "jwt_auth_no_auth_header",
    "message": "Authorization header not found.",
    "data": []
}
BAD ISS
{
    "success": false,
    "statusCode": 403,
    "code": "jwt_auth_bad_iss",
    "message": "The iss do not match with this server.",
    "data": []
}
INVALID SIGNATURE
{
    "success": false,
    "statusCode": 403,
    "code": "jwt_auth_invalid_token",
    "message": "Signature verification failed",
    "data": []
}
BAD REQUEST
{
    "success": false,
    "statusCode": 403,
    "code": "jwt_auth_bad_request",
    "message": "User ID not found in the token.",
    "data": []
}
USER NOT FOUND
{
    "success": false,
    "statusCode": 403,
    "code": "jwt_auth_user_not_found",
    "message": "User doesn't exist",
    "data": []
}
EXPIRED TOKEN
{
    "success": false,
    "statusCode": 403,
    "code": "jwt_auth_invalid_token",
    "message": "Expired token",
    "data": []
}
AVAILABLE FILTER HOOKS
JWT Auth is developer friendly and has some filters available to override the default settings.
JWT_AUTH_CORS_ALLOW_HEADERS
The jwt_auth_cors_allow_headers allows you to modify the available headers when the CORs support is enabled.
Default Value:
'X-Requested-With, Content-Type, Accept, Origin, Authorization'
Usage example:
/**
 * Change the allowed CORS headers.
 *
 * @param string $headers The allowed headers.
 * @return string The allowed headers.
 */
add_filter(
    'jwt_auth_cors_allow_headers',
    function ( $headers ) {
        // Modify the headers here.
        return $headers;
    }
);
JWT_AUTH_ISS
The jwt_auth_iss allows you to change the value before the payload is encoded to be a token.
Default Value:
get_bloginfo( 'url' )
Usage example:
/**
 * Change the token issuer.
 *
 * @param string $iss The token issuer.
 * @return string The token issuer.
 */
add_filter(
    'jwt_auth_iss',
    function ( $iss ) {
        // Modify the "iss" here.
        return $iss;
    }
);
JWT_AUTH_NOT_BEFORE
The jwt_auth_not_before allows you to change the value before the payload is encoded to be a token.
Default Value:
// Creation time.
time()
Usage example:
/**
 * Change the token's nbf value.
 *
 * @param int $not_before The default "nbf" value in timestamp.
 * @param int $issued_at The "iat" value in timestamp.
 *
 * @return int The "nbf" value.
 */
add_filter(
    'jwt_auth_not_before',
    function ( $not_before, $issued_at ) {
        // Modify the "not_before" here.
        return $not_before;
    },
    10,
    2
);
JWT_AUTH_EXPIRE
The jwt_auth_expire allows you to change the value before the payload is encoded to be a token.
Default Value:
time() + (DAY_IN_SECONDS * 7)
Usage example:
/**
 * Change the token's expire value.
 *
 * @param int $expire The default "exp" value in timestamp.
 * @param int $issued_at The "iat" value in timestamp.
 *
 * @return int The "nbf" value.
 */
add_filter(
    'jwt_auth_expire',
    function ( $expire, $issued_at ) {
        // Modify the "expire" here.
        return $expire;
    },
    10,
    2
);
JWT_AUTH_ALG
The jwt_auth_alg allows you to change the supported signing algorithm for your application.
Default Value:
'HS256'
Usage example:
/**
 * Change the token's signing algorithm.
 *
 * @param string $alg The default supported signing algorithm.
 * @return string The supported signing algorithm.
 */
add_filter(
    'jwt_auth_alg',
    function ( $alg ) {
        // Change the signing algorithm here.
        return $alg;
    }
);
JWT_AUTH_PAYLOAD
The jwt_auth_payload allows you to modify all the payload / token data before being encoded and signed.
Default value:
<?php
$token = array(
    'iss' => get_bloginfo('url'),
    'iat' => $issued_at,
    'nbf' => $not_before,
    'exp' => $expire,
    'data' => array(
        'user' => array(
            'id' => $user->ID,
        )
    )
);
Usage example:
/**
 * Modify the payload/ token's data before being encoded & signed.
 *
 * @param array $payload The default payload
 * @param WP_User $user The authenticated user.
 * .
 * @return array The payload/ token's data.
 */
add_filter(
    'jwt_auth_payload',
    function ( $payload, $user ) {
        // Modify the payload here.
        return $payload;
    },
    10,
    2
);
JWT_AUTH_VALID_CREDENTIAL_RESPONSE
The jwt_auth_valid_credential_response allows you to modify the valid credential response when generating a token.
Default value:
<?php
$response = array(
    'success'    => true,
    'statusCode' => 200,
    'code'       => 'jwt_auth_valid_credential',
    'message'    => __( 'Credential is valid', 'jwt-auth' ),
    'data'       => array(
        'token'       => $token,
        'id'          => $user->ID,
        'email'       => $user->user_email,
        'nicename'    => $user->user_nicename,
        'firstName'   => $user->first_name,
        'lastName'    => $user->last_name,
        'displayName' => $user->display_name,
    ),
);
Usage example:
/**
 * Modify the response of valid credential.
 *
 * @param array $response The default valid credential response.
 * @param WP_User $user The authenticated user.
 * .
 * @return array The valid credential response.
 */
add_filter(
    'jwt_auth_valid_credential_response',
    function ( $response, $user ) {
        // Modify the response here.
        return $response;
    },
    10,
    2
);
JWT_AUTH_VALID_TOKEN_RESPONSE
The jwt_auth_valid_token_response allows you to modify the valid token response when validating a token.
Default value:
<?php
$response = array(
    'success'    => true,
    'statusCode' => 200,
    'code'       => 'jwt_auth_valid_token',
    'message'    => __( 'Token is valid', 'jwt-auth' ),
    'data'       => array(),
);
Usage example:
/**
 * Modify the response of valid token.
 *
 * @param array $response The default valid token response.
 * @param WP_User $user The authenticated user.
 * @param string $token The raw token.
 * @param array $payload The token data.
 * .
 * @return array The valid token response.
 */
add_filter(
    'jwt_auth_valid_token_response',
    function ( $response, $user, $token, $payload ) {
        // Modify the response here.
        return $response;
    },
    10,
    4
);
CREDITS
PHP-JWT from firebase
JWT Authentication for WP REST API
https://wordpress.org/plugins/wp-rest-api-controller/
WP REST API Controller
WP REST API Controller allows admins to toggle the visibility of, and customize the endpoints for, all custom post types and all taxonomies within WordPress with an easy-to-use graphical interface. Additionally, you can tweak visibility and customize the meta data attached to the API response.
Note: This plugin requires WordPress Version 4.7 or later to work.
Features:
- Enable/Disable REST API endpoints for custom post types and taxonomies.
- Enable/Disable custom post type/taxonomy meta data (add or remove meta fields from API requests).
- Rename custom post type/taxonomy base endpoints.
- Rename custom post type/taxonomy meta data names in API requests so they are more user friendly.
- Manipulate and control post types/taxonomies and their data created by third party plugins and themes.
- Granular control of API responses without writing a single line of PHP code.
- Filters included to alter and extend default functionality.
Note: As of version 1.4.0, this plugin no longer controls default WordPress Posts or Pages.
Screenshots
WP REST API Controller settings page.
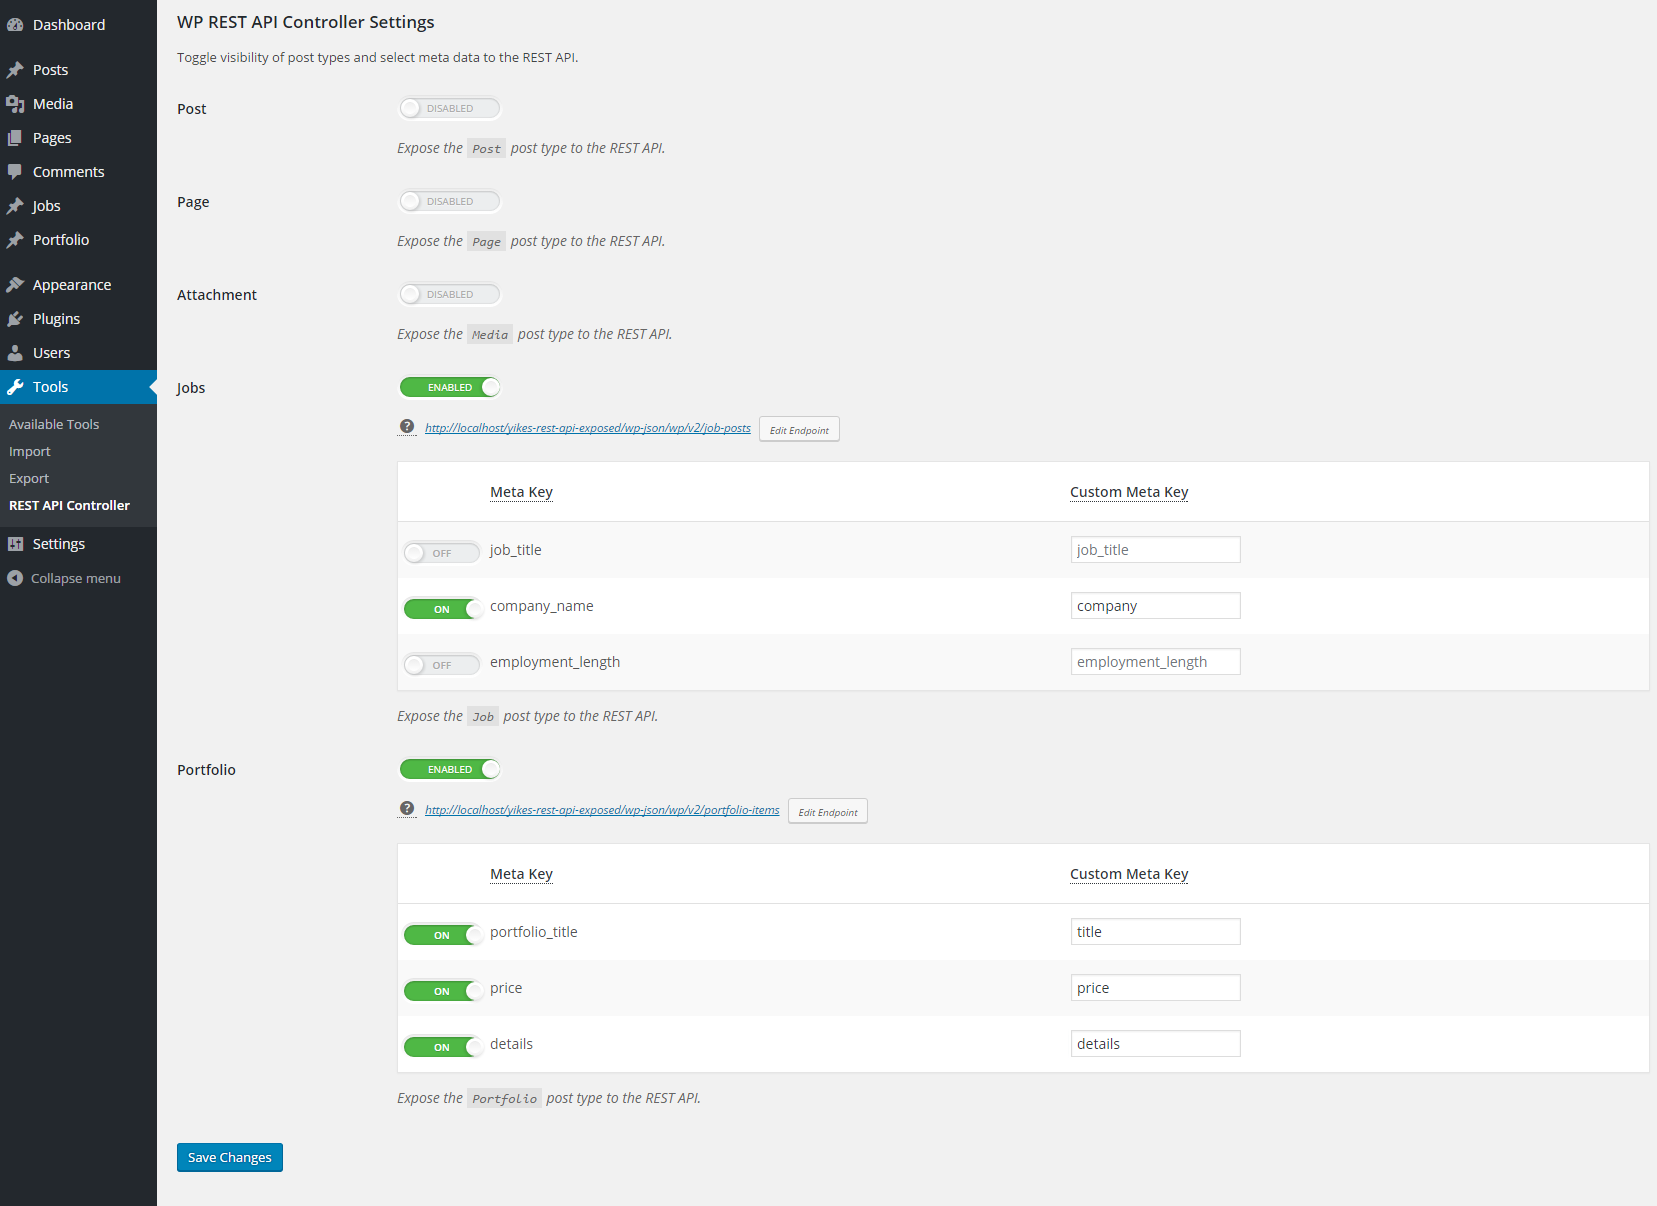
FAQ
- Can I toggle the visibility of endpoints?
- Can I alter the default REST endpoints using this plugin?
- Can I alter REST endpoints for post types from other plugins or my theme?
- Are all post types customizable using this plugin?
- Can we customize the meta data assigned to post types?
- Is this plugin compatible with the Core WordPress 4.7 REST API?
- How do I retrieve repeating postmeta fields?