VSCode – Extenstions list + reactjs setup
SETUP REACTJS ON MAC
Install Node.js — installer vs. Homebrew vs. NVM
https://pawelgrzybek.com/install-nodejs-installer-vs-homebrew-vs-nvm/
Published: 2019.01.15 | 3 minutes read
No matter if you are working on backend or are in the frontend camp, [Node.js](https://nodejs.org/) is getting more popular day by day and you may need to install it at some point. There is plenty of ways to install it on your operating system and I am about to show you the most popular methods and highlight pros and cons of each of them.
## Pre-built installer for your platform [#](https://pawelgrzybek.com/install-nodejs-installer-vs-homebrew-vs-nvm/#pre-built-installer-for-your-platform)
The easiest and most obvious way is to download a pre-built installer for your platform from the [Node.js downloads page](https://nodejs.org/en/download/). Installation itself is very straight forward — next, next, next, done.

Despite the fact it is the easiest way of installing it, it comes with many disadvantages. It locks you to a particular version — it may not be a big issue on day one but it can be in the long run if you are willing to jump between projects that depend on different versions. Another (worst) issue with this method is the fact that it requires admin permissions (`sudo`) to install package globally. I published [“Fix privileges and never again use sudo with npm”](https://pawelgrzybek.com/fix-priviliges-and-never-again-use-sudo-with-npm/) with some solutions for this issue, but you better check [“Resolving EACCES permissions errors when installing packages globally”](https://docs.npmjs.com/resolving-eacces-permissions-errors-when-installing-packages-globally) on official documentation or follow this article.
## Node from Homebrew / Chocolatey [#](https://pawelgrzybek.com/install-nodejs-installer-vs-homebrew-vs-nvm/#node-from-homebrew–chocolatey)
[“Homebrew — the best friend of the macOS user”](https://pawelgrzybek.com/homebrew-the-best-friend-of-the-macos-user/) explains why I love this tool so much. Windows users can find an alternative like [Chocolatey](https://chocolatey.org/). Both of these package managers allow you to install Node.js with ease.
“`
brew install node
choco install nodejs.install
“`
CLI tools like that allow you to install / uninstall software in no time and never again be bothered by insufficient permissions. Although they allow you to manage versions too, in Node.js you should use…
NVM VERSION MANAGER
nvm is a simple bash CLI that allows you to install multiple Node.js versions and switch between them using simple commands. Although it is available for macOS and Linux only, [Node.js version manager for Windows](https://github.com/coreybutler/nvm-windows) exists (ironically it is written in Go). Installation is straightforward — you can use a simple bash script or `brew` (my preferred way).
“`
curl -o- https://raw.githubusercontent.com/creationix/nvm/v0.34.0/install.sh | bash
brew install nvm
“`
Thats the way to install the latest version of Node.js.
“`
nvm install node
“`
There are two steps to installing nvm with brew.
First use brew to install the application:
brew install nvm
Then take a look at the brew info “caveats” section, to see what else you have to do:
brew info nvm
You might see something like (this can change!):
You should create NVM’s working directory if it doesn’t exist:
mkdir ~/.nvm
Add the following to ~/.bash_profile or your desired shell
configuration file:
export NVM_DIR=”$HOME/.nvm”
. “/usr/local/opt/nvm/nvm.sh”
If you do not have a ~/.bash_profile file, then you can simply create one.
Make sure to restart your terminal before trying the command.
Be curious and explore more `nvm` commands on an [official nvm documentation](https://github.com/creationix/nvm#usage). My most frequently used commands are: `install`, `uninstall`, `list` and `use`.

https://github.com/lukechilds/zsh-nvm
It is hard to remember the version of Node.js that a project depends on — smash the version into `.nvmrc` file in the root of your project and run `nvm use` inside this directory. If something can be automated, it should be automated — installing the right version of dependencies is not an exception. I made a simple bash script that runs `nvm use` whenever it encounters a `.nvmrc` file inside your project. There is a cool [zsh-nvm plugin for Zsh users](https://github.com/lukechilds/zsh-nvm) that does the same job. –
https://opensource.com/article/19/9/adding-plugins-zsh
It should be noted that installing nvm with Homebrew is not officially supported:
Homebrew installation is not supported. If you have issues with homebrew-installed nvm, please brew uninstall it, and install it using the instructions below, before filing an issue.
Paweł Grzybek Mod skube • a year ago
Yes you are right.
The only reason why is the fact that nvm needs to be added to shell session. Official installation script does it for you. Brew installation requires a few lines of code to be added to .zshrc / .bashrc / .whareverrc…
Post-install message from brew formula gives a detailed instruction about this step.
Thanks for contribution. Have a fantastic day!
https://medium.com/@arunkrsoam/install-react-js-on-mac-7cffe8bda2ac
Install React JS on Mac!
Hidden steps for node.js / nvm
Arun Kumar
Feb 25·4 min read
Now, install the create-react-app. That generally create a react app with required files.
$ sudo npm install -g create-react-app
Verify that create-react-app has installed or not?
$ npm -v$create-react-app — version
3.3.0
create-react-app – installs lots of files – NO uppercase
$ create-react-app REACT_App
Once the project is created then cd to the project directory and run application by $ npm start command as given below:
$ npm start
Showed below error
· npm start error events.js:200 throw er; // Unhandled ‘error’ event
$npm install react-scripts@2.1.8$ $npm start
Then it showed below error
· errno: ‘ENOTFOUND’, code: ‘ENOTFOUND’, syscall: ‘getaddrinfo’, hostname: ‘x86_64-apple-darwin13.4.0’
#unset HOST
Finally, it resolved the error by unseating the HOST and server started,


You can navigate to to access the webpage of react application.
Sometimes it’s irritating such minor issued that must be in knowledge to fix to initiate the react application.
For more troubleshooting, you can refer to stackflow and other websites.
Thanks, Arun
How to build and deploy a React app to Github pages in less than 5 minutes


If you’re new to the react domain, my previous article on Getting Started with React is highly recommended.
Learn React by building a To-Do App — React Functionalities Explained
If you are one of those people who are intimidated by the buzz around React but find it difficult to get started, then…
medium.com
In this article, we are building a which gives genuine life advice to keep us motivated amidst the chaos and deploy it to Github pages for making a great website out of it.
Prerequisite:
- Github account and git installed
- Node.js and npm installed in your machine(Node 8.10.0 or later versions are accepted)
Fork the following GitHub repo to get the project files: .
AnjaliSharma1234/Personal-Advisor-React-App
A personal advisor app to keep you motivated and calm amidst the chaos. It is a React web app fetching data from an…
github.com
Getting Started
Skip these steps and move to the deployment section if you’ve already built the React app
Step1: Create the React app: npx create-react-app your-app-name
Step2: Go to the project repo: cd your-app-name
Step3: Copy the src and public folder from the following repo https://github.com/AnjaliSharma1234/Personal-Advisor-React-App(You can customize the files according to your preferences) and substitute them in the your-app-name folder.
Step4: Run your application: npm start
You can now see the app running in the localhost browser popup like this:

Congratulations, you’ve created your react app, let’s move to deployment for building a website out of it.
Deployment
Make sure your react app code is already pushed to the GitHub account under some {Github-repo-name}.
Step1: Install the gh-pages package as a “dev-dependency” of the app
npm install gh-pages — save-dev
Step2: Add homepage property to package.json file
Open package.json and add
“homepage”: “http://{Github-username}.github.io/{Github-repo-name}"

Step3: Deploy scripts under package.json file
In the existing scripts property, add a predeploy property and a deploy property, each having the values shown below:
“scripts”: {
//…
“predeploy”: “npm run build”,
“deploy”: “gh-pages -d build”
}

The predeploy command helps to bundle the react app while the deploy command fires up the bundled file.
Step4: Create a remote GitHub repository
(Skip this step if your remote GitHub repository is already initialized)
Initialize: git init
Add it as remote: git remote add origin your-github-repository-url.git
Step5: Now deploy it to GitHub Pages
npm run deploy

This command will create a branch named gh-pages at your GitHub repository. This branch hosts your app and homepage property you created in package.json file hold your link for a live preview.
Go to {your-GitHub-code-repository} -> settings -> GitHub pages section and setup source to the gh-pages branch.

Step6: Update your repository code (optional)
Commit and push your updated code commit to GitHub
git add .
git commit -m “Your commit message”
git push origin master
That’s it! You have successfully deployed your app to the website URL defined in Step2 of this Deployment section.
Congratulations!
https://medium.com/productivity-freak/the-ultimate-vscode-setup-for-js-react-6a4f7bd51a2
–>
The Ultimate VSCode Setup for Front End/JS/React


Updated Feb 2020
My .
Why? Speed, stability and TypeScript.
Overall, I’m very happy with the switch. As with Atom, for me, out-of-the-box the editor has a lot of missing functionality. However, it is covered by extensions.
I divided this list into Utilities and HTML/CSS/JS/React specific extensions, sorted alphabetically.
Utilities
Bracket Pair Colorizer
This extension allows matching brackets to be identified with colours. The user can define which characters to match, and which colours to use.


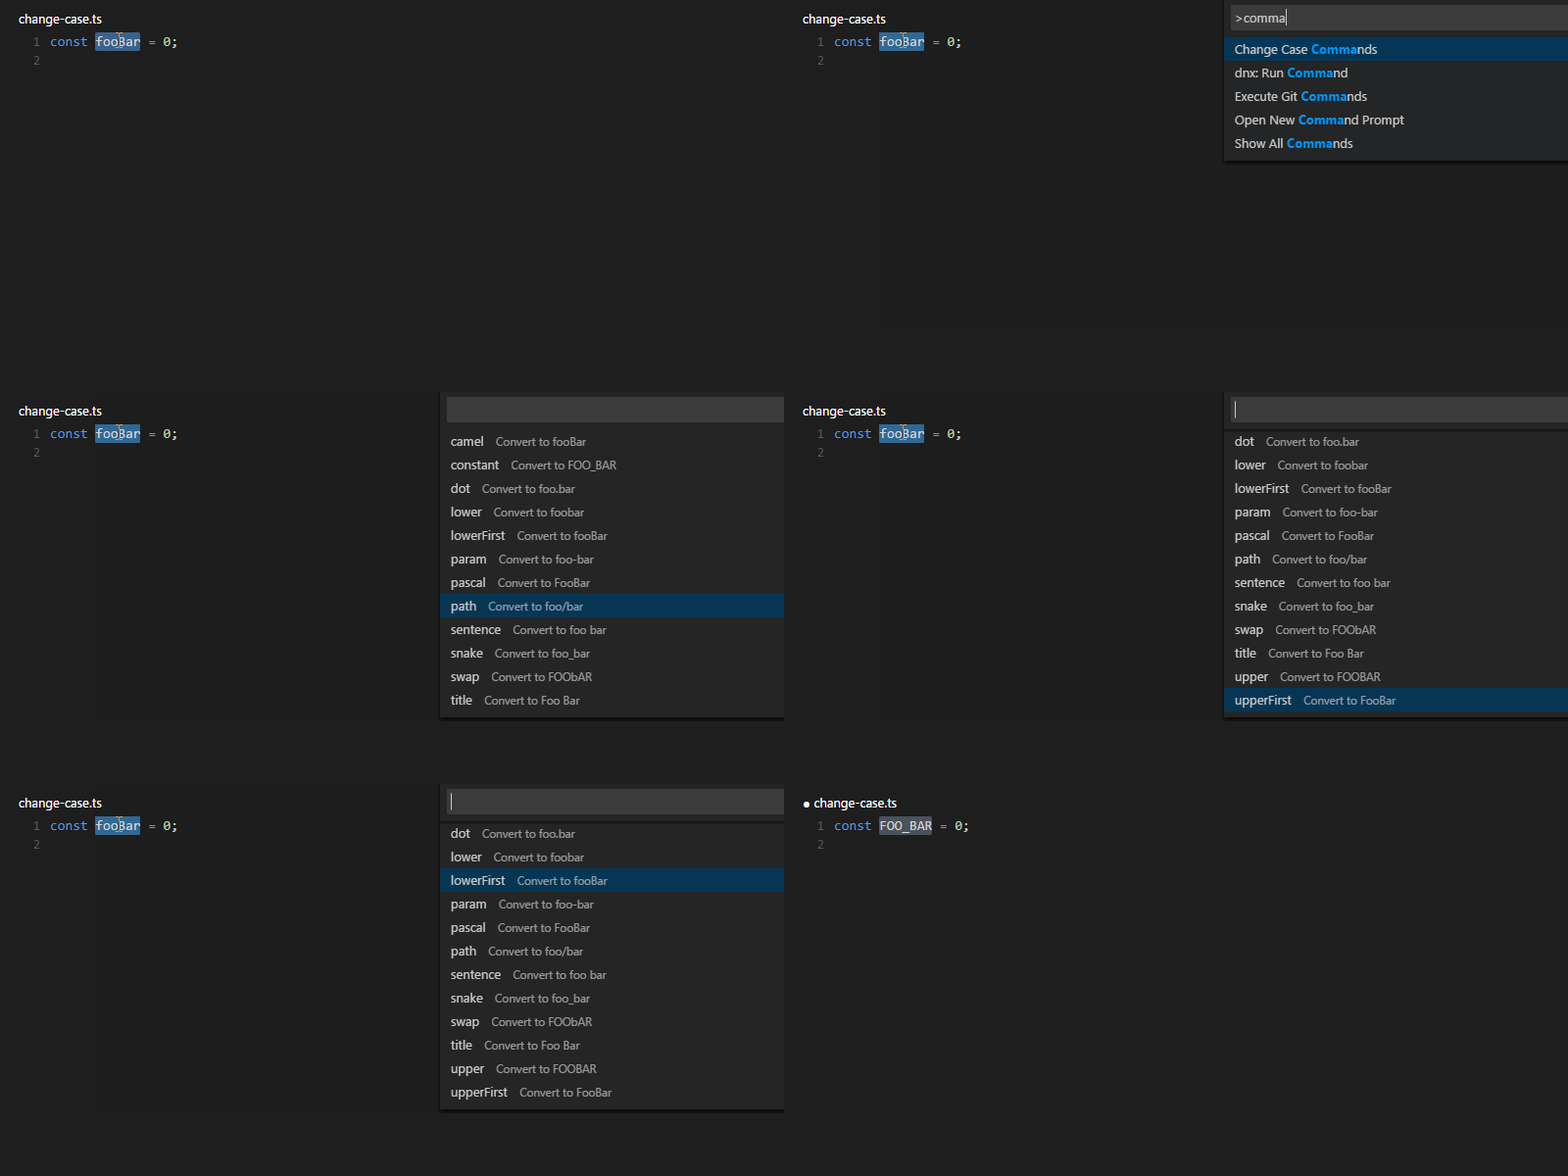
change-case
A wrapper around node-change-case for Visual Studio Code. Quickly change the case of the current selection or current word.

Code Spell Checker
A basic spell checker that works well with camelCase code.
The goal of this spell checker is to help with catching common spelling errors while keeping the number of false positives low.


DuplicateSelection
This extension brings Sublime-like duplication of selected text — it duplicates it inline, and not in a new line, like the default behavior of VSCode.
EditorConfig for VS Code
Brings EditorConfig and .editorconfig support to VSCode.
File Utils
A convenient way of creating, duplicating, moving, renaming and deleting files and directories.
I configured keyboard shortcuts in the File Explorer, like r to rename and d to duplicate.


file-icons
File-specific icons in VSCode for improved visual grepping.


Find Related Files
Finds files related to the current file based on user-defined configuration rules. I use it to find spec/test files based on source files.


FiraCode
Monospaced font with programming ligatures.
tl;dr — converts !==, => etc into beautiful symbols.
VSCode instructions.


GitLens — Git supercharged
Supercharge the Git capabilities built into Visual Studio Code — Visualize code authorship at a glance via Git blame annotations and code lens, seamlessly navigate and explore Git repositories, gain valuable insights via powerful comparison commands, and so much more


indent-rainbow
This extension colorizes the indentation in front of your text alternating four different colors on each step. Some may find it helpful in writing code for Nim or Python.


macros
automate repetitive actions with custom macros.
VSCode doesn’t have a built in way to open file explorer and focus on the current file, these are two different commands. This extension allows combining a set of commands, so I hooked cmd+shift+r to do that. See instructions here.
Markdown All in One
All you need to write Markdown (keyboard shortcuts, table of contents, auto preview and more).


Material Icon Theme
Material-UI inspired file icons, alternative to File Icons.


Multi Line tricks
Enable Alt+L (line select) and Alt+Shift+L (selection to multi-cursor) behavior on VSCode. Another feature I really missed from Sublime.


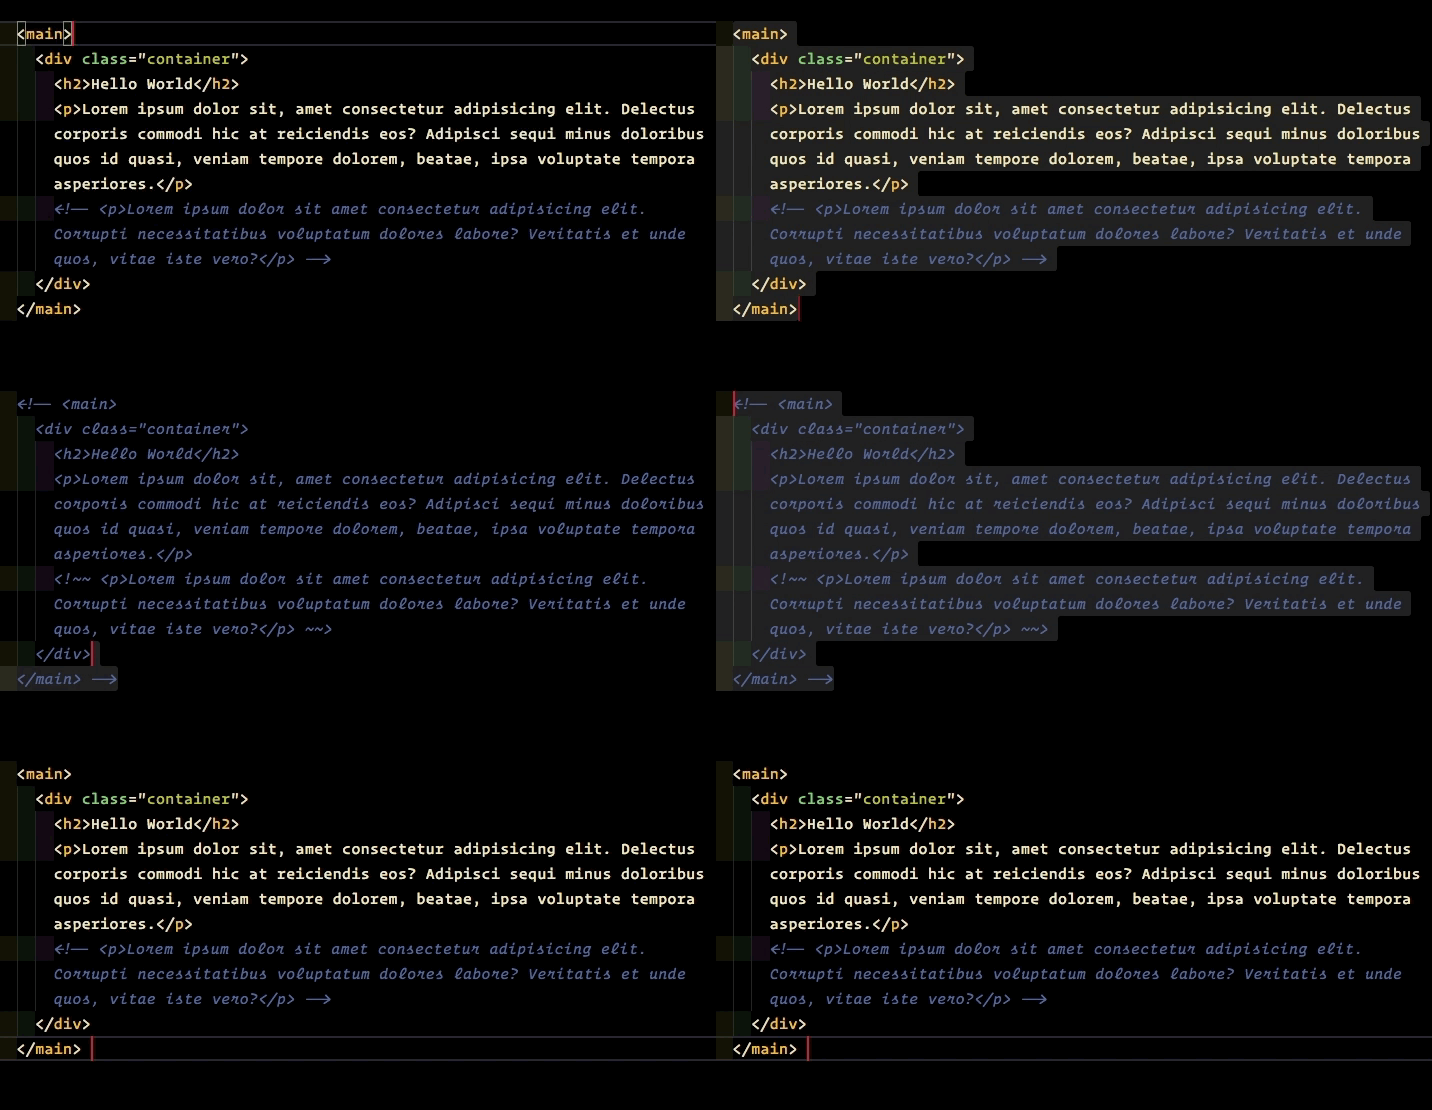
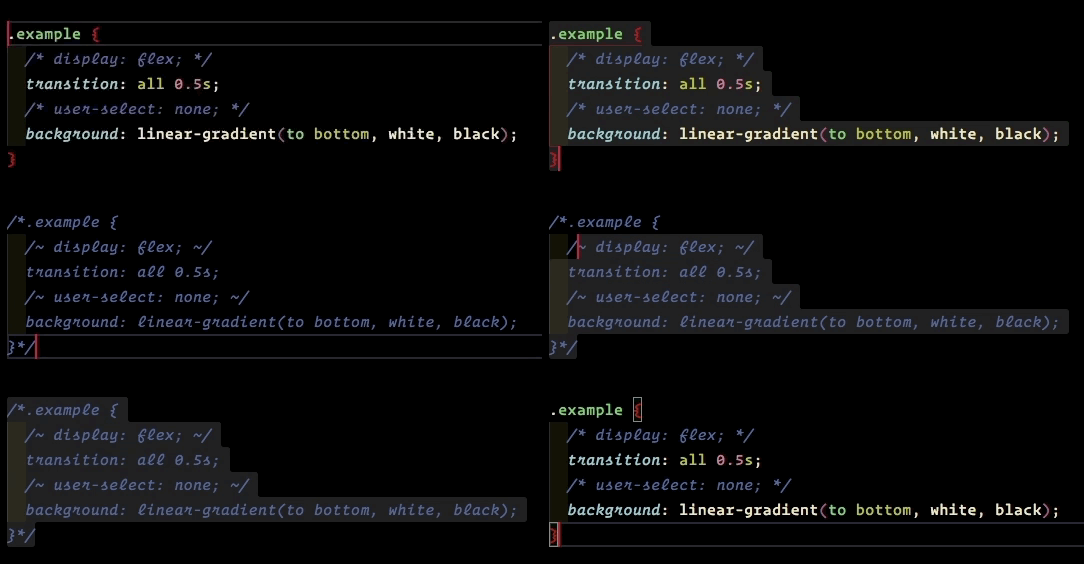
Nest Comments
If your code contains a comment, and you want to add a new comment to temporarily disable a block or portion of code, the first instance of a --> or */ closing comment tag will end the entire comment.
This extension will convert pre-existing comments to safe characters, allowing a new block comment that includes the original comment. It also reverses the effect to uncomment the same block of code.


open-in-finder
Adds a few commands for opening the current file or project in Finder.
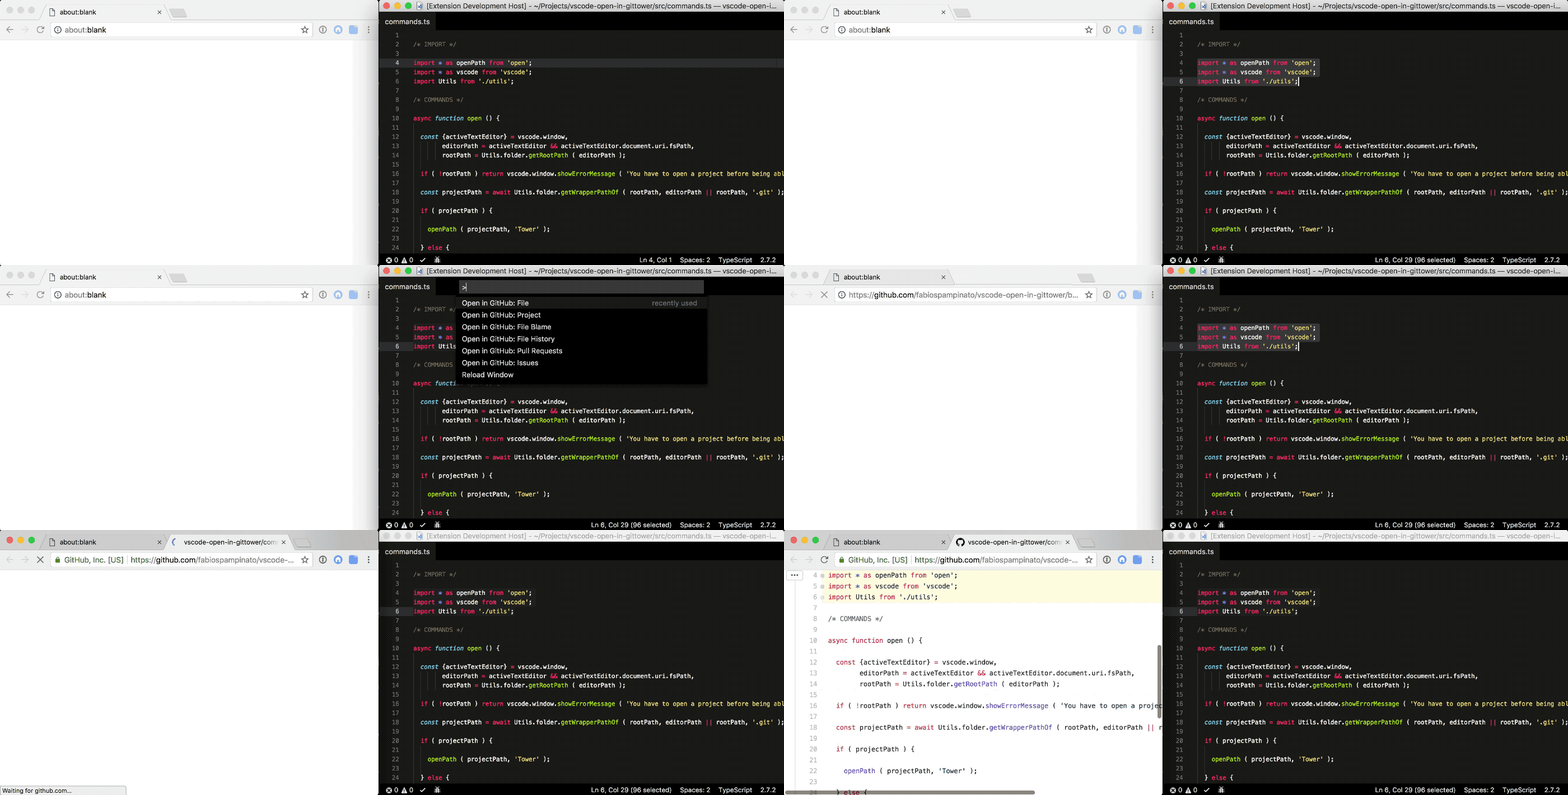
open-in-github
Open the current project or file in github.com.

Path Intellisense
Visual Studio Code plugin that autocompletes filenames.


Project Manager
Easily switch between projects


saveBackup
Backup file when you save. Life saver.
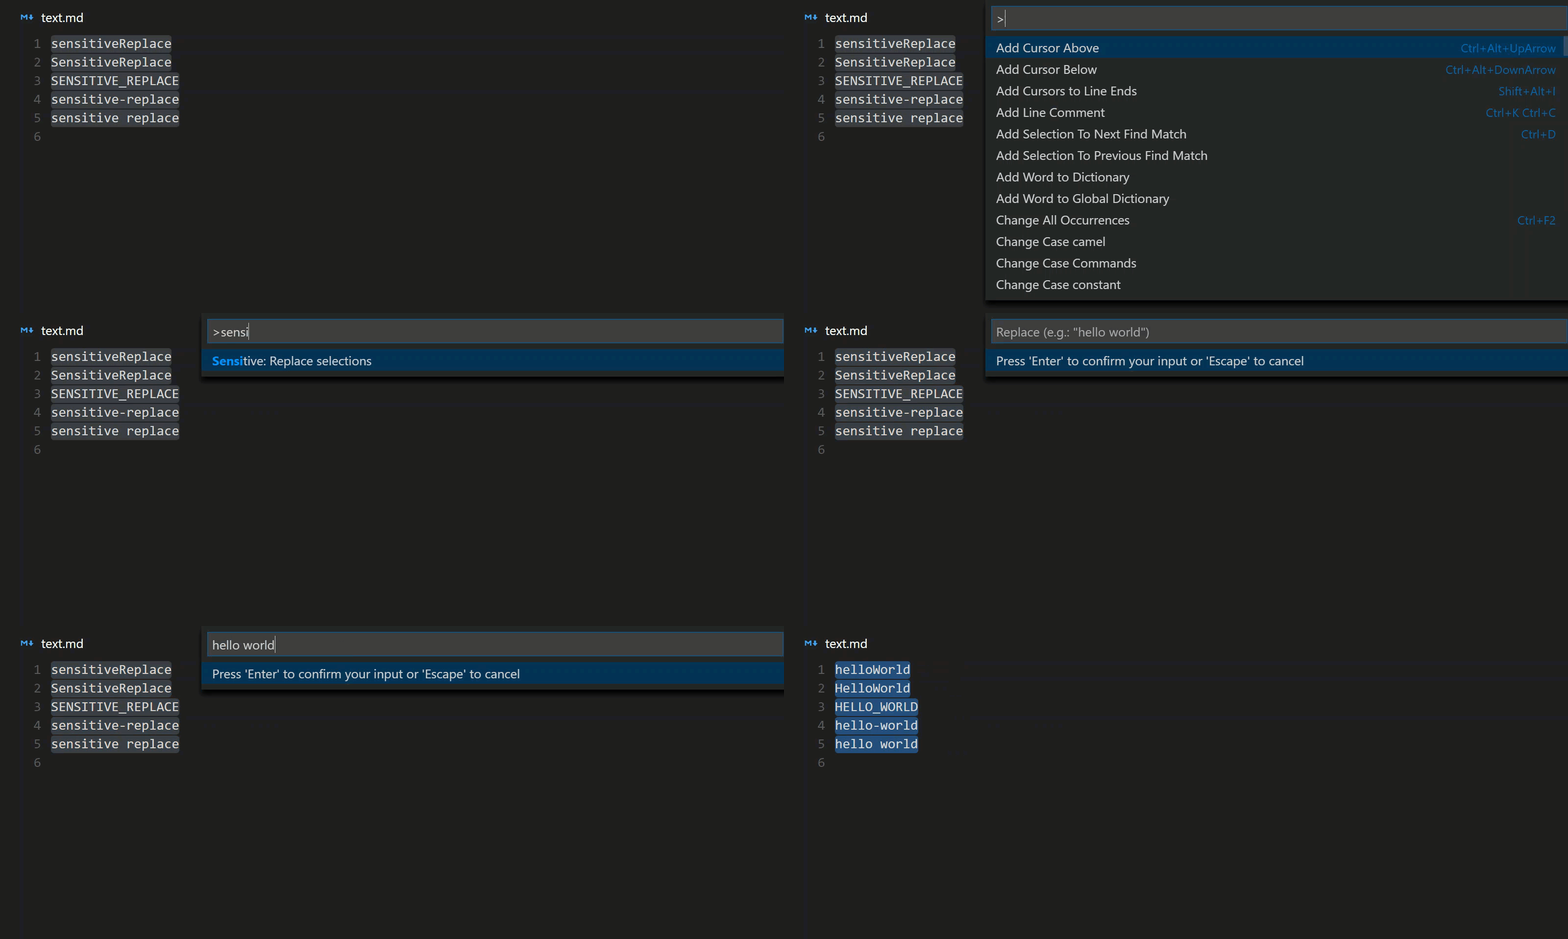
Sensitive Replace (VSCode now supports this feature!)
Replace selections while preserving cases.

Settings Sync
Synchronize Settings, Snippets, Themes, File Icons, Launch, Keybindings, Workspaces and Extensions Across Multiple Machines Using GitHub Gist.
Toggle Quotes
Toggle cycle " -> ' -> `
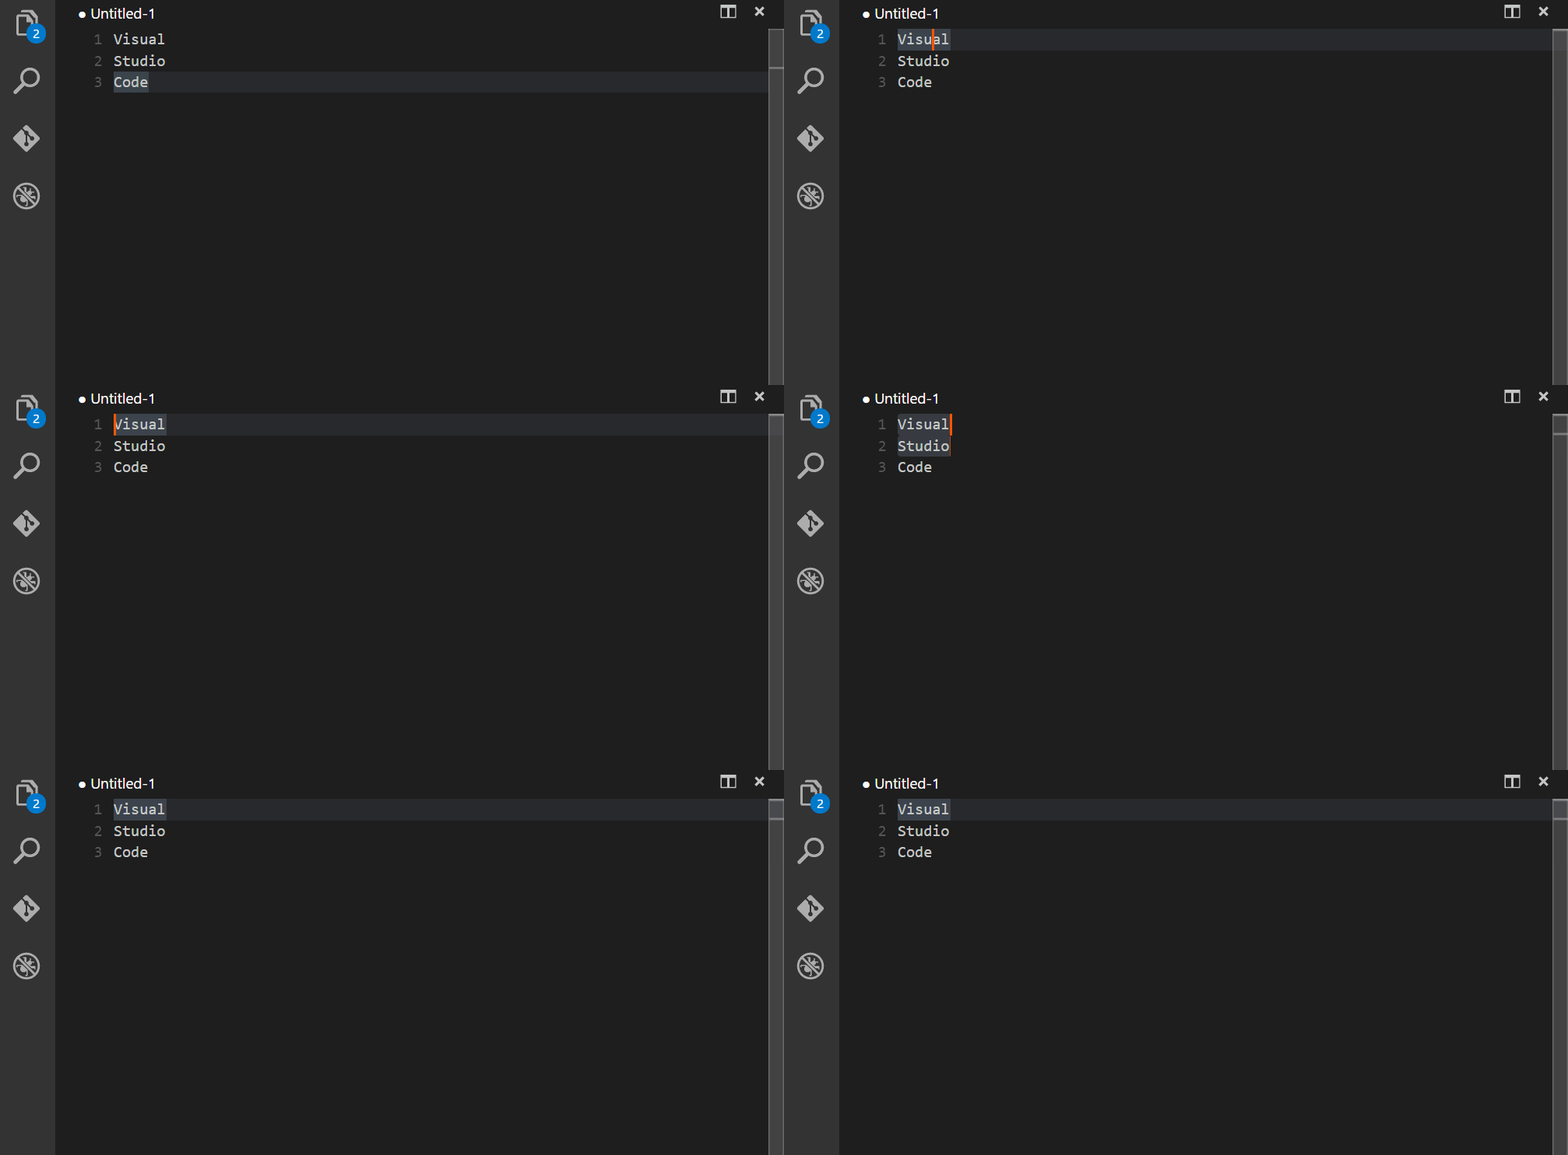
transpose
Transpose is an extension for VSCode for transposing/swapping selections or characters.

Unique Lines
Keep unique lines of text and remove duplicates from current selection. Also includes a command to shuffle currently selected lines.
Visual Studio IntelliCode
The Visual Studio IntelliCode extension provides AI-assisted development features for Python, TypeScript/JavaScript and Java developers in Visual Studio Code, with insights based on understanding your code context combined with machine learning.


HTML/CSS/JS/React Specific Extensions
Auto Rename Tag
Automatically rename paired HTML/XML tag.


ES7 React/Redux/GraphQL/React-Native snippets
This extension provides you JavaScript and React/Redux snippets in ES7 with Babel plugin features for VS Code.
Plenty of useful snippets! Highlights:
import {} from '' where the cursor starts at the path.
const [foo, setFoo] = useState(null)with proper uppercasing of what’s after set.
ESLint
Integrates ESLint into VS Code.
eslint-disable-snippets
Includes snippets for ignoring; a block, the current line, or the next line.


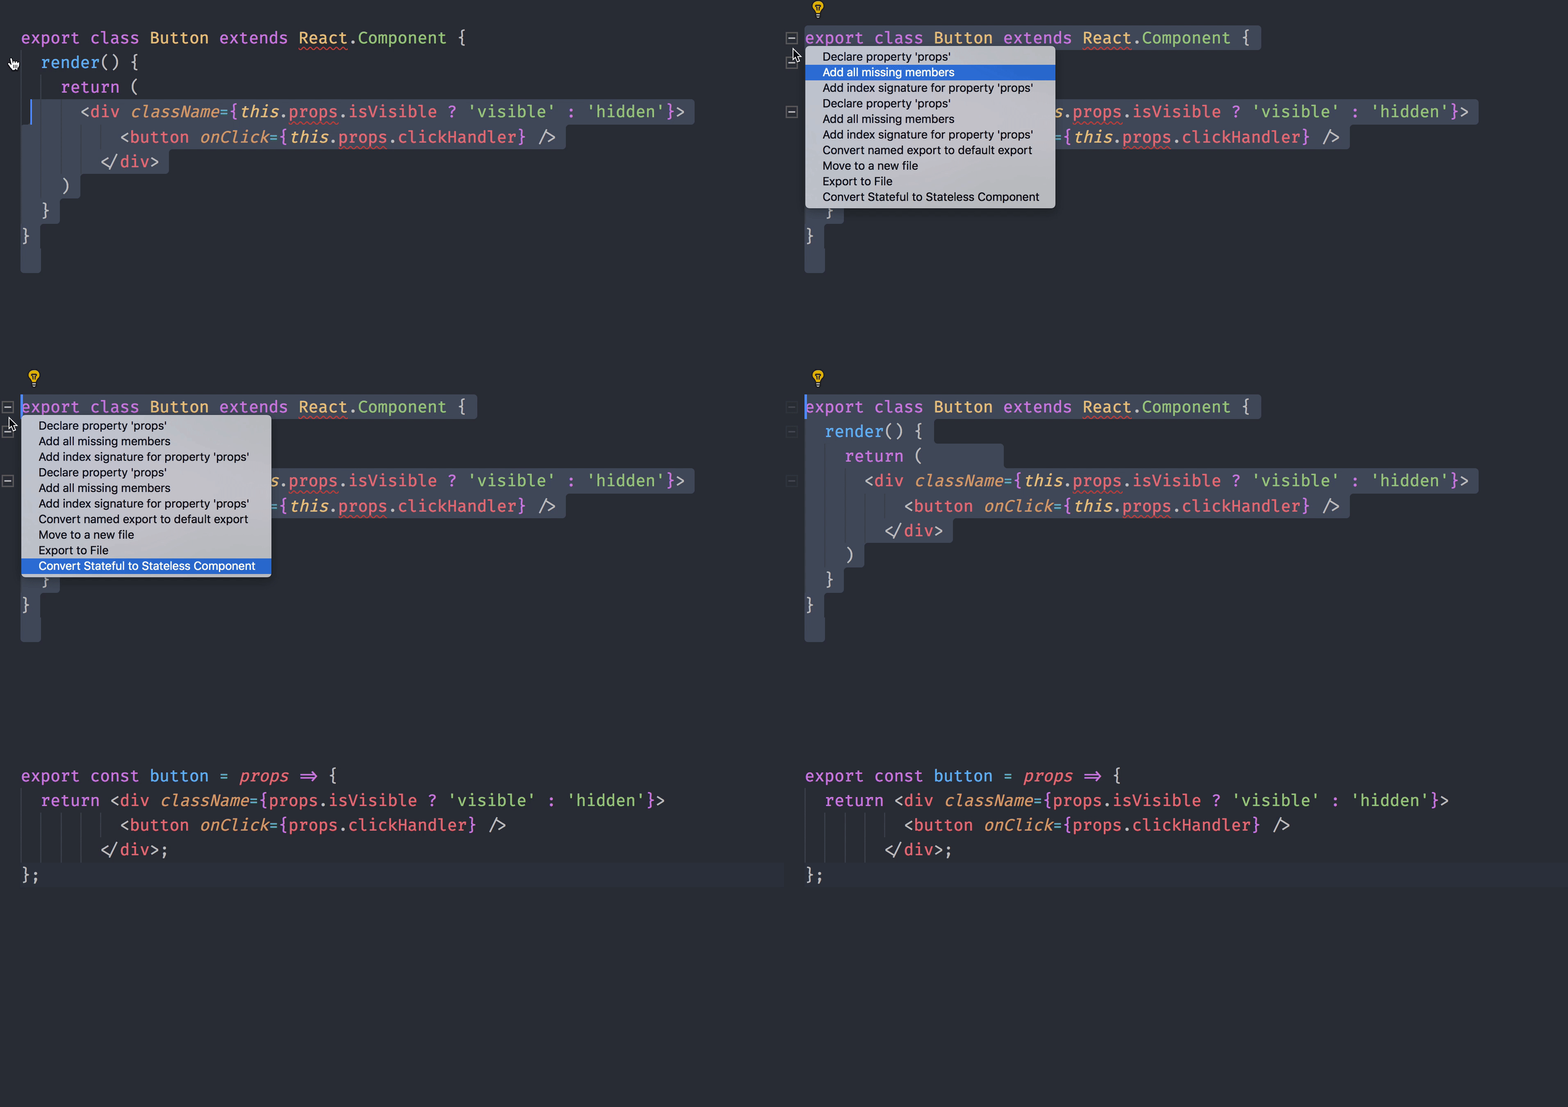
glean
Allows extracting typescript and javascript code into separate module, as well as extracting JSX into new components



htmltagwrap
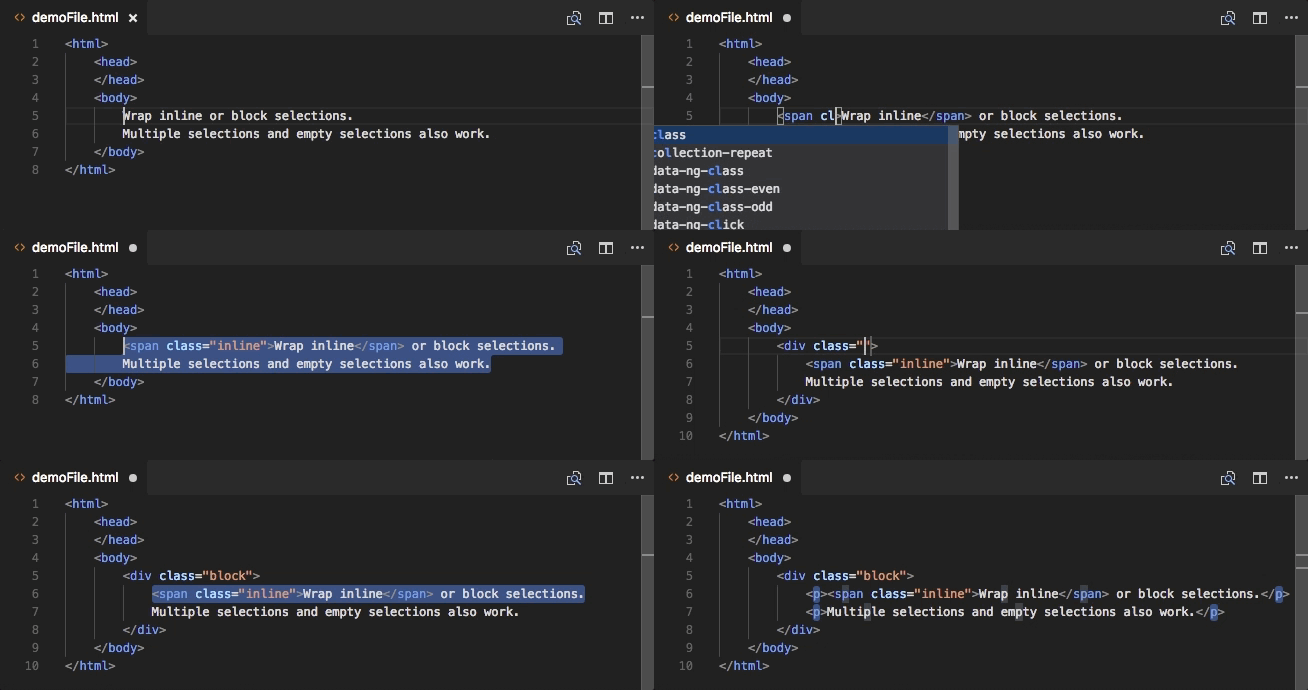
Wraps selected code with HTML tags. A feature I really missed from TextMate.

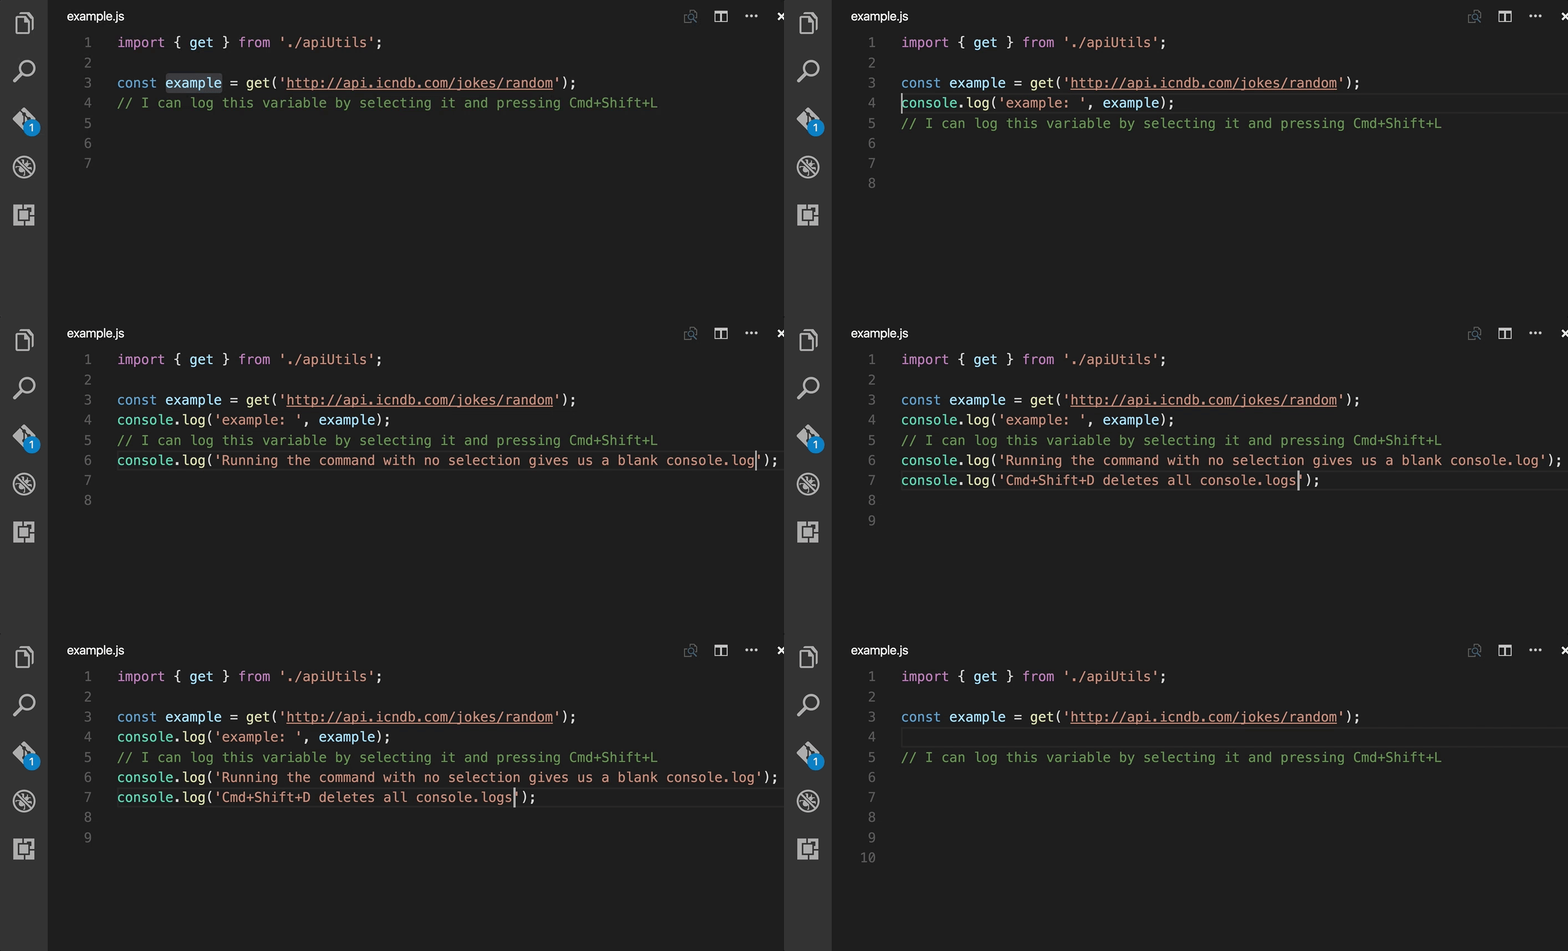
javascript console utils
Help insert and remove console.(*) statements.

Jest Snippets
Code snippets for testing framework Jest.
npm Intellisense
Visual Studio Code plugin that autocompletes npm modules in import statements.


Prettier — Code formatter
VS Code package to format your JavaScript / TypeScript / CSS using Prettier.
React Refactor
This simple extension provides refactor code actions for React developers.
Recompose your overgrown JSX without worrying about the given data. This extension will do the dirty work for you without breaking your code.


Version Lens


My Theme
Dracula Official
My all-time favorite theme.


Got more? Let me know in the comments!
https://github.com/Microsoft/vscode-docs/blob/master/docs/nodejs/reactjs-tutorial.md
| Order | Area | TOCTitle | ContentId | PageTitle | DateApproved | MetaDescription | MetaSocialImage |
|---|---|---|---|---|---|---|---|
|
5
|
nodejs
|
React Tutorial
|
2dd2eeff-2eb3-4a0c-a59d-ea9a0b10c468
|
React JavaScript Tutorial in Visual Studio Code
|
10/8/2020
|
React JavaScript tutorial showing IntelliSense, debugging, and code navigation support in the Visual Studio Code editor.
|
/assets/images/nodejs_javascript_vscode.png
|
Using React in Visual Studio Code
React is a popular JavaScript library developed by Facebook for building web application user interfaces. The Visual Studio Code editor supports React.js IntelliSense and code navigation out of the box.
Welcome to React
We’ll be using the create-react-app generator for this tutorial. To use the generator as well as run the React application server, you’ll need Node.js JavaScript runtime and npm (Node.js package manager) installed. npm is included with Node.js which you can download and install from Node.js downloads.
Tip: To test that you have Node.js and npm correctly installed on your machine, you can type
node --versionandnpm --versionin a terminal or command prompt.
You can now create a new React application by typing:
npx create-react-app my-app
where my-app is the name of the folder for your application. This may take a few minutes to create the React application and install its dependencies.
Note: If you’ve previously installed
create-react-appglobally vianpm install -g create-react-app, we recommend you uninstall the package usingnpm uninstall -g create-react-appto ensure that npx always uses the latest version.
Let’s quickly run our React application by navigating to the new folder and typing npm start to start the web server and open the application in a browser:
cd my-app
npm start
You should see the React logo and a link to “Learn React” on http://localhost:3000 in your browser. We’ll leave the web server running while we look at the application with VS Code.
To open your React application in VS Code, open another terminal or command prompt window, navigate to the my-app folder and type code .:
cd my-app
code .
Markdown preview
In the File Explorer, one file you’ll see is the application README.md Markdown file. This has lots of great information about the application and React in general. A nice way to review the README is by using the VS Code Markdown Preview. You can open the preview in either the current editor group (Markdown: Open Preview kb(markdown.showPreview)) or in a new editor group to the side (Markdown: Open Preview to the Side kb(markdown.showPreviewToSide)). You’ll get nice formatting, hyperlink navigation to headers, and syntax highlighting in code blocks.
Syntax highlighting and bracket matching
Now expand the src folder and select the index.js file. You’ll notice that VS Code has syntax highlighting for the various source code elements and, if you put the cursor on a parenthesis, the matching bracket is also selected.
IntelliSense
As you start typing in index.js, you’ll see smart suggestions or completions.
After you select a suggestion and type ., you see the types and methods on the object through IntelliSense.
VS Code uses the TypeScript language service for its JavaScript code intelligence and it has a feature called Automatic Type Acquisition (ATA). ATA pulls down the npm Type Declaration files (*.d.ts) for the npm modules referenced in the package.json.
If you select a method, you’ll also get parameter help:
Go to Definition, Peek definition
Through the TypeScript language service, VS Code can also provide type definition information in the editor through Go to Definition (kb(editor.action.revealDefinition)) or Peek Definition (kb(editor.action.peekDefinition)). Put the cursor over the App, right click and select Peek Definition. A Peek window will open showing the App definition from App.js.
Press kbstyle(Escape) to close the Peek window.
Hello World!
Let’s update the sample application to “Hello World!”. Add the link to declare a new H1 header and replace the <App /> tag in ReactDOM.render with element.
import React from 'react';
import ReactDOM from 'react-dom';
import './index.css';
import App from './App';
import * as serviceWorker from './serviceWorker';

var element = React.createElement('h2', { className: 'greeting' }, 'Hello, world!');
ReactDOM.render(element, document.getElementById('root'));
serviceWorker.unregister();
Once you save the index.js file, the running instance of the server will update the web page and you’ll see “Hello World!”.
Tip: VS Code supports Auto Save, which by default saves your files after a delay. Check the Auto Save option in the File menu to turn on Auto Save or directly configure the
files.autoSaveuser setting.
Debugging React
To debug the client side React code, we’ll need to install the Debugger for Chrome extension.
Note: This tutorial assumes you have the Chrome browser installed. There are also debugger extensions for the Edge and Firefox browsers.
Open the Extensions view (kb(workbench.view.extensions)) and type ‘chrome’ in the search box. You’ll see several extensions which reference Chrome.
Press the Install button for Debugger for Chrome.
Set a breakpoint
To set a breakpoint in index.js, click on the gutter to the left of the line numbers. This will set a breakpoint which will be visible as a red circle.
Configure the Chrome debugger
We need to initially configure the debugger. To do so, go to the Run view (kb(workbench.view.debug)) and click create a launch.json file to customize Run and Debug. Choose Chrome from the Select Environment drop-down list. This will create a launch.json file in a new .vscode folder in your project which includes a configuration to launch the website.
We need to make one change for our example: change the port of the url from 8080 to 3000. Your launch.json should look like this:
{
    "version": "0.2.0",
    "configurations": [
        {
            "type": "chrome",
            "request": "launch",
            "name": "Launch Chrome against localhost",
            "url": "http://localhost:3000",
            "webRoot": "${workspaceFolder}"
        }
    ]
}
Ensure that your development server is running (npm start). Then press kb(workbench.action.debug.start) or the green arrow to launch the debugger and open a new browser instance. The source code where the breakpoint is set runs on startup before the debugger was attached, so we won’t hit the breakpoint until we refresh the web page. Refresh the page and you should hit your breakpoint.
You can step through your source code (kb(workbench.action.debug.stepOver)), inspect variables such as element, and see the call stack of the client side React application.
The Debugger for Chrome extension README has lots of information on other configurations, working with sourcemaps, and troubleshooting. You can review it directly within VS Code from the Extensions view by clicking on the extension item and opening the Details view.
Live editing and debugging
If you are using webpack together with your React app, you can have a more efficient workflow by taking advantage of webpack’s HMR mechanism which enables you to have live editing and debugging directly from VS Code. You can learn more in this Live edit and debug your React apps directly from VS Code blog post and the webpack Hot Module Replacement documentation.
Linting
Linters analyze your source code and can warn you about potential problems before you run your application. The JavaScript language services included with VS Code has syntax error checking support by default, which you can see in action in the Problems panel (View > Problems kb(workbench.actions.view.problems)).
Try making a small error in your React source code and you’ll see a red squiggle and an error in the Problems panel.
Linters can provide more sophisticated analysis, enforcing coding conventions and detecting anti-patterns. A popular JavaScript linter is ESLint. ESLint, when combined with the ESLint VS Code extension, provides a great in-product linting experience.
First, install the ESLint command-line tool:
npm install -g eslint
Then install the ESLint extension by going to the Extensions view and typing ‘eslint’.
Once the ESLint extension is installed and VS Code reloaded, you’ll want to create an ESLint configuration file, .eslintrc.js. You can create one using the extension’s ESLint: Create ESLint configuration command from the Command Palette (kb(workbench.action.showCommands)).
The command will prompt you to answer a series of questions in the Terminal panel. Take the defaults, and it will create a .eslintrc.js file in your project root that looks something like this:
module.exports = {
    "env": {
        "browser": true,
        "es2020": true
    },
    "extends": [
        "eslint:recommended",
        "plugin:react/recommended"
    ],
    "parserOptions": {
        "ecmaFeatures": {
            "jsx": true
        },
        "ecmaVersion": 11,
        "sourceType": "module"
    },
    "plugins": [
        "react"
    ],
    "rules": {
    }
};
ESLint will now analyze open files and shows a warning in index.js about ‘App’ being defined but never used.
You can modify the ESLint rules in the .eslintrc.js file.
Let’s add an error rule for extra semi-colons:
 "rules": {
        "no-extra-semi":"error"
    }
Now when you mistakenly have multiple semicolons on a line, you’ll see an error (red squiggle) in the editor and error entry in the Problems panel.
Popular Starter Kits
In this tutorial, we used the create-react-app generator to create a simple React application. There are lots of great samples and starter kits available to help build your first React application.
VS Code React Sample
This is a sample React application used for a demo at the 2016 //Build conference. The sample creates a simple TODO application and includes the source code for a Node.js Express server. It also shows how to use the Babel ES6 transpiler and then use webpack to bundle the site assets.
MERN
There is helpful VS Code-specific documentation at vscode-recipes which details setting up Node.js server debugging. VS Code also has great MongoDB support through the Azure Databases extension.
TypeScript React
If you’re curious about TypeScript and React, you can also create a TypeScript version of the create-react-app application. See the details at TypeScript-React-Starter on the TypeScript Quick Start site.
Angular
Angular is another popular web framework. If you’d like to see an example of Angular working with VS Code, check out the Chrome Debugging with Angular CLI recipe. It will walk you through creating an Angular application and configuring the launch.json file for the Debugger for Chrome extension.
Common questions
Can I get IntelliSense within declarative JSX?
Yes. For example, if you open the create-react-app project’s App.js file, you can see IntelliSense within the React JSX in the render() method.
