
https://linuxconfig.org/how-to-setup-sftp-server-on-ubuntu-20-04-focal-fossa-linux
How to setup SFTP server on Ubuntu 20.04 Focal Fossa Linux
18 April 2020 by Korbin Brown
In this guide, we will show you how to setup an SFTP server using VSFTPD on Ubuntu 20.04 Focal Fossa. If you haven’t already, check out our tutorial on How to setup FTP server on Ubuntu 20.04 Focal Fossa with VSFTPD, as this article on SFTP assumes that you’ve applied the configuration covered in the FTP guide.
FTP is a great protocol for accessing and transferring files, but it has the shortcoming of being a clear text protocol. In other words, it’s not secure to use over an internet connection, since your credentials and data are transmitted without encryption. The ‘S’ in SFTP stands for ‘Secure’ and tunnels the FTP protocol through SSH, providing the encryption needed to establish a secure connection.
In this tutorial you will learn:
- How to install and configure SSH daemon
- How to setup an SFTP user account and group
- How to connect to SFTP server via command line
- How to connect to SFTP server via command line
How to setup SFTP server on Ubuntu 20.04 Focal Fossa Linux
| Category | Requirements, Conventions or Software Version Used |
|---|---|
| System | Installed or upgraded Ubuntu 20.04 Focal Fossa |
| Software | VSFTPD, SSH daemon |
| Other | Have VSFTPD installed and configured as covered in How to setup FTP server on Ubuntu 20.04 Bionic Beaver with VSFTPDPrivileged access to your Linux system as root or via the sudo command. |
| Conventions | # – requires given linux commands to be executed with root privileges either directly as a root user or by use of sudo command $ – requires given linux commands to be executed as a regular non-privileged user |
Configure SSH daemon
SFTP requires SSH, so if SSH server is not already installed on your system, install it with the following command:
$ sudo apt install sshOnce SSH is installed, we need to make some changes to the SSHD configuration file. Use nano or your favorite text editor to open it:
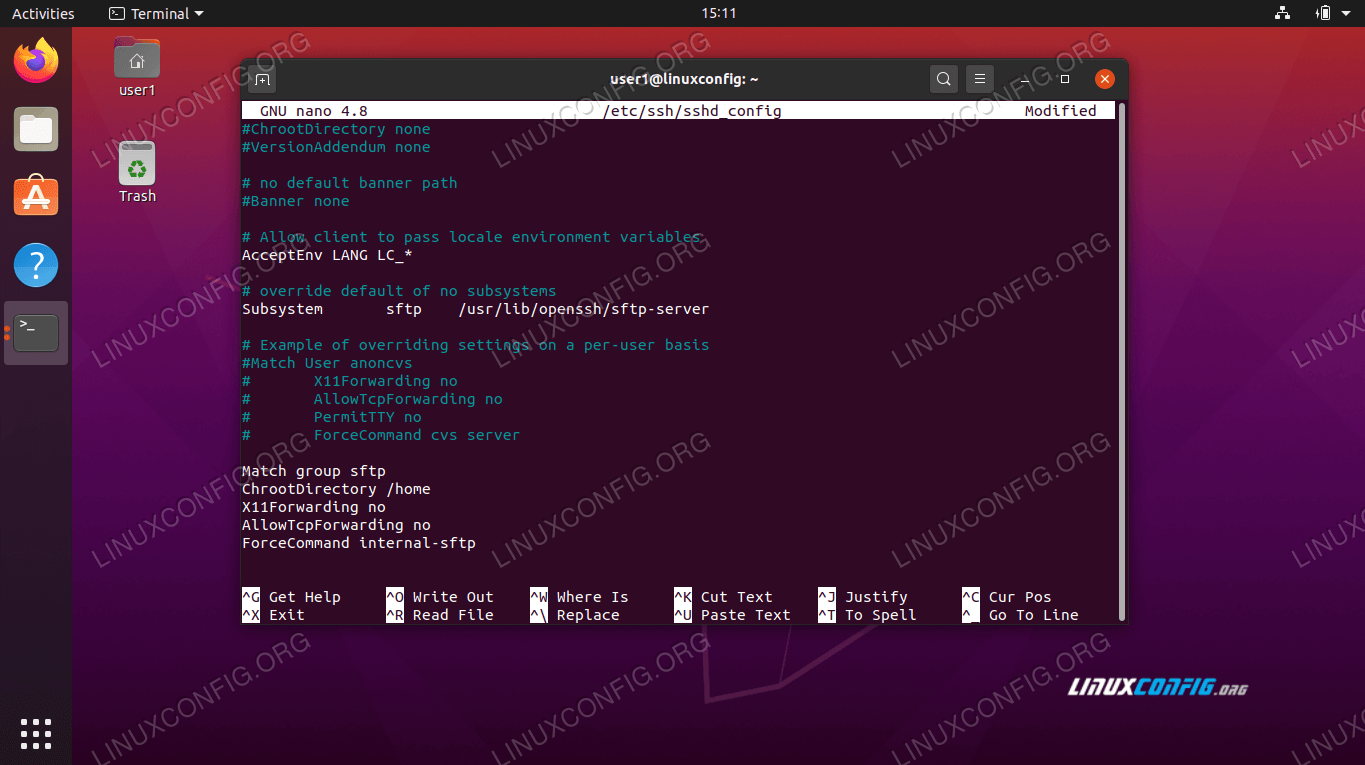
$ sudo nano /etc/ssh/sshd_configScroll to the bottom of the file and add the following 5 lines at the very end:
Match group sftp
ChrootDirectory /home
X11Forwarding no
AllowTcpForwarding no
ForceCommand internal-sftp

SSH configuration file
The lines above will allow users in the
sftpgroup to access their home directories via SFTP, but denies them normal SSH access, so they can never access a shell. After pasting those lines, save and close the configuration file.Restart the SSH service for these new changes to take effect:
$ sudo systemctl restart ssh
Create SFTP user account
Now we need to create user accounts for anyone that we wish to grant SFTP access to.
Create a new user group called
sftp. All of our SFTP users will need to belong to this group.
$ sudo addgroup sftp
Adding group `sftp' (GID 1002) ...
Done.
Next, create a new user. We’ll simply call ours
sftpuserin this example. Also be sure to add this user to the
sftpgroup.
$ sudo useradd -m sftpuser -g sftpSet a password for the newly created
sftpuser:
$ sudo passwd sftpuser
New password:
Retype new password:
passwd: password updated successfully
Lastly, let’s grant full access to the user on their own home directory, but deny access to the directory for all other users on the system:
$ sudo chmod 700 /home/sftpuser/
Our SFTP configuration is complete; now we can login to make sure everything is working properly.
Login to SFTP using command line
You can login via SFTP with either the hostname or IP address of your system. To test from the same system as the one you just configured SFTP on, connecting to the loopback address 127.0.0.1 will work just fine.
Open a
terminal
and login using the
sftpcommand:
$ sftp sftpuser@127.0.0.1
The authenticity of host '127.0.0.1 (127.0.0.1)' can't be established.
ECDSA key fingerprint is SHA256:9HZflwSB64J+SELGLczOuv3f06gT/3ZaZAOezVZn2XQ.
Are you sure you want to continue connecting (yes/no/[fingerprint])? yes
Warning: Permanently added '127.0.0.1' (ECDSA) to the list of known hosts.
sftpuser@127.0.0.1's password:
Connected to 127.0.0.1.
sftp>
Navigate to the user’s home directory, since that’s the only place it has permissions. In here, try making a new directory to confirm that everything is working as intended:
sftp> cd sftpuser
sftp> mkdir sftp-test
sftp> ls
sftp-test
sftp>
Login to SFTP using GUI
If you prefer to use a GUI application to connect to your SFTP server, there are lots of options available. You can use your preferred SFTP client or the one built into Ubuntu by default – the Nautilus file manager.
Open Nautilus file manager from within the Applications menu.
Click on “Other Locations” and enter
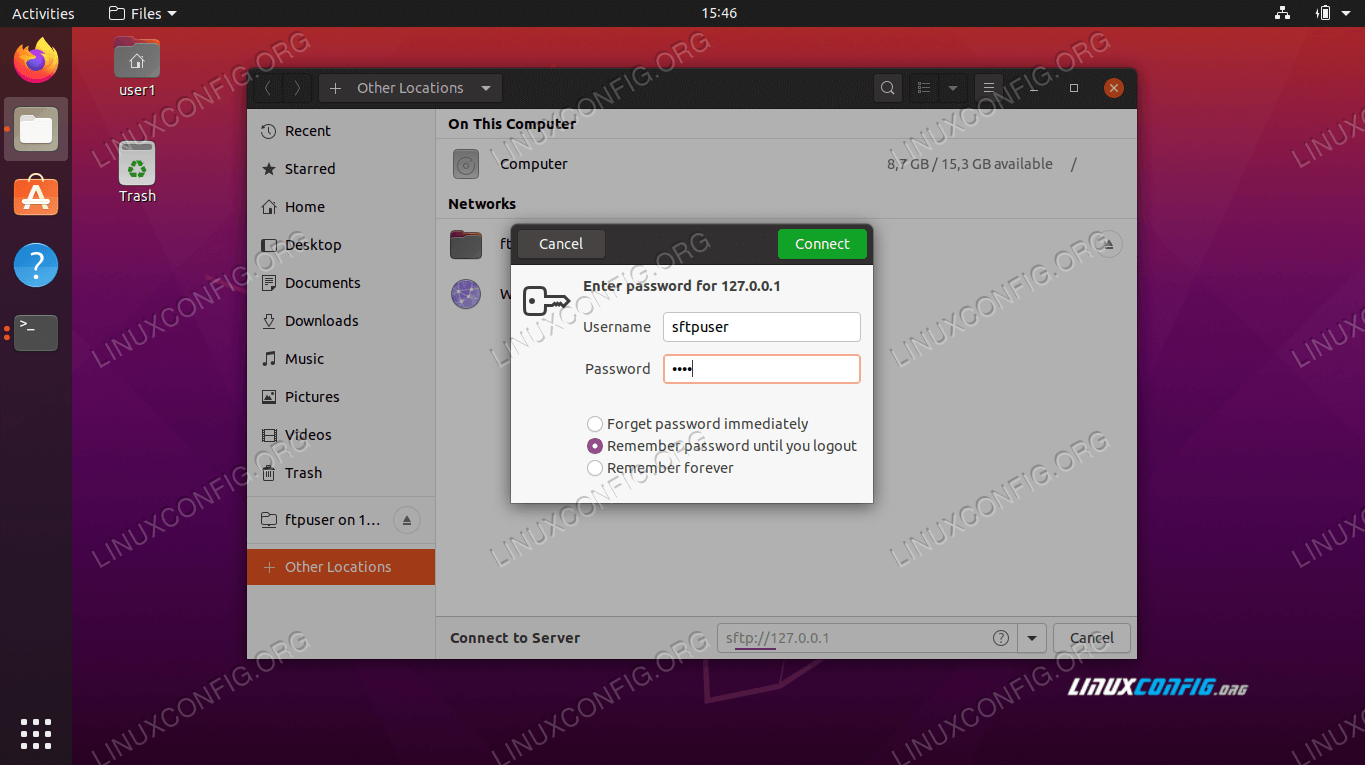
sftp://127.0.0.1in the “Connect to server” box at the bottom of the window and click connect.Enter the SFTP account’s credentials that we setup earlier and click connect.
Upon a successful connection, you’ll be able to open your home directory and see the test directory you created earlier.
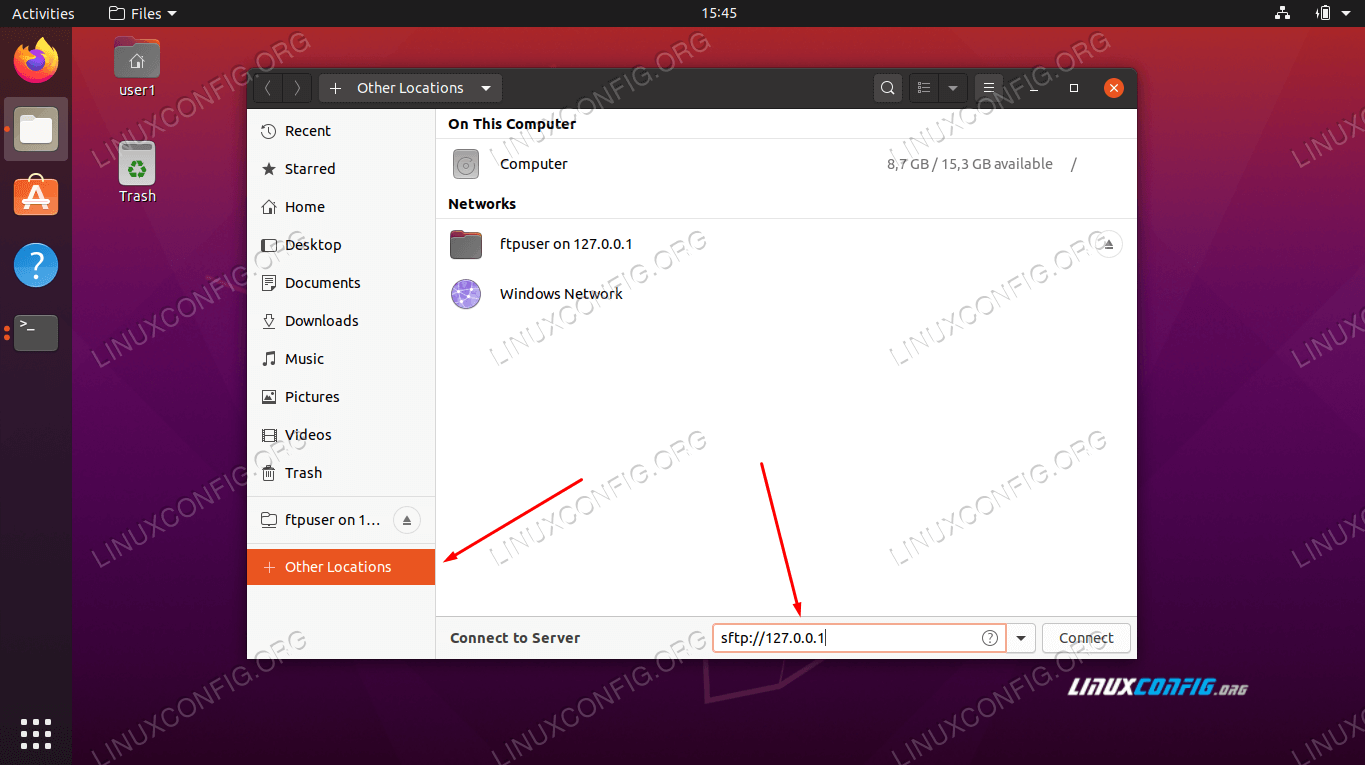
Connect to SFTP server with Nautilus
Enter SFTP account credentials to connect
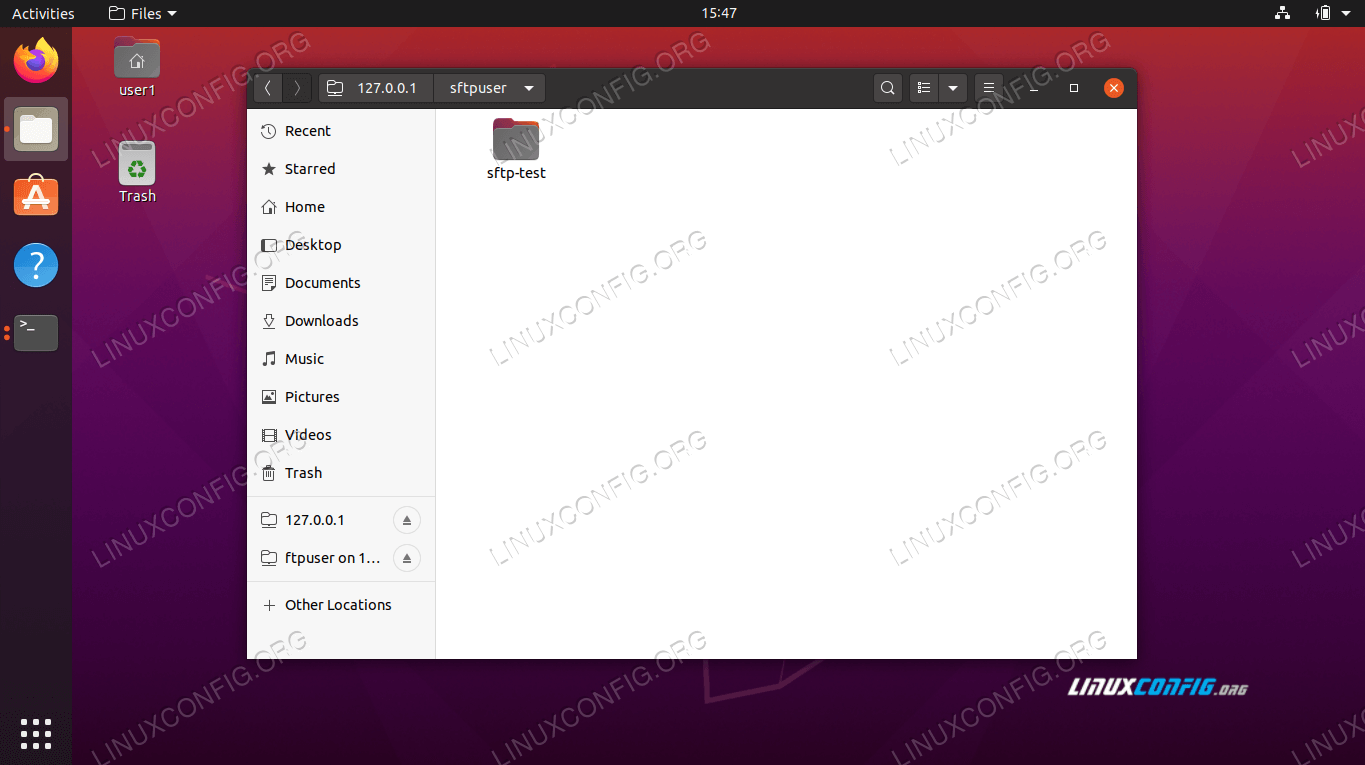
Successful connection to SFTP server
Conclusion
In the FTP Server article, we saw how to use VSFTPD to create an FTP server on Ubuntu 20.04 Focal Fossa. We also covered how to use the command line and Ubuntu GUI to connect to the FTP server.
In this article, we saw how to secure the FTP protocol by setting up SFTP on our system. By following the instructions in this guide, computers on your local network or across the internet can securely access your system to store and retrieve files, either via the command line or their preferred SFTP client.
Related Linux Tutorials:
- How to setup FTP/SFTP server and client on AlmaLinux
- How to setup vsftpd on Debian
- How to setup FTP server on Ubuntu 20.04 Focal Fossa Linux
- Things to install on Ubuntu 20.04
- FTP client list and installation on Ubuntu 20.04 Linux…
- How to connect to an FTP server using Python
- Things to do after installing Ubuntu 20.04 Focal Fossa Linux
- How to test Internet connection on Linux
- Install and Configure MySQL Workbench on Ubuntu Linux
- Ubuntu 20.04 Tricks and Things you Might not Know
https://linuxconfig.org/how-to-setup-ftp-server-on-ubuntu-20-04-focal-fossa-linux
How to setup FTP server on Ubuntu 20.04 Focal Fossa Linux
21 April 2020 by Korbin Brown
In this guide, we will show you how to setup an FTP server using VSFTPD on Ubuntu 20.04 Focal Fossa.
VSFTPD is a popular choice for setting up FTP servers, and is the default FTP tool on a few Linux distributions. Follow along with us below to find out how to install the application and get your FTP server up and running.
In this tutorial you will learn:
- How to install and configure VSFTPD
- How to setup an FTP user account
- How to connect to FTP server via command line
- How to connect to FTP server via GUI
How to setup FTP server on Ubuntu 20.04 Focal Fossa Linux
| Category | Requirements, Conventions or Software Version Used |
|---|---|
| System | Installed or upgraded Ubuntu 20.04 Focal Fossa |
| Software | VSFTPD |
| Other | Privileged access to your Linux system as root or via the sudo command. |
| Conventions | # – requires given linux commands to be executed with root privileges either directly as a root user or by use of sudo command $ – requires given linux commands to be executed as a regular non-privileged user |
VSFTPD installation
First, install VSFTPD on your system by typing this command into the
terminal
:
$ sudo apt-get install vsftpd
Configure FSFTPD server
It’s always best practice to keep a backup copy of the original config file, just in case something goes wrong later. Let’s rename the default config file:
$ sudo mv /etc/vsftpd.conf /etc/vsftpd.conf_origCreate a new VSFTPD configuration file using nano or whichever text editor you prefer:
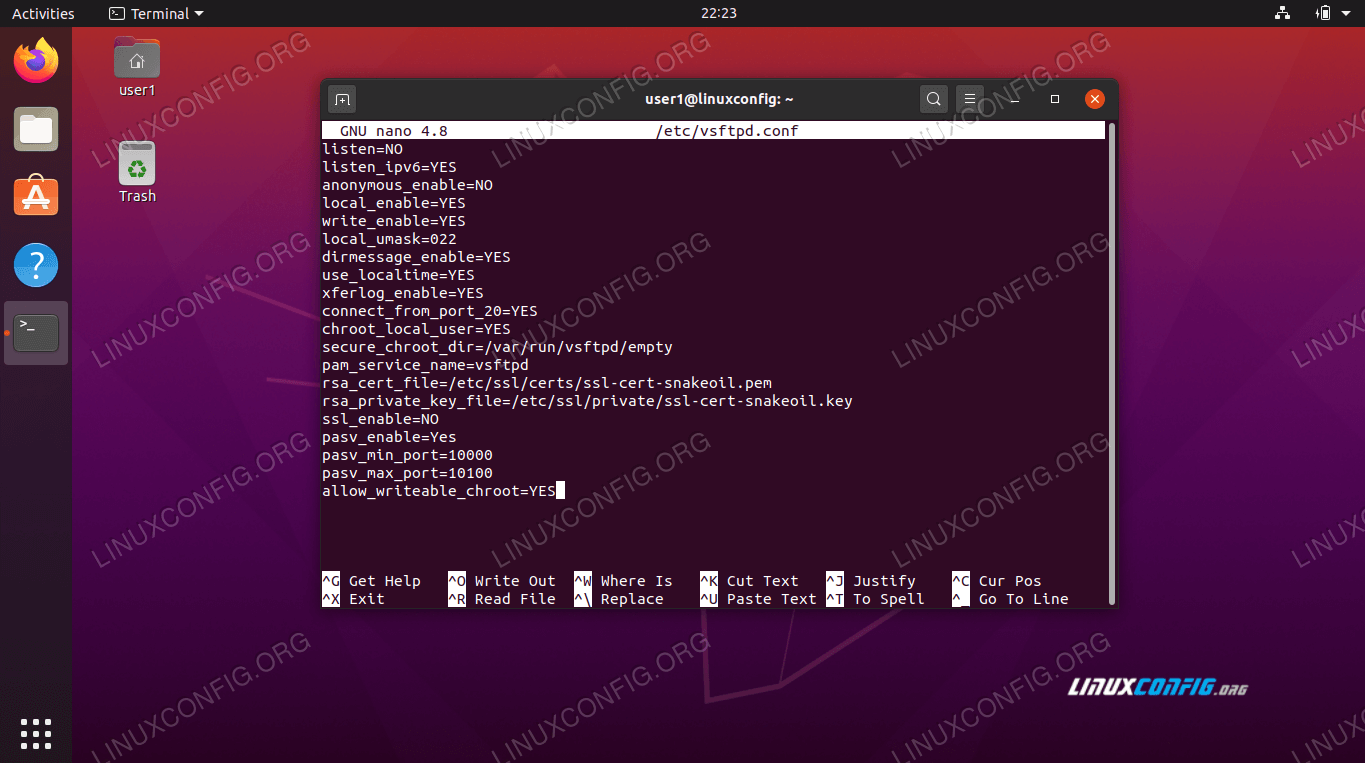
$ sudo nano /etc/vsftpd.confCopy the following base configuration into your file. This configuration will suffice for a basic FTP server, and can later be tweaked for the specific needs of your environment once you’ve verified this is working properly:
listen=NO
listen_ipv6=YES
anonymous_enable=NO
local_enable=YES
write_enable=YES
local_umask=022
dirmessage_enable=YES
use_localtime=YES
xferlog_enable=YES
connect_from_port_20=YES
chroot_local_user=YES
secure_chroot_dir=/var/run/vsftpd/empty
pam_service_name=vsftpd
rsa_cert_file=/etc/ssl/certs/ssl-cert-snakeoil.pem
rsa_private_key_file=/etc/ssl/private/ssl-cert-snakeoil.key
ssl_enable=NO
pasv_enable=Yes
pasv_min_port=10000
pasv_max_port=10100
allow_writeable_chroot=YES
Paste the above lines into your newly created
/etc/vsftpd.conffile, and then save changes and close the file.
VSFTPD configuration file
Ubuntu’s built-in firewall will block FTP traffic by default, but the following command will create an exception in UFW to allow the traffic:
sudo ufw allow from any to any port 20,21,10000:10100 proto tcpWith the configuration file saved and the firewall rules updated, restart VSFTPD to apply the new changes:
$ sudo systemctl restart vsftpd
Create an FTP user
Our FTP server is ready to receive incoming connections, so now it’s time to create a new user account that we’ll use to connect to the FTP service.
Use this first command to create a new account called
ftpuser, and the second command to set a password for the account:
$ sudo useradd -m ftpuser
$ sudo passwd ftpuser
New password:
Retype new password:
passwd: password updated successfully
In order to verify that everything’s working properly, you should store at least one file in
ftpuser‘s home directory. This file should be visible when we login to FTP in the next steps.
$ sudo bash -c "echo FTP TESTING > /home/ftpuser/FTP-TEST"
NOTE FTP is not an encrypted protocol, and should only be used for accessing and transferring files on your local network. If you plan to accept connections from over the internet, it’s recommended that you configure an SFTP server for additional security.
Connect to FTP server via CLI
You should now be able to connect to your FTP server either by IP address or hostname. To connect from
command line
and verify that everything is working,
open a terminal
and use Ubuntu’s
ftpcommand to connect to your loopback address (127.0.0.1).
$ ftp 127.0.0.1
Connected to 127.0.0.1.
220 (vsFTPd 3.0.3)
Name (127.0.0.1:user1): ftpuser
331 Please specify the password.
Password:
230 Login successful.
Remote system type is UNIX.
Using binary mode to transfer files.
ftp> ls
200 PORT command successful. Consider using PASV.
150 Here comes the directory listing.
-rw-r--r--    1 0        0              12 Mar 04 22:41 FTP-TEST
226 Directory send OK.
ftp>
Your output should look like the text above, indicating a successful login and a
lscommand that reveals our test file we created earlier.
Connect to FTP server via GUI
You can also connect to your FTP server by GUI, if you prefer. There are many options for FTP clients, but the Nautilus file manager is a viable option that’s installed by default in Ubuntu. Here’s how to use it to connect to your FTP server:
Open Nautilus file manager from within the Applications menu.
Click on “Other Locations” and enter
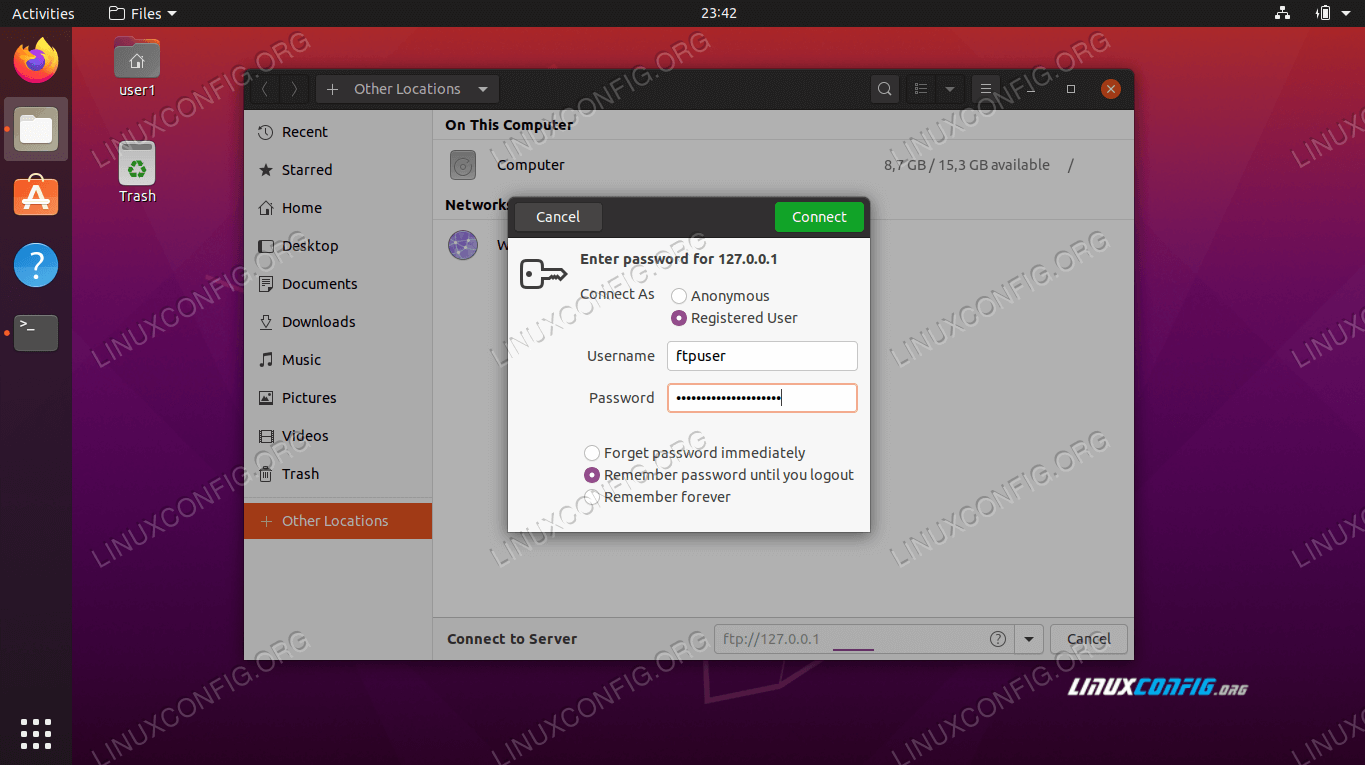
ftp://127.0.0.1in the “Connect to server” box at the bottom of the window and click connect.Enter the FTP account’s credentials that we setup earlier and click connect.
Upon a successful connection, you’ll see the test file you created earlier.
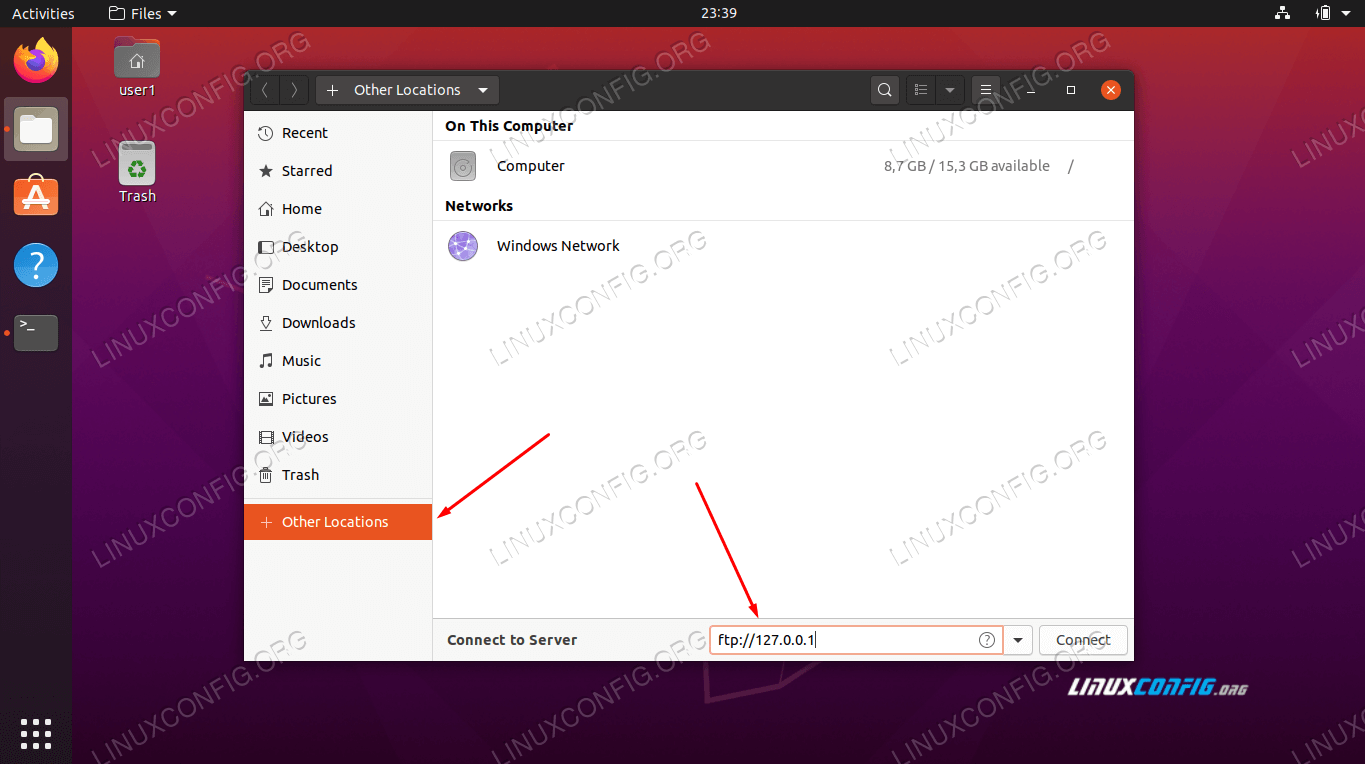
Connect to FTP server with Nautilus
Enter FTP credentials
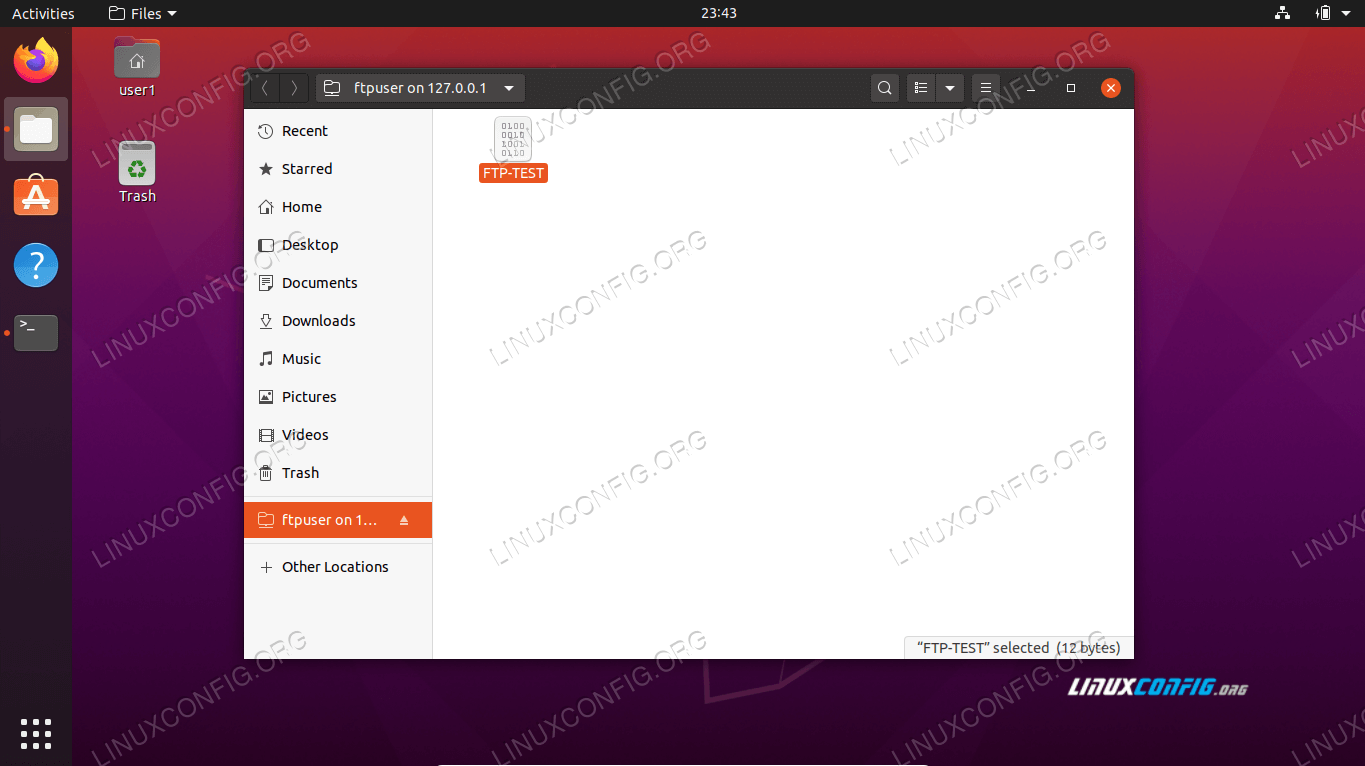
Successful connection to FTP server
Conclusion
In this article, we saw how to use VSFTPD to create an FTP server on Ubuntu 20.04 Focal Fossa. We also covered how to use the command line and Ubuntu GUI to connect to the FTP server.
By following this guide, computers on your local network can access your system to store and retrieve files, either via the command line or their preferred FTP client.
Related Linux Tutorials:
- Things to install on Ubuntu 20.04
- How to setup FTP/SFTP server and client on AlmaLinux
- Things to do after installing Ubuntu 20.04 Focal Fossa Linux
- How to setup vsftpd on Debian
- Ubuntu 20.04 Tricks and Things you Might not Know
- FTP client list and installation on Ubuntu 20.04 Linux…
- Ubuntu 20.04 Guide
- How to setup SFTP server on Ubuntu 20.04 Focal Fossa Linux
- How to use ncurses widgets in shell scripts on Linux
- How to connect Android smartphone to KDE connect on Ubuntu…