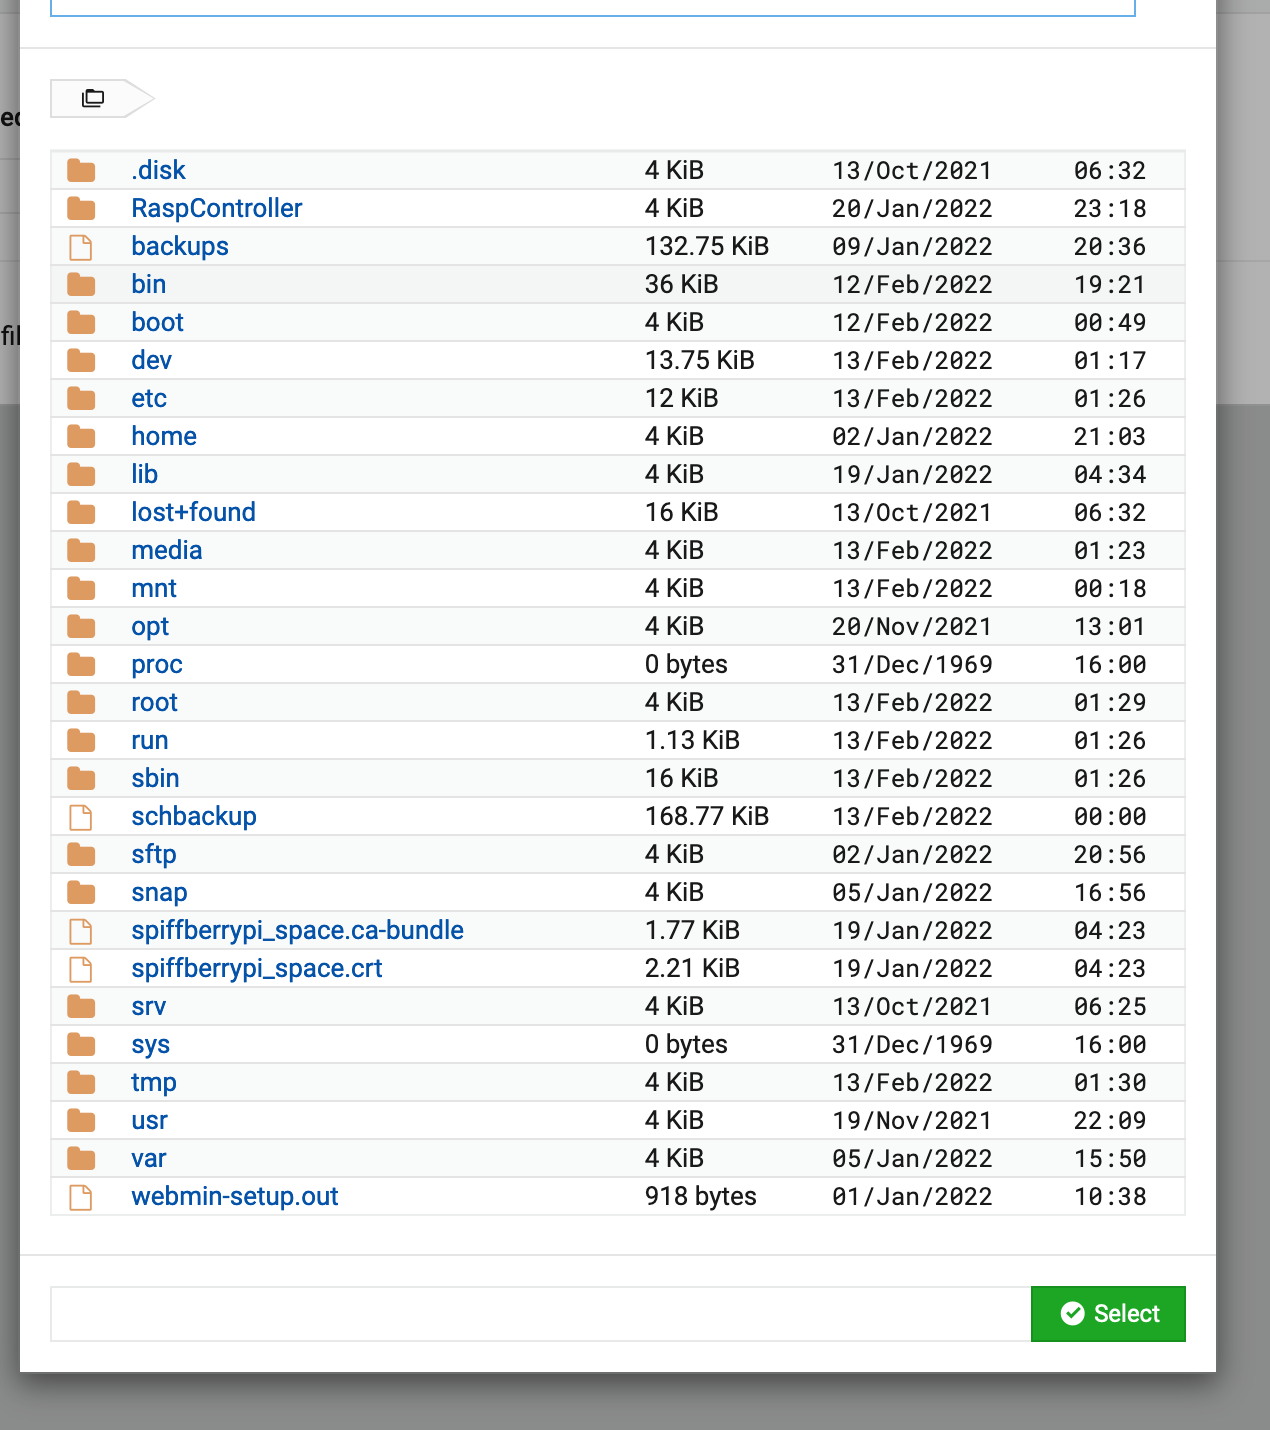
but – I did manage to make a backup using webmin – makes me feel like a cheater – but at least I have backups til I figure out the rest.
Ubuntu Backups
Introduction
This article is dedicated to documenting methods of performing drive imaging (also called bare metal backups, or disk cloning). Drive imaging is a complete copy of all information on a drive, necessary to restore all of the data or entire operating system on a drive to the same state it was when the image was created. This is different from imaging a partition, where one is making a copy of an individual partition that resides on a drive, or backing up individual files and folders.
 Please ensure you are comfortable with the information discussed before proceeding. Improperly executing a command may result in partial or complete data loss. Please double- or even triple-check your target device to avoid such catastrophic loss.
Preparations
Here are the requirements for drive imaging using Ubuntu:
- Exclusive access to the drive being imaged (i.e. the drive being imaged shouldn't be mounted). Live operating system imaging methods, for example, physical-to-virtual (P2V), virtual-to-virtual (V2V), etc. are not covered here.
- The location (remote file share, external USB drive, internal drive, etc.) where the drive image is being backed up to should have the same or more free space then that of the drive being imaging. For example, if you are imaging a 160GB drive, you should have 160GB or more free space to back up to.
- The filesystem of the backup location needs to support the filesize necessary to backup the image as one file.
- An environment to perform the drive imaging. This can be a live environment where one images the data of the computers internal drive.
dd
dd is a universal command line program used for low level copying of data. It will copy the entire drive, even if the used data is only consuming 10% of the beginning of the drive. For example, dd'ing a 100GB drive, where all the data is at the beginning, and is only 10GB is being consumed, the resulting file will be 100GB in size.
In order to find out which drive to clone, open a terminal and execute:
sudo fdisk -l
The output of the command will list each hard drive (ex. /dev/sda).
Backup with dd
The following example will create a drive image of /dev/sda, the image will be backed up to an external drive, and compressed. For example, one may use bzip2 for maximum compression:
sudo dd if=/dev/sda | bzip2 > /media/usb/image.bz2
However, one may use this same concept to change the compression type (gzip, zip, etc.) to one that best suites your needs (higher compression speed, preferred compression format, etc.).
Restoring a drive image
To restore a drive image, one will want to boot into a live environment. Restoration is quite simple, and really just involves reversing the if and of values. This will tell dd to overwrite the drive with the data that is stored in the file. Ensure the image file isn't stored on the drive you're restoring to. If you do this, eventually during the operation dd will overwrite the image file, corrupting it and your drive.
To restore the drive above:
bzcat /media/usb/image.bz2 | dd of=/dev/sda
When restoring the whole drive, the system will not automatically create the devices (/dev/sda1, /dev/sda2, etc.). Reboot to ensure automatic detection.
If you restored Ubuntu to a new drive, and the UUIDs (see UsingUUID for more) changed, then you must change the bootloader and the mount points. One will want to edit the following via a terminal:
sudo nano /boot/grub/menu.lst
sudo nano /etc/fstab
To know what the new UUIDs for your drives are, use the following command:
sudo blkid
From this list, you can cross-reference the information with that of fdisk to know which drive is which. Then simply update the UUIDs in both GRUB and fstab files.
Clone Drive
Clone the contents of a whole hard drive onto another completely different drive
dd if=/dev/sda of=/dev/sdb
Clonezilla
https://launchpad.net/ubuntu/+source/clonezilla is another modern imaging solution. For more on it, please see the Clonezilla homepage.
CategoryBackupRecovery CategoryCommandLine
Create Disk Image & Clone Hard Disk Partition With Ubuntu Live USB
- by Usman Javaid
- Dec 17, 2011
- 8 Comments
Earlier, we showed you how to create persistent Ubuntu Live media disk, and use it for resetting and changing Windows 7 administrator and standard user account password. Apart from tweaking with Windows registry hives, Ubuntu Live media disk can be used to create data backup, shrink partitions, clone hard disk, scan system for viruses, imaging disk partitions and more. Although disk imaging or hard disk cloning can be done using data backup and disk copying applications, malware-infected OS often make it hard to perform essential data backup operations. For instance, if a PC is infected with boot sector virus, disk cloning application doesn’t work unless you clean the system from virus and repair boot sector.
Ubuntu Live media disk lets you clone disks and create disk images, so that you can easily restore the data after performing low-level cleaning of the system. In this post, we will look at 2 simple ways for cloning and imaging disks using Ubuntu Live USB.
The first step is to change the system boot priority from BIOS menu. On system startup, press F2, F10, ESC, DEL, or other system defined key for accessing BIOS menu. Now, open Boot menu to set USB Hard disk/Removable Drive as first boost option. Once done, save the changes, plug-in Ubuntu Live USB, and the reboot the system. Once rebooted, it will take you to Ubuntu Live boot menu, select Run Ubuntu from this USB option to load Ubuntu OS.
Create Image of local disk partition to external hard drive
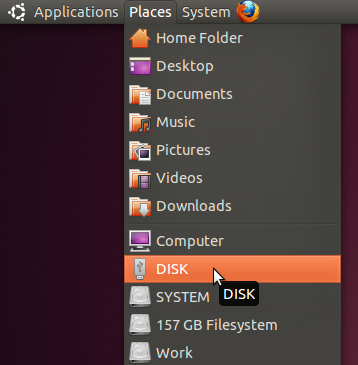
Once Ubuntu 10.10 is loaded, plug-in the external hard disk on which you want to create your primary hard disk image, and then mount the external hard disk from Places menu.
We will use Ubuntu dd command to create disk image. The command is widely used to perform low-level data copying and disk cloning operations. Using if (input file) and of (output file) operands, we can use dd to create an exact copy of specified disk in IMG format. To begin, click Applications and open Terminal from Accessories menu.
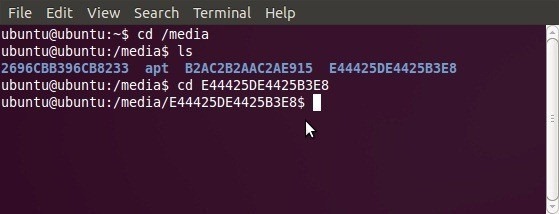
Now navigate to media disk using cd /media command. Open the external hard disk using the cd
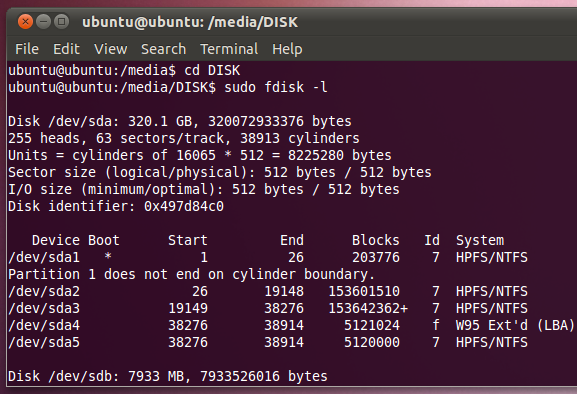
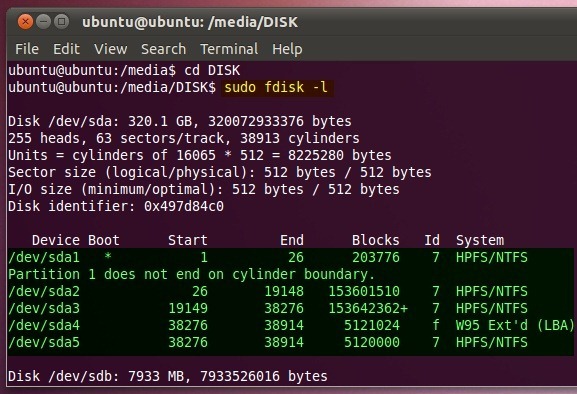
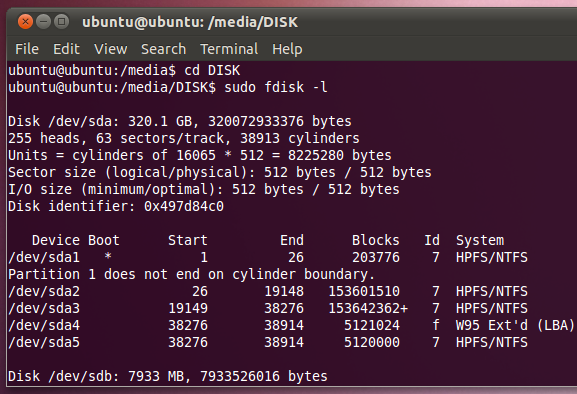
Since we need to create disk image to external drive, we will use sudo fdisk –l command to list down all the partitions of primary hard disk. This will help us identify the partition whose image is to be created on external hard disk. Once listed, note down the partition identifier under Device column, as it will be used to specify the hard disk partition with dd command to create a disk image.
The syntax for creating disk image is as follows:
sudo dd if=
of=./
If you for instance want to create a disk image for /dev/sda5. Enter;
sudo dd if=/dev/sda5 of=./BackupDisk.img
The time it takes to create a disk image depends upon the size of specified disk partition.
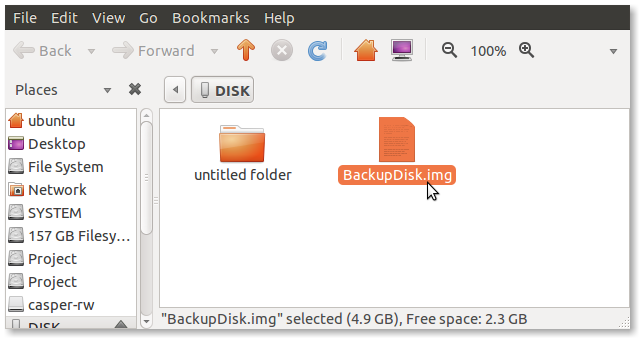
Once the image is created, open external hard drive location in Nautilus (Ubuntu File Explorer) to verify the disk image size. Similarly, you can create disk images for other partitions of primary hard disk in external storage medium.
The dd command also lets you restore or extract the IMG file to specified location. The syntax of extracting IMG file is as follows.
sudo dd if=.
of=
You can specify the local disk where data is to be extracted or specify the folder hierarchy where you want to copy the data from IMG file.
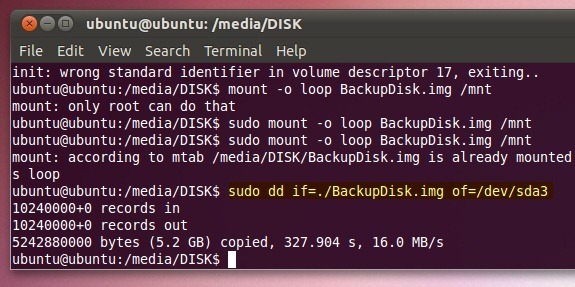
sudo dd if=./BackupDisk.img of=/dev/sda3
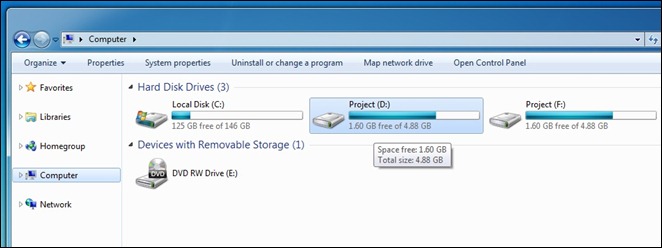
It must be noted that when you restore data from IMG file using dd command, it will wipe all the free space of target drive. The screenshot below shows the cloned D drive. To reclaim the free space, copy the data from cloned drive to other disk and then format the cloned drive using Windows built-in Format utility.
Clone Local Disk Using Ubuntu Live USB
The process of cloning disk is similar to creating disk image. All you need is to mount the primary hard disk and navigate to it in Terminal using cd
Once mounted, use sudo fdisk –l to list down hard disk partitions, so that you can note down the Device identifiers of both disks including disk which is to be cloned and target disk where data is to be copied.
For instance, if you want to create a clone of /dev/sda5 in /dev/sda3. Enter following command
sudo dd if=/dev/sd5 of=/dev/sd3
It will take /dev/sd5 as input file (if operand) and clone disk at specified location (/dev/sd3).
https://www.tomshardware.com/how-to/back-up-raspberry-pi-as-disk-image
How to Back Up Your Raspberry Pi as a Disk Image
By Avram Piltch published August 13, 2020
Turn your Raspberry Pi microSD card into a small .img file you can share or take anywhere.
(Image credit: Tom's Hardware)
When you work hard on a Raspberry Pi project, you’ll want to make a complete disk backup of the entire OS and software, not just your code. Even the best Raspberry Pi microSD cards can fail or get lost and you may also want to re-use the project on another card or share it with others. For example, at Tom’s Hardware, we have a Raspberry Pi web server we use for battery tests and we have multiple Pis that all have the same exact image.
There are a few ways to backup a Raspberry Pi. You can use Raspberry Pi OS’s SD Card Copier app, which is under the Accessories section of the Start menu, to clone your microSD card directly to another microSD card. But unless you need a second card right away, it’s a better idea to create a disk image: a file you can store on a PC or in the cloud, distribute to others and write to a new microSD card at any time, using Etcher or Raspberry Pi Disk Imager.
Some folks recommend taking your microSD card, sticking it in a Windows PC and copying it sector-for-sector with Win32 Disk Imager, but that creates two problems. First, the card you are writing to has to be exactly the same size as the one you backed up or larger. Because there are subtle differences in the number of sectors on different makes and models of card, a 32GB San Disk card may have a few more sectors than a 32GB Samsung card and, if the destination card is smaller, the copy process won’t work properly and the card won’t boot. Second, your backup file will be huge: the full size of your card, even if you only were using 3 out of 32GB.
Fortunately, there’s a way to create a compressed disk image that’s even smaller than the amount of used space on the source microSD card you’re backing up. To create the disk image, you’ll need an external USB drive to connect to your Raspberry Pi and write it to. If the USB drive is a higher capacity than the source microSD card (ex: a 32GB USB drive to image a 16GB card), you can back up the whole card before shrinking it. However, if you don’t have a USB drive that’s big enough, check out the section at the bottom of this article on shrinking your rootfs partition.
How to Make a Raspberry Pi Disk Image
\1. Format a USB Flash or hard drive as either NTFS (if you are using Windows on your PC and plan to read this drive on a PC) or EXT4 (for Linux). Make sure the Flash drive is larger than the capacity of the used space. Make sure to give the drive a volume name that you remember (ex: “pibkup” in our case). You can also format the drive directly on the Raspberry Pi if you like.
(Image credit: Tom's Hardware)
\2. Connect the USB drive to your Raspberry Pi.
3. Install pishrink.sh on your Raspberry Pi and copy it to the /usr/local/bin folder by typing:
wget https://raw.githubusercontent.com/Drewsif/PiShrink/master/pishrink.sh
sudo chmod +x pishrink.sh
sudo mv pishrink.sh /usr/local/bin
\4. Check the mount point path of your USB drive by entering
lsblk
(Image credit: Tom's Hardware)
You’ll see a list of drives connected to the Raspberry Pi and the mount point name of each. Your USB drive will probably be mounted at /media/pi/[VOLUME NAME]. In our case, it was /media/pi/pibkup. If your drive isn’t mounted, try rebooting with the USB drive connected or you can mount it manually by typing sudo mkdir /dev/mysub to create a directory and sudo mount /dev/sda1 /dev/myusb to mount it. However, you can’t and shouldn’t do that if it’s already mounted.
5. Copy all your data to an img file by using the dd command.
sudo dd if=/dev/mmcblk0 of=[mount point]/myimg.img bs=1M
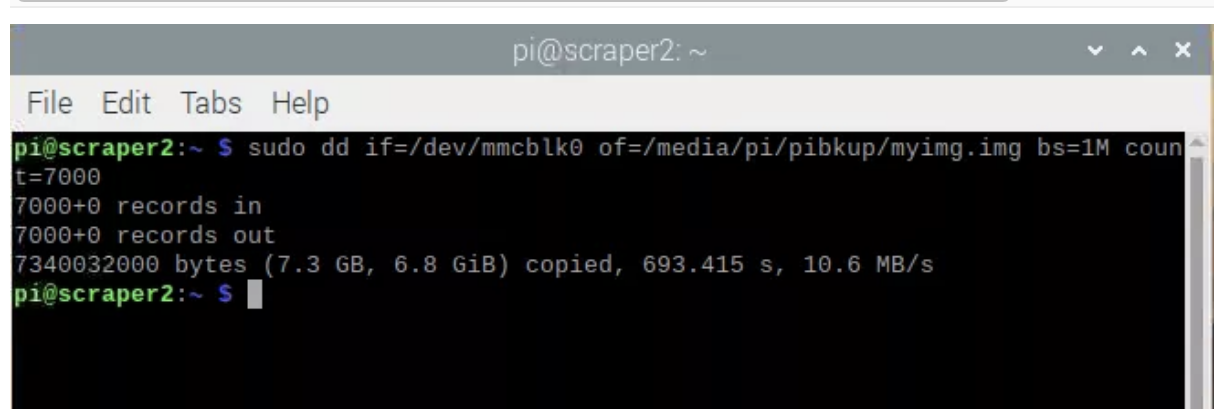
However, if you shrank a partition on the source microSD card, you’ll need to use the count attribute to tell it to copy only as many MBs as are in use. For example, in our case, we had had a 16GB card, but after shrinking the rootfs down to 6.5GB, the card only had about 6.8GB in use (when you count the /boot partition). So, to be on the safe side (better to copy too much data than too little), we rounded up and set dd to copy 7GB of data by using count=7000. The amount of data is equal to count * block size (bs) so 7000 * 1M means 7GB.
sudo dd if=/dev/mmcblk0 of=[mount point]/myimg.img bs=1M count=7000
(Image credit: Tom's Hardware)
Only do this if you have previously shrunk the partition. If you use count and copy less than the full partition you could have an incomplete image that's missing data or won't boot.
\6. Navigate to the USB drive's root directory.
cd /media/pi/pickup
\7. Use pishrink with the -z parameter, which zips your image up with gzip.
sudo pishrink.sh -z myimg.img
(Image credit: Tom's Hardware)
This process will also take several minutes but, when it is done, you will end up with a reasonably sized image file called myimg.img.gz. You can copy this file to your PC, upload it to the cloud or send it to a friend.
How to Shrink a Partition on Raspberry Pi
If you want to make a disk image of a microSD card, but don’t have an external USB drive of a greater capacity, you have a problem. Even though the eventual .img.gz file you create in the tutorial above should be much smaller than your source card, you still need enough space to accommodate the uncompressed .img file as part of the process.
What’s particularly frustrating is that, by default, the dd file copy process makes an image out of ALL the space on your microSD card, even the unused space.For example, you might have a 64GB microSD card, but only be actually using 6GB of space. If you don’t shrink the rootfs partition, you will end up copying all 64GB over to your external drive, which will take a lot more time to complete and will require that you have at least 65GB of free space.
So the solution is to shrink the rootfs partition of your microSD card down to a size that’s just a little bit bigger than the amount of used space. Then you can copy just your partitions over to the USB drive.
To do the shrinking, you’ll need a USB microSD card reader and a second microSD card with Raspberry Pi OS on it.
\1. Put your source microSD card (the one you want to copy) in a reader and connect to your Raspberry Pi.
\2. Boot your Raspberry Pi off a different microSD card.
\3. Install gparted on your Raspberry Pi.
sudo apt-get install gparted -y
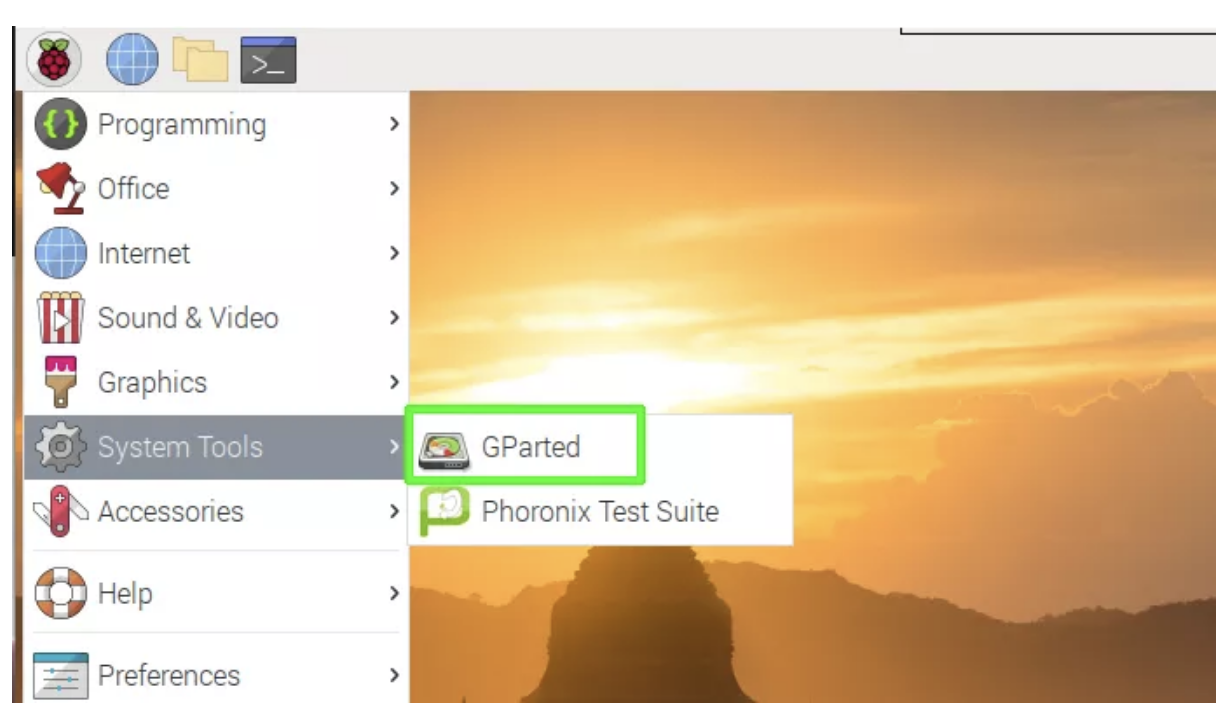
\4. Launch gparted from within the Raspberry Pi OS GUI. It’s in the System Tools section of the start menu.
(Image credit: Tom's Hardware)
\5. Select your external microSD card from the pull down menu in the upper right corner of the gparted window.
(Image credit: Tom's Hardware)
\6. Unmount the rootfs partition if it is mounted (a key icon is next to it) by right clicking it and selecting Unmount from the menu. If the option is grayed out, it’s not mounted.
(Image credit: Tom's Hardware)
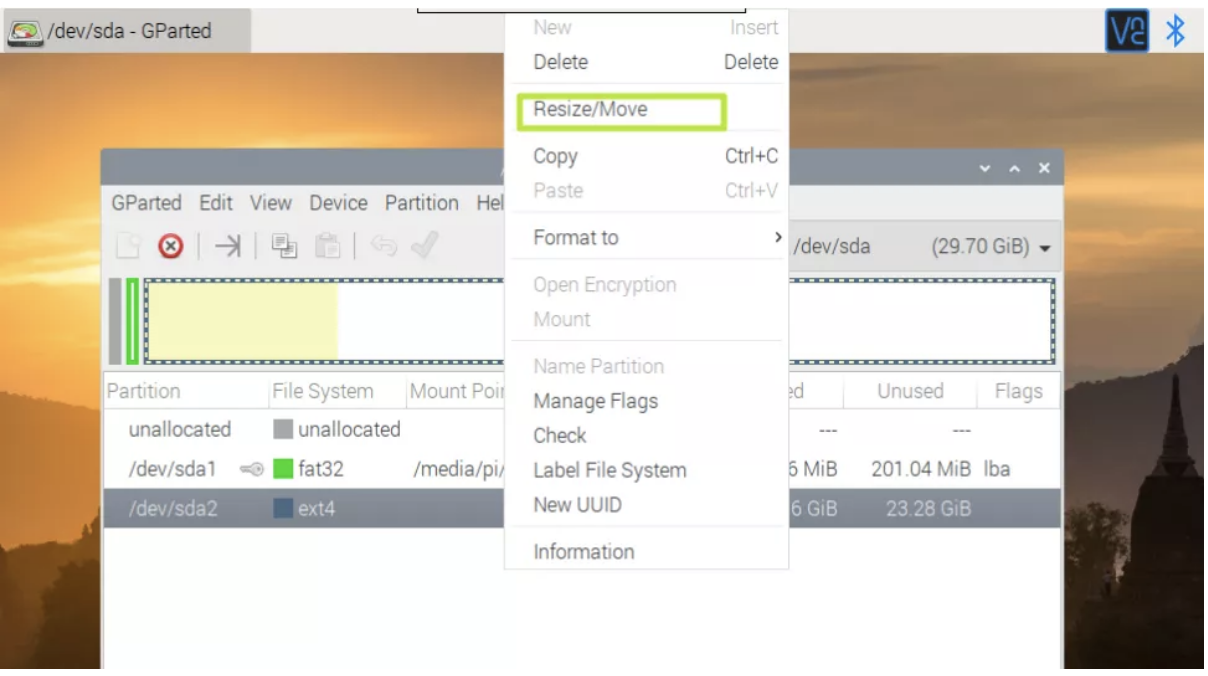
\7. Right click rootfs and select Resize / Move.
(Image credit: Tom's Hardware)
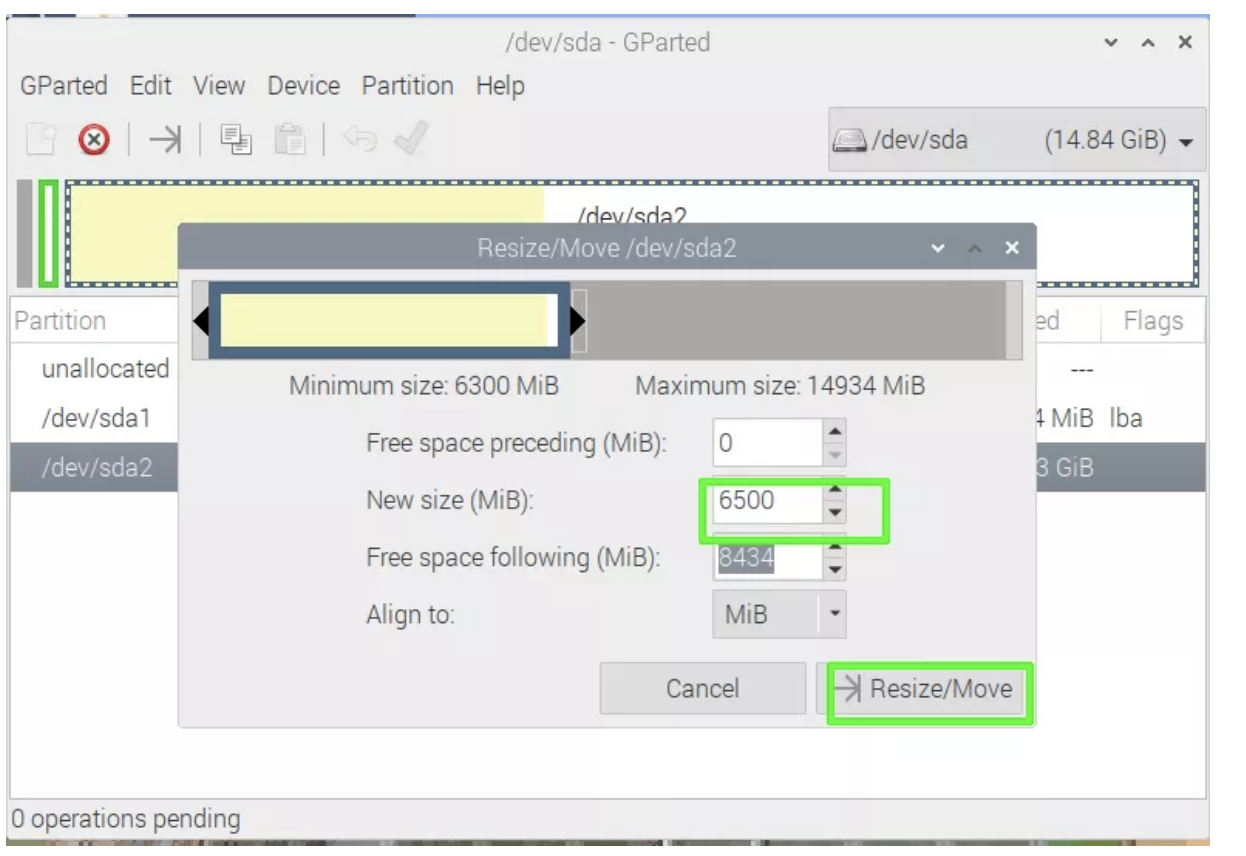
\8. Set the new size for the partition as the minimum size or slightly larger and click Resize.. Note that gparted may overreport the amount of used space (when we unmounted a partition with 4.3GB used, it changed to say 6GB were in use), but you have to go with at least its minimum.
(Image credit: Tom's Hardware)
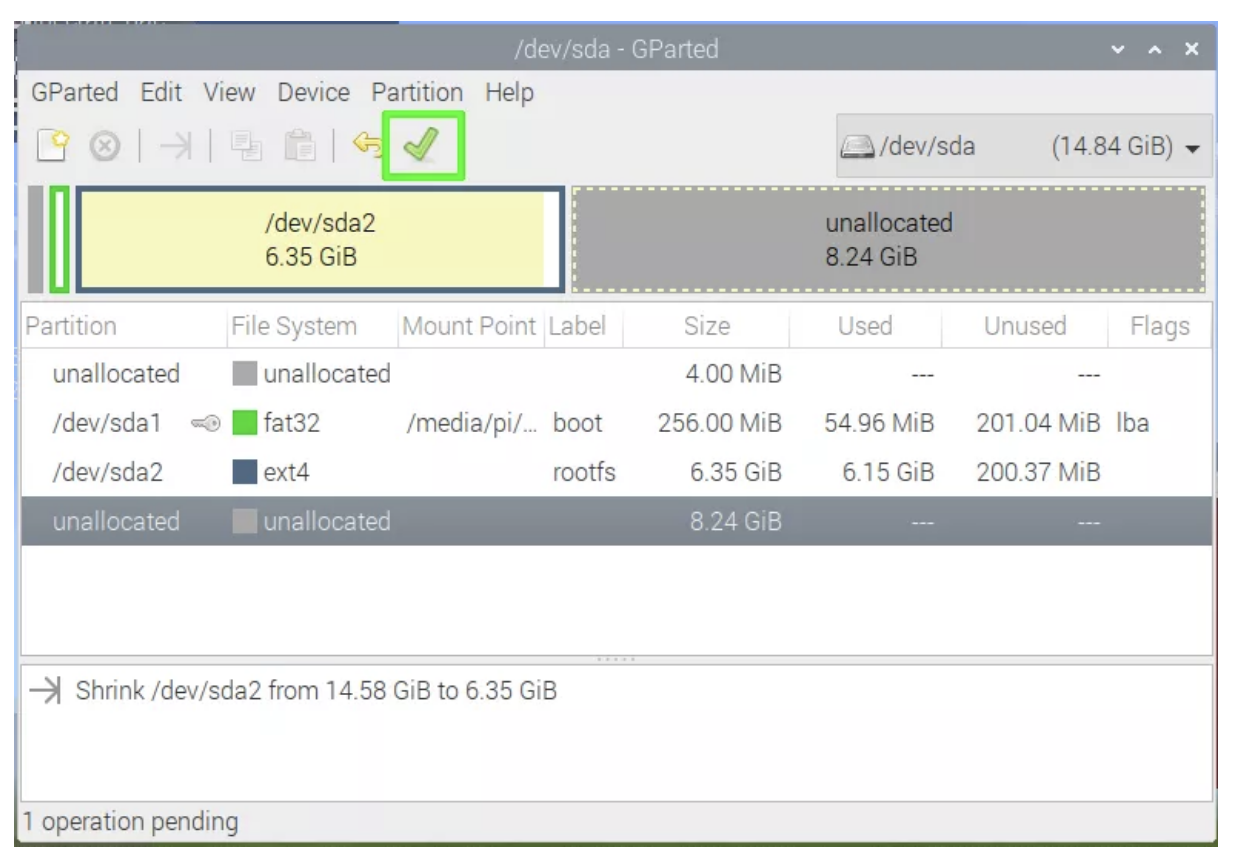
\9. Click the green check mark in the gparted window and click Apply (when warned) to proceed.
(Image credit: Tom's Hardware)
\10. Shutdown the Raspberry Pi.
\11. Remove the source microSD card from the USB card reader and insert it into the Raspberry Pi to boot from.
\12. Follow the instructions in the section above on creating a disk image. Make sure to use the count attribute in step 5.
Writing Your Raspberry Pi Disk Image to a Card
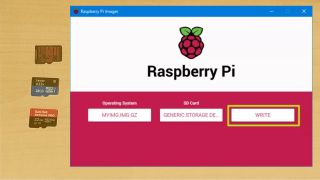
Once you’re done, you’ll have a file with the extension .img.gz and you can write or “burn” it to a microSD card the same way you would any .img file you download from the web. The easiest way to burn a custom image is to:
\1. Launch Raspberry Pi Imager on your PC. You can download Raspberry Pi Imager if you don’t have it already.
(Image credit: Tom's Hardware)
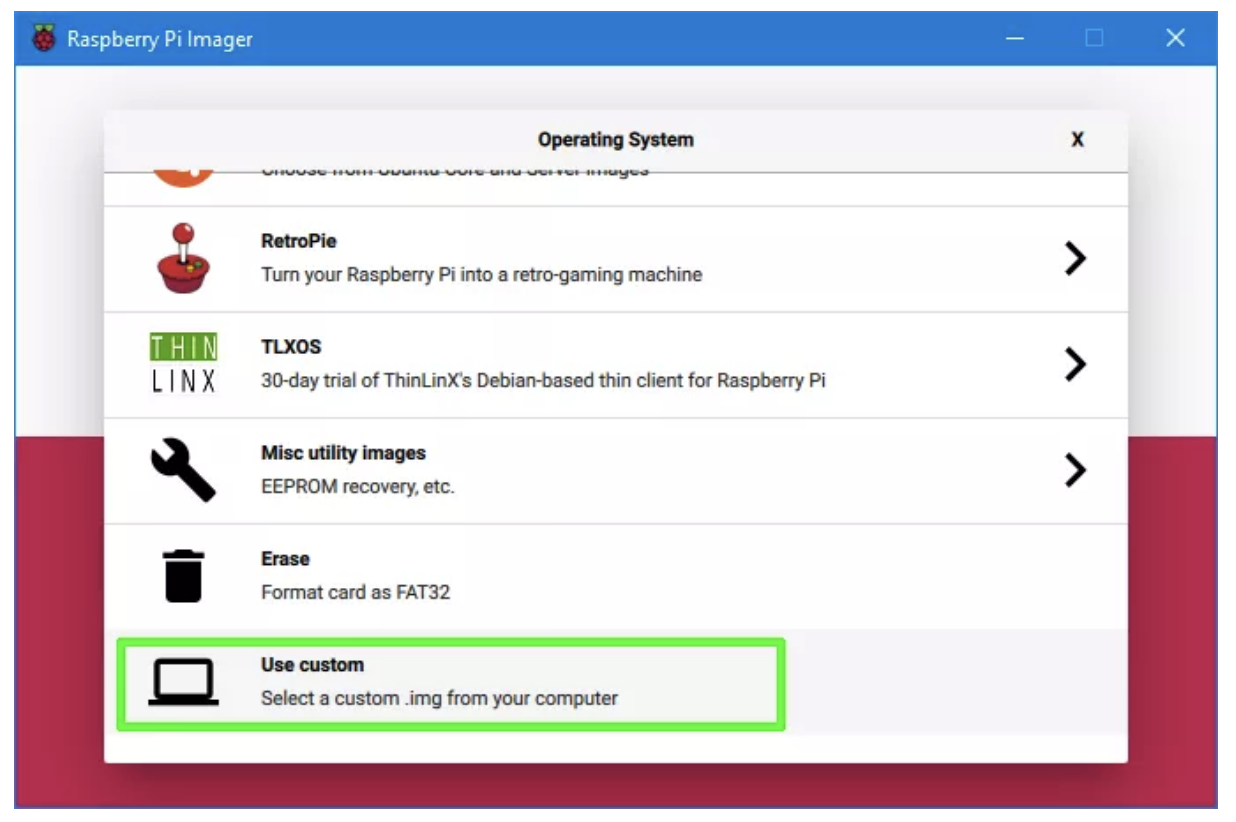
\2. Select Use custom from the Choose OS menu.
(Image credit: Tom's Hardware)
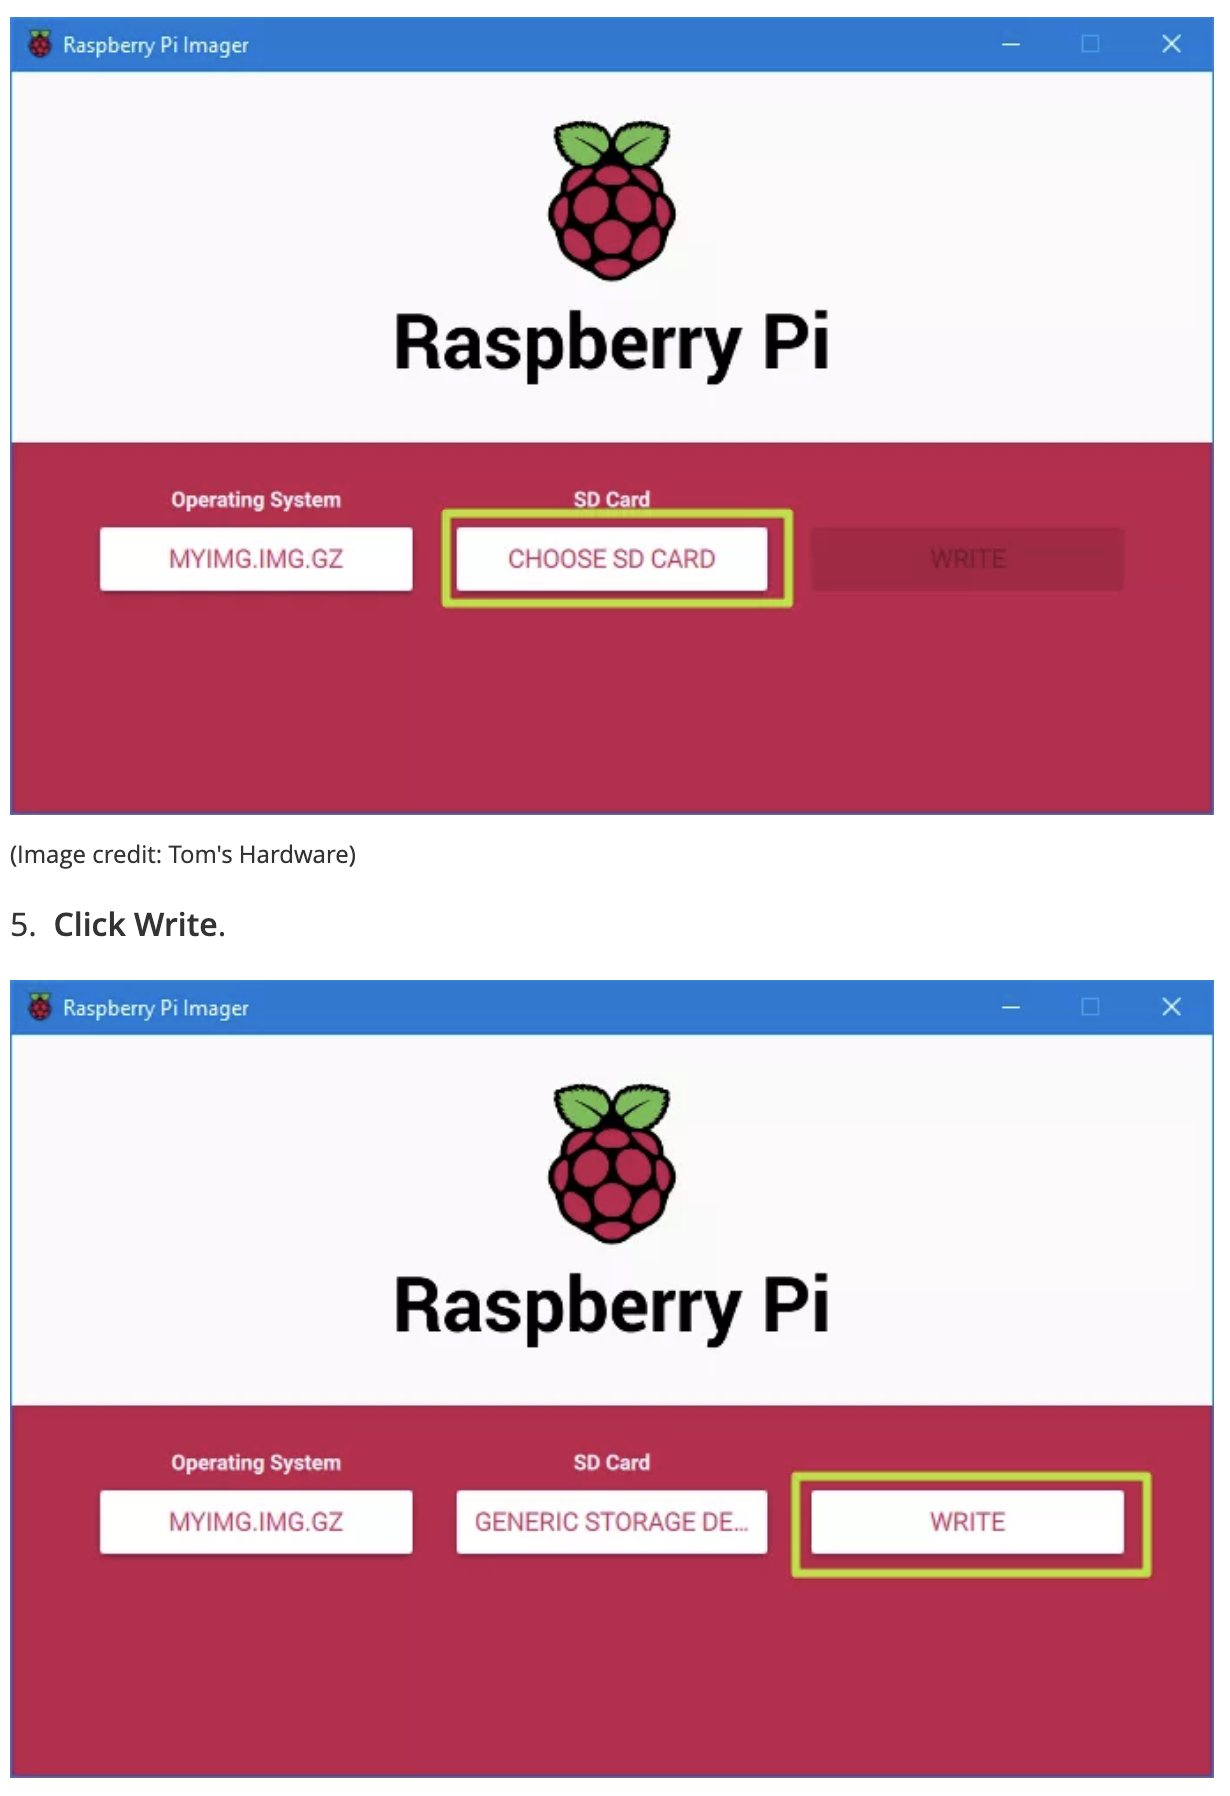
\3. Select your .img.gz file.
\4. Select the microSD card you wish to burn it to.

