
REACT Routing
https://betterprogramming.pub/8-basic-and-advanced-react-router-tips-6993ece8f57a
8 Basic and Advanced React Router Tips
Routes, 404, links, redirects, asynchronous loading, and more

Image by the author.
Many consider React the best overall JavaScript framework for building web applications. One of the basics that you need to master is React routing.
React Router allows your web application to be organized into pages on different URLs, as you are used to with any other pages on the internet. Because React is just one big JavaScript script, all pages are loaded up and displayed immediately when the user clicks a link.
I will cover the basics as well as some advanced tips that include 404 pages, redirects, asynchronous pages, and a site map. I have used these techniques to build all my websites, including 7urtle.
Introduction to React Router
React routes use the package react-router-dom, so start by installing it:
npm i -D react-router-dom
Because I prefer functional programming, I am also using my @7urtle/lambda library from 7urtle to make my code more elegant. You can either rewrite those examples or install the library with:
npm i -D @7urtle/lambda
I will only use the library a couple of times here, so no worries.
Then create Routes.js next to your index.js:
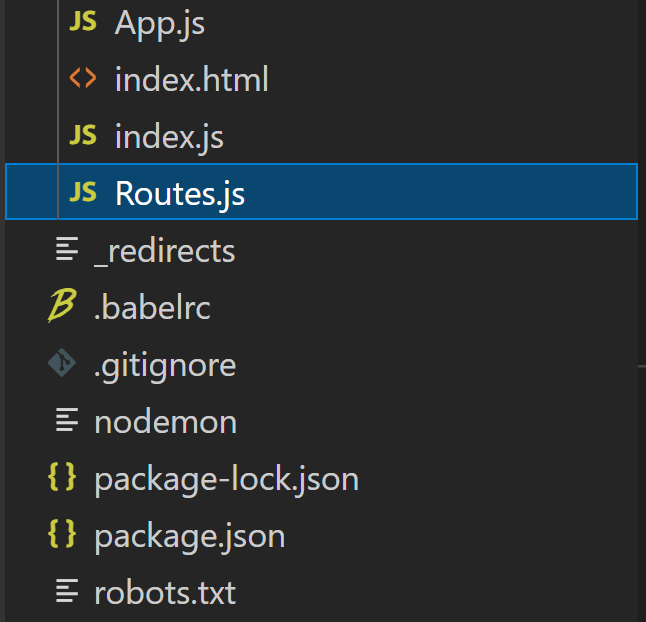
This file will hold your Route configuration. A route with two pages looks like this:
Configuration is done through the children tag under the Switch parent.
The Route tag contains all of your routes:
- The
exactparameter makes sure that only exact matches are used. - The
pathparameter contains the address of your page. - The
componentthen holds the React page itself.
For a 404 page, just define Route without any path that will send all the remaining requests there. The router goes through all the routes sequentially from the top and uses the first match it finds. That means your 404 needs to come after all other routes and redirects.
React Router in App.js
The Router component then has to be used in your App.js like this:
Notice the Router section using the Routes that we have defined in the previous file. This is how routing happens.
Routes will affect only the area of the Routes tag. The header and any other JSX around are not affected. This way, you can define a menu or a header and footer that remain the same independently on the router.
Router basename
“The base URL for all locations. If your app is served from a sub-directory on your server, you’ll want to set this to the sub-directory. A properly formatted basename should have a leading slash, but no trailing slash.” — React Router’s docs
I always use this code with the getBasename function for situations where my React app could be used from some subdirectory. This will elegantly take care of defining the correct basename. You may want to edit it further, however, if you want to rely on some more complicated routing using subdirectory paths.
You may also not need this in your situation at all. Simply delete it and see if things still work.
React Router Pages
You define a page as you would any other component because it is nothing but another component. The only difference is that React Router manages the Route component’s visibility based on the URL. This is an example of a page:
In the same way, you can define any other pages or your 404 page.
The page gets displayed based on the path used in Routes.js and the page component is displayed in place of the Routes component in App.js.
Scrolled Long Pages
One challenge that you will find is that if you scroll a page and reopen it, the user will return to the scrolled position instead of the top. If you want to ensure that pages are always scrolled to the top when they are opened, just create a parent Page component like this:
We simply use React’s useEffect to trigger instant scroll to top.
You can also use this to implement any other behavior that should happen on every page or to add any tags to decorate the page (like the main tag in this example).
Then just use this Page in all the pages where you want it by adding the tag as a parent, like in this example of a 404 page:
React Router Links to Pages
Linking to pages from your components is simple using the Link component. We can add a link back to a home page from the 404 page:
The Link tag is super simple and requires only the to parameter that needs to match your route from Routes.js.
React Router Redirect Routes
You may want to define some standard redirects in your application that, for example, always redirect the root path / to your login page /login. You can do that by adding a Redirect component to your Routes.js.
In the Redirect tag, both the parameters from and to are paths. Make sure that your redirects are defined higher than your 404 route.
React Router Redirect From Code
You may also wish to redirect to a page programmatically from your code. You do that by using useHistory in your component.
In this example, we use useEffect to watch for changes in the state of authentication, and if the user is authenticated, the page triggers a redirect to /sub-page. Your path should again match one of your paths from Routes.js.
React Route Asynchronous Page Loading
React is just one big JavaScript script, so all pages always load up with your first-page request and then links work instantaneously instead of making server requests with each page.
If you want to make the initial request smaller and faster, you can load some of your pages asynchronously. I am using this technique for learning pages on @7urtle/lambda. You can test it there and see that it is still fairly fast. Of course, the page loads only once, so all subsequent visits are again instantaneous.
You will need a new package called react-loadable:
npm i -D react-loadable
To make a page load asynchronously, add this definition to Routes.js:
Notice the constant AsyncPages where I placed the myAsyncSubPage definition using the loadable function.
I then call it in the Route tag in a regular way. No change there.
One thing we also need to define is the LoadingPage component that displays loading information while the system loads the page from your server. You can create it like this:
It is as simple as can be.
React Router Site Map
I recommend maintaining a site map for your website. It is good for search engines since Google can now crawl React pages, and it also helps you manage your site as it grows.
What I do is define a SiteMap object in Routes.js:
You can see that it defines all the information that I need for links and uses the path in Route components.
I then leverage the SiteMap in my own Link7urtle component:
In your own components, the Link7urtle is used simply as:
You can see that we simply pass SiteMap.HomePage to the Link7urtle and everything happens automagically (or we can also define any of the parameters manually).
Your website should also maintain sitemap.xml and robots.txt. I maintain these manually and make sure that they align with my Routes.js. This is my sitemap.xml:
Notice that you always need to use the full URL, including the correct protocol.
And my robots.txt then links to it like this:
For Sitemap, again use the full URL.
React Routing With Netlify, AWS, and Other Services
That is all for React Router itself, but when you deploy your new application to production, you may soon find out that simply calling any subpage of your application may not work.
Routing will always work when you start from your root because Router doesn’t call your server to navigate but instead uses browser history features. So with most providers, if you call any URL of your site, it will fail.
The usual solution is to make sure that all server requests are always passed to the index. The solution to this always depends on the specific service that you are using.
React Router with Netlify
For example, if you are deploying your React app as serverless on Netlify, you need to add a _redirects file to the root of your app:
Now everything should work the way you expect and your routes will be fully supported.
React Router with Amazon Web Services S3
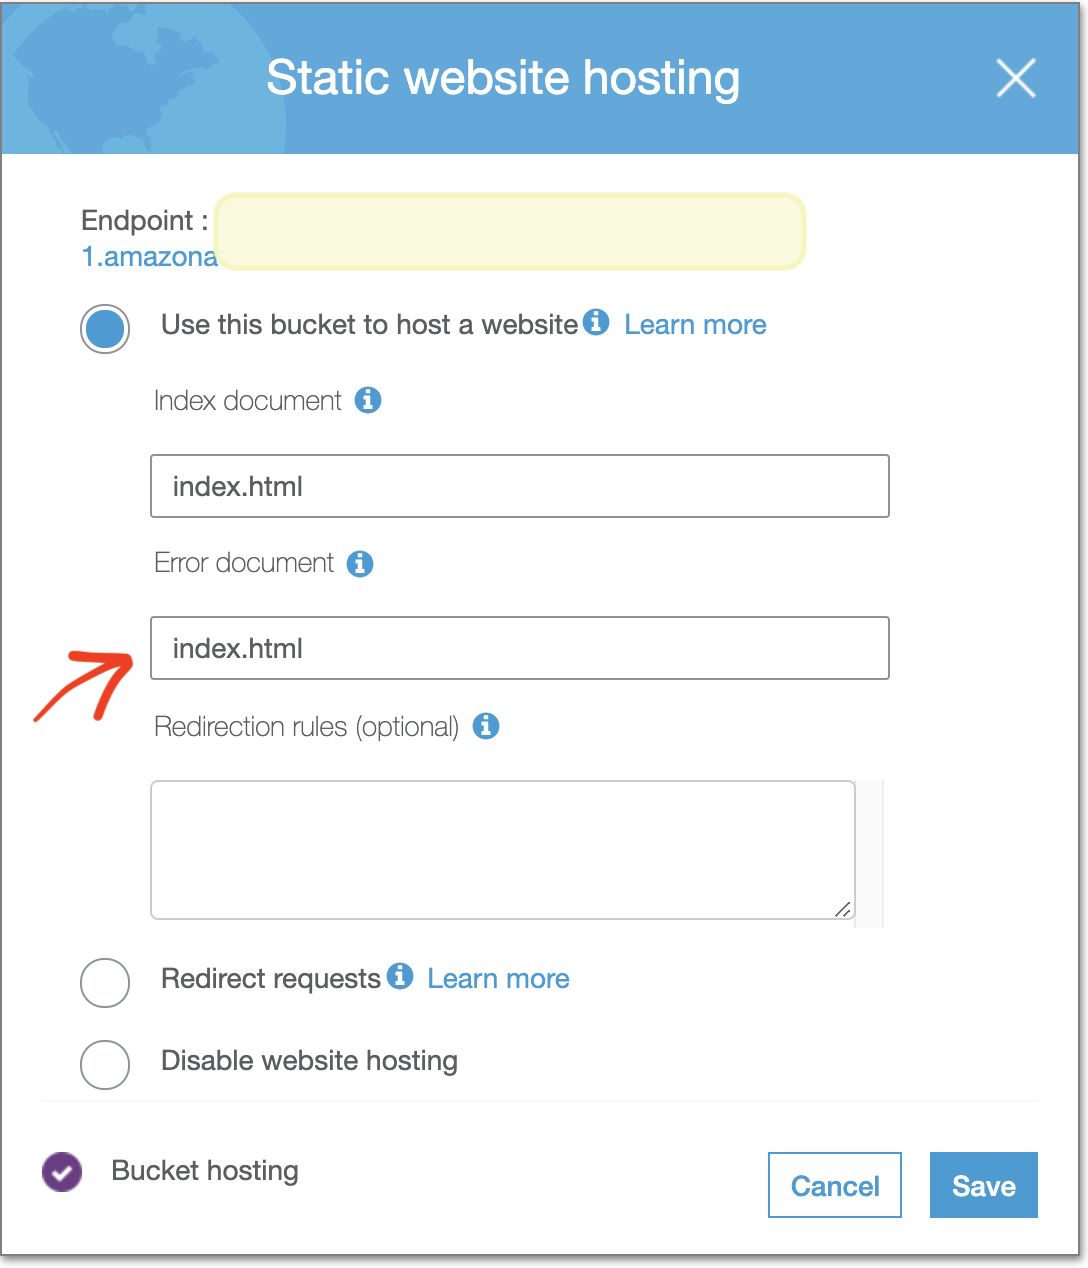
The same situation happens if you want to use Amazon Web Services with S3 for serverless delivery. I am using a solution from Stack Overflow.
You can put index.html in the Error document box. Go to your bucket (the one that actually has the code — not the one you use to redirect) -> Properties -> Static website hosting.
React Router for Amazon Web Services CloudFront
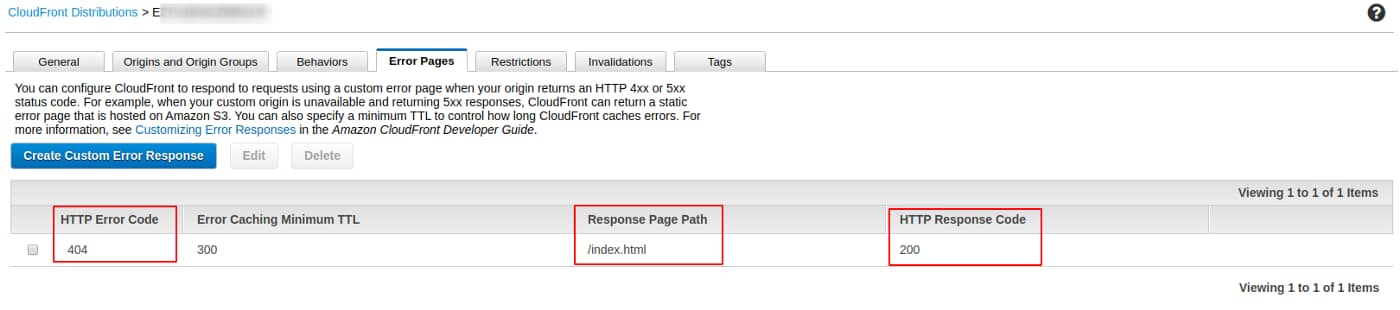
If you are using Amazon Web Services CloudFront, follow this advice from Stack Overflow.
Create a custom error page (AWS Docs) in CloudFront distribution that routes 404 errors to index.html and returns a 200 response code. This way, your application will handle the routing.
Conclusion
React Router is really powerful and it is what I use in all my web applications built in React. In this article, I revealed all the secrets of the setup that I use on 7urtle. You can see it working in real-time, including some asynchronous loading.
Please let me know if you end up using my solution and post in the comments if you succeeded or if you have any questions and need help.
Check out my website for more details.