

3 quick ways to add fonts to your React app
https://blog.greenroots.info/3-quick-ways-to-add-fonts-to-your-react-app
Tapas Adhikary
In HTML, font is used to specify the font face, font size, typography of the text. You can add fonts to your React application in different ways. This article aims to explain three quick ways of adding fonts to your React app. All the examples in the article assumes the React code structure provided by the create-react-app. You can choose to use the examples in any other code structure too.
Using the Font link
We can link to any fonts hosted online using the <link> tag inside an HTML file. Let's take an example of applying Google Fonts using the <link> tag.
- https://fonts.google.com/
- Click on a Font of your choice,

- Click on the
+Select this stylebutton

-
Go to the section,
Use on the weband copy the code under the<link>section
-
Go to the
index.htmlfile of your project. If your app is based on thecreate-react-app, you will find it under thepublicfolder. Paste the copied lines inside the<head>section. Here is an example,<link rel="preconnect" href="https://fonts.gstatic.com"> <link href="https://fonts.googleapis.com/css2?family=Hanalei+Fill&display=swap" rel="stylesheet"> -
Go to your CSS file and add a style like,
.font-link {
  font-family: 'Hanalei Fill', cursive;
}
Here we are using the same font-family that linked in the above step.
-
Last, you can add this style anywhere in your React component.
const FontLink = () => {
  return(
      <div className="card">
          <span className="font-link">
              This is with Font Link. We are linking the fonts from the Google Fonts.
          </span>
      </div>
  )
};

export default FontLink;
Please note, we are using the class name with the
<span>element in the React component.


This is how the component may look like,

Using the Web Font Loader
The Web Font Loader helps you to load fonts from Google Fonts, Typekit, Fonts.com, and Fontdeck, as well as self-hosted web fonts. It is co-developed by Google and Typekit.
Let us see how to load multiple fonts from Google Fonts and use them in a React component.
-
Install
webfontloaderyarn add webfontloader # Or, npm i webfontloader -
Import
webloaderto your componentimport WebFont from 'webfontloader';
-
Load the desired fonts using the font name. It is better to use the
useEffecthook and let it run once when the component loads. As the fonts need to be loaded just once in the app, you can load them in theindex.jsfile.useEffect(() => { WebFont.load({ google: { families: ['Droid Sans', 'Chilanka'] } }); }, []);Here we are loading fonts, 'Droid Sans' and 'Chilanka'.
-
Now you can use these fonts in a React component using the
classNameorstyleattribute. To use with theclassNameattribute, create a CSS class in the .css file,.font-loader { font-family: 'Chilanka'; }Then, in the component's
render()method,<div className="font-loader"> This is with Web Font Loader using the class attribute. We are loading the <u><b>Chilanka</b></u> font from the Google Fonts. </div>With the
styleattribute,<div style={{fontFamily: 'Droid Sans'}}> This is with Web Font Loader using the style attribute. We are loading the <u><b>Droid Sans</b></u> fonts from the Google Fonts. </div>
This is how the component may look like,
Read more about the Web Font Loader from here.
Using @font-face
In some situations, you may not be allowed to connect to a font repository online and link/load it. A classic example is, your app users use intranet and they have restricted access to the internet. In these situations, the fonts must be downloaded locally and packaged within the app.
@font-face is a CSS rule to define a font name by pointing to a font with a URL.
-
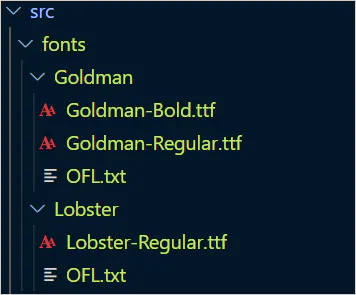
Create a folder called
fontsundersrc. -
Download the required fonts into the
src\fontsfolder. In this example, we have downloaded two fonts,GoldmanandLobster.
-
Next, import the fonts into the
index.jsfile.import './fonts/Goldman/Goldman-Bold.ttf';
-
In the
index.cssfile add,@font-face { font-family: "GoldmanBold"; src: local("GoldmanBold"), url("./fonts/Goldman/Goldman-Bold.ttf") format("truetype"); font-weight: bold; } -
Now add a class name in the
App.cssfile that uses this family name..font-face-gm { font-family: "GoldmanBold"; } -
Use this class name in your React component,
const FontFace = () => {
  return(
      <div className="card">
          <div className="font-face-gm">
              This is using Font Face.
              We are linking the <u><b>Goldman</b></u> font from the Google Fonts.
          </div>
      </div>
  )
}
export default FontFace;
This is how the component may look like,
Before we end...
Hope it was useful. Please Like/Share so that it reaches others as well. But, a few more points before we finish,
-
All the mechanisms discussed here are also applicable to a vanilla JavaScript application.
-
We can use multiple fonts in one app.

-
All the source code used in this article is in my GitHub repository.

Let's connect. You can @ me on Twitter (@tapasadhikary) with comments, or feel free to follow. You may also enjoy reading,