
Post install Python / Pip / Pipenv
https://docs.python-guide.org/dev/virtualenvs/#virtualenvironments-ref
1. Setting up project folder
Install pipenv requests
Create / add main.py file to project folder w/ contents below:
Run the main.py script
ALT: Method for server: Virtualenv
https://docs.python-guide.org/dev/virtualenvs/#virtualenvironments-ref
basic usage
Create a virtual environment for a project:
2. Set Up Local Testing Server (in folder you just set up)
Enter the command to start up the server in that directory:
NOTES: (not applicable with my install)
# If Python version returned above is 3.X
python3 -m http.server# On windows try “python” instead of “python3”, or “py -3”
# If Python version returned above is 2.X
python -m SimpleHTTPServer
3. SUCCESS – URL – http://localhost:8000/
Using folder for Google Workspace
https://developers.google.com/web/tools/chrome-devtools/workspaces
1. http://localhost:
8000 – inspect w/ devtools
NEXT STEP:
https://developers.google.com/web/tools/chrome-devtools/workspaces
Set up DevTools
-
Press Command+Option+J (Mac) or Control+Shift+J (Windows, Linux, Chrome OS) to open the Console panel of DevTools.
 Figure 4. The Console panel
 -
Click the Sources tab.
-
Click the Filesystem tab.
 Figure 5. The Filesystem tab
 -
Click Add Folder To Workspace.
-
Select
~/Desktop/app. -
Click Allow to give DevTools permission to read and write to the directory. In the Filesystem tab, there is now a green dot next to
index.html,script.js, andstyles.css. These green dots mean that DevTools has established a mapping between the network resources of the page, and the files in~/Desktop/app.Figure 6. The Filesystem tab now shows a mapping between the local files and the network ones
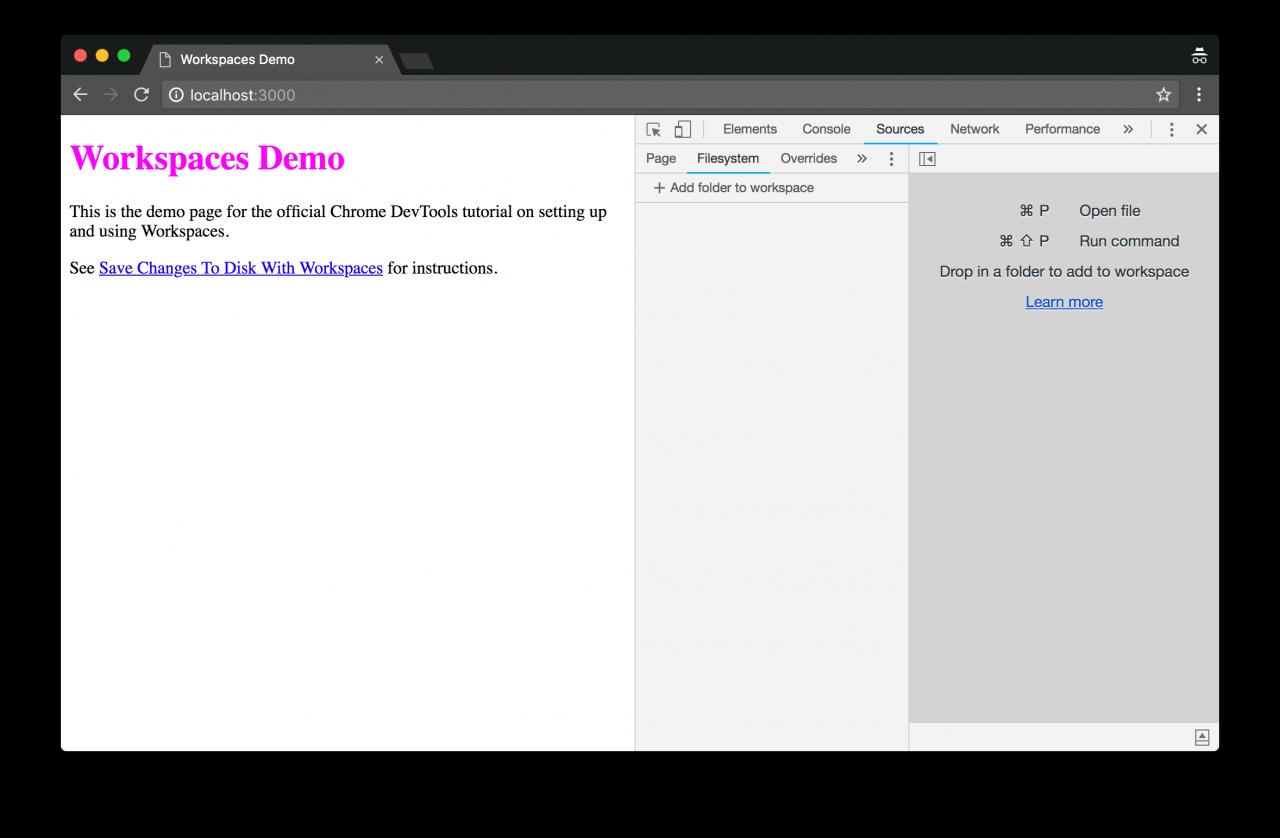 Figure 5. The Filesystem tab
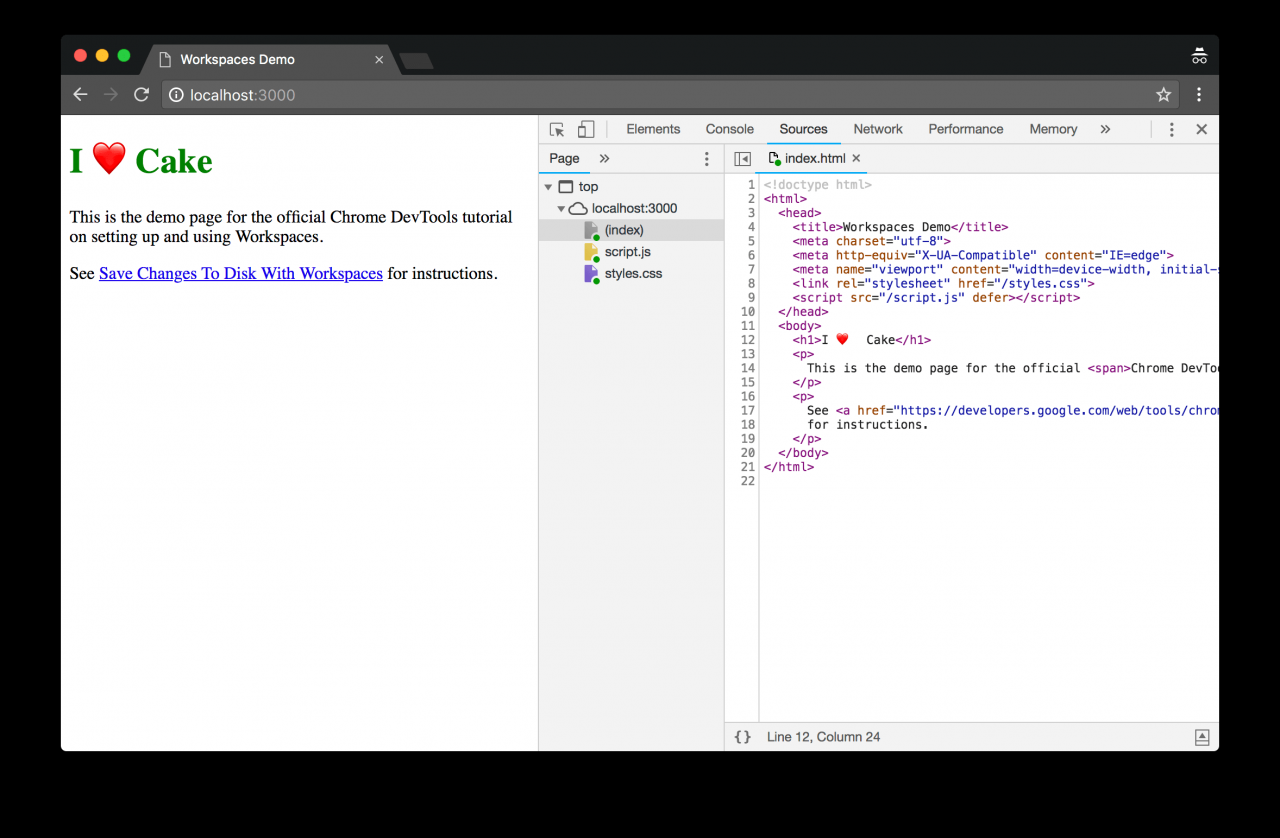 Figure 6. The Filesystem tab now shows a mapping between the local files and the network ones
Step 2: Save a CSS change to disk
-
Open
~/Desktop/app/styles.cssin a text editor. Notice how thecolorproperty ofh2elements is set tofuchsia. Figure 7. Viewing
 styles.cssin a text editor -
Close the text editor.
-
Back in DevTools, click the Elements tab.
-
Change the value of the
colorproperty of the<h2>element to your favorite color. Remember that you need to click the<h2>element in the DOM Tree in order to see the CSS rules applied to it in the Styles pane. The green dot next tostyles.css:1means that any change you make will get mapped to~/Desktop/app/styles.css.Figure 8. Setting the colorproperty of theh2element togreen -
Open
~/Desktop/app/styles.cssin a text editor again. Thecolorproperty is now set to your favorite color. -
Reload the page. The color of the
<h2>element is still set to your favorite color. This works because when you made the change, DevTools saved the change to disk. And then, when you reloaded the page, your local server served the modified copy of the file from disk.
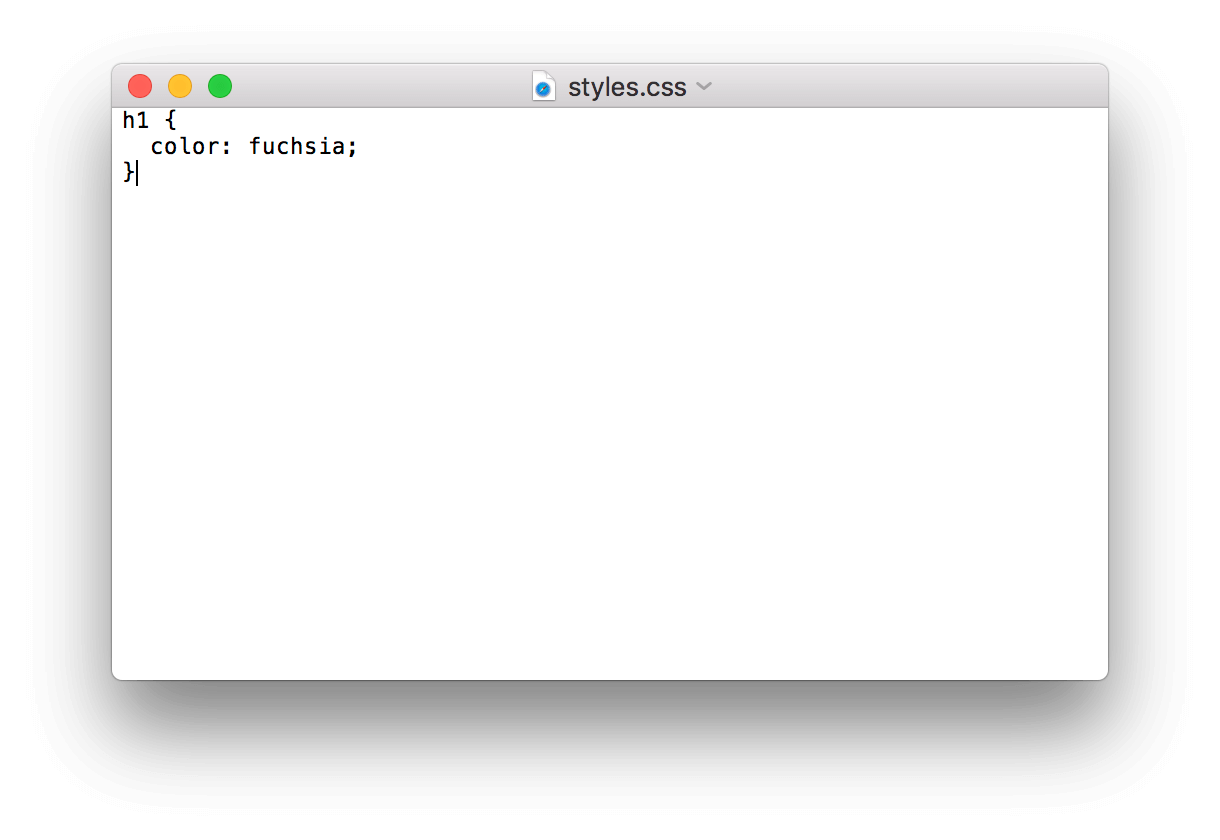 Figure 7. Viewing
 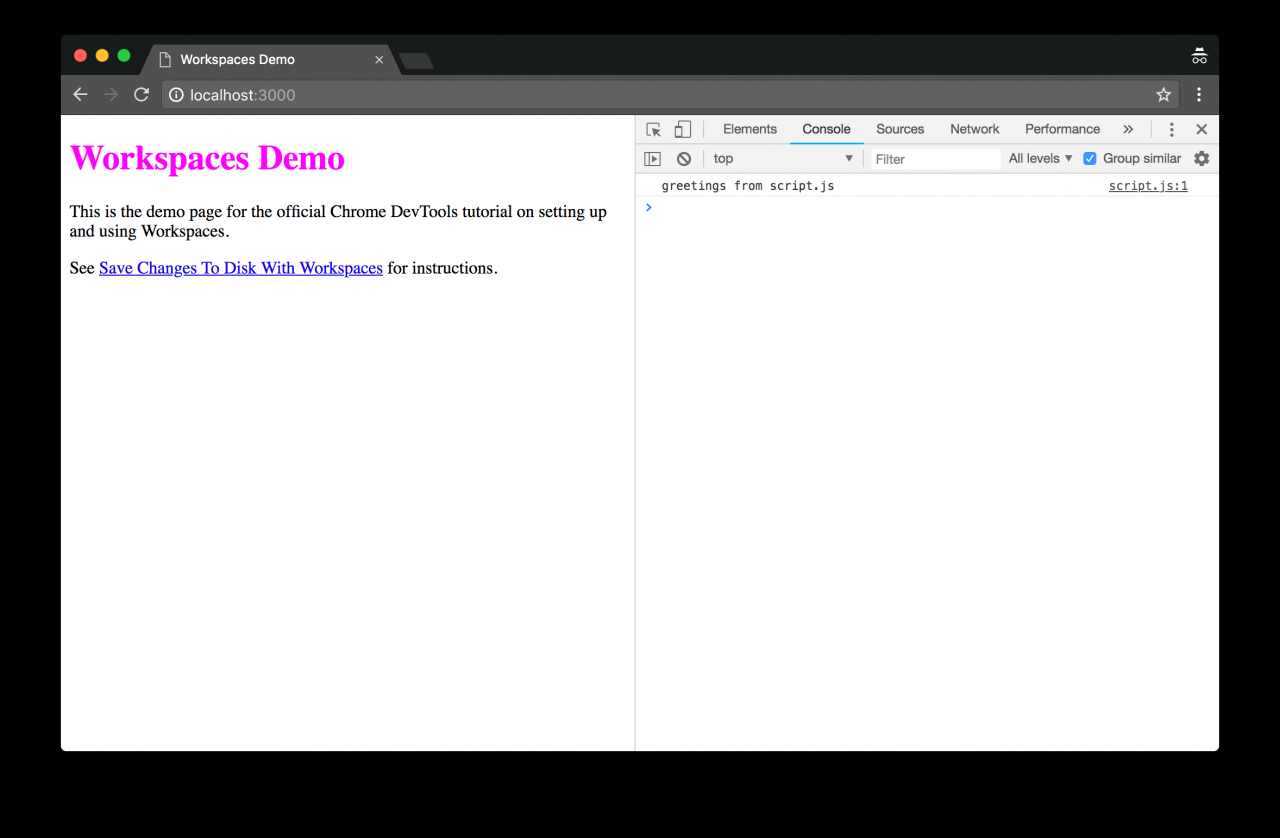 Figure 8. Setting the
 Step 3: Save an HTML change to disk
Try changing HTML from the Elements panel
Warning: The workflow that you're about to try doesn't work. You're trying it now so that you don't waste time later trying to figure out why it's not working.
-
Click the Elements tab.
-
Double click the text content of the
h2element, which saysWorkspaces Demo, and replace it withI ❤️ Cake.Figure 9. Attempting to change HTML from the DOM Tree of the Elements panel -
Open
~/Desktop/app/index.htmlin a text editor. The change that you just made isn't there. -
Reload the page. The page reverts to its original title.
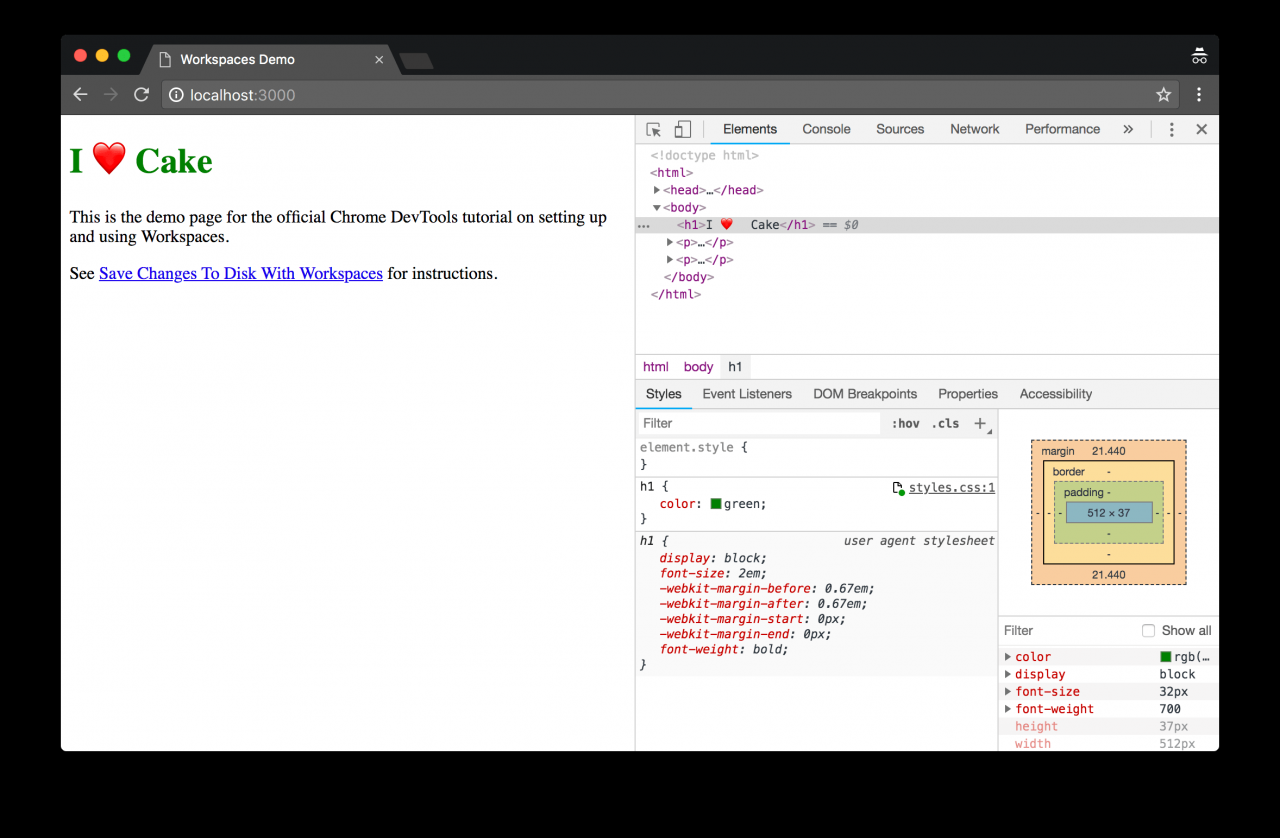 Figure 9. Attempting to change HTML from the DOM Tree of the Elements panel
Optional: Why it doesn't work
Note: This section describes why the workflow from Try changing HTML from the Elements panel doesn't work. You can skip this section if you don't care why.
- The tree of nodes that you see on the Elements panel represents the page's DOM.
- To display a page, a browser fetches HTML over the network, parses the HTML, and then converts it into a tree of DOM nodes.
- If the page has any JavaScript, that JavaScript may add, delete, or change DOM nodes. CSS can change the DOM, too, via the property.
- The browser eventually uses the DOM to determine what content it should present to browser users.
- Therefore, the final state of the page that users see may be very different from the HTML that the browser fetched.
- This makes it difficult for DevTools to resolve where a change made in the Elements panel should be saved, because the DOM is affected by HTML, JavaScript, and CSS.
In short, the DOM Tree !== HTML.
Change HTML from the Sources panel
If you want to save a change to the page's HTML, do it via the Sources panel.
-
Click the Sources tab.
-
Click the Page tab.
-
Click (index). The HTML for the page opens.
-
Replace
<h2>Workspaces Demo</h2>with<h2>I ❤️ Cake</h2>. See Figure 11. -
Press Command+S (Mac) or Control+S (Windows, Linux, Chrome OS) to save the change.
-
Reload the page. The
<h2>element is still displaying the new text.Figure 11. Line 12 has been set to I ❤️ Cake -
Open
~/Desktop/app/index.html. The<h2>element contains the new text.
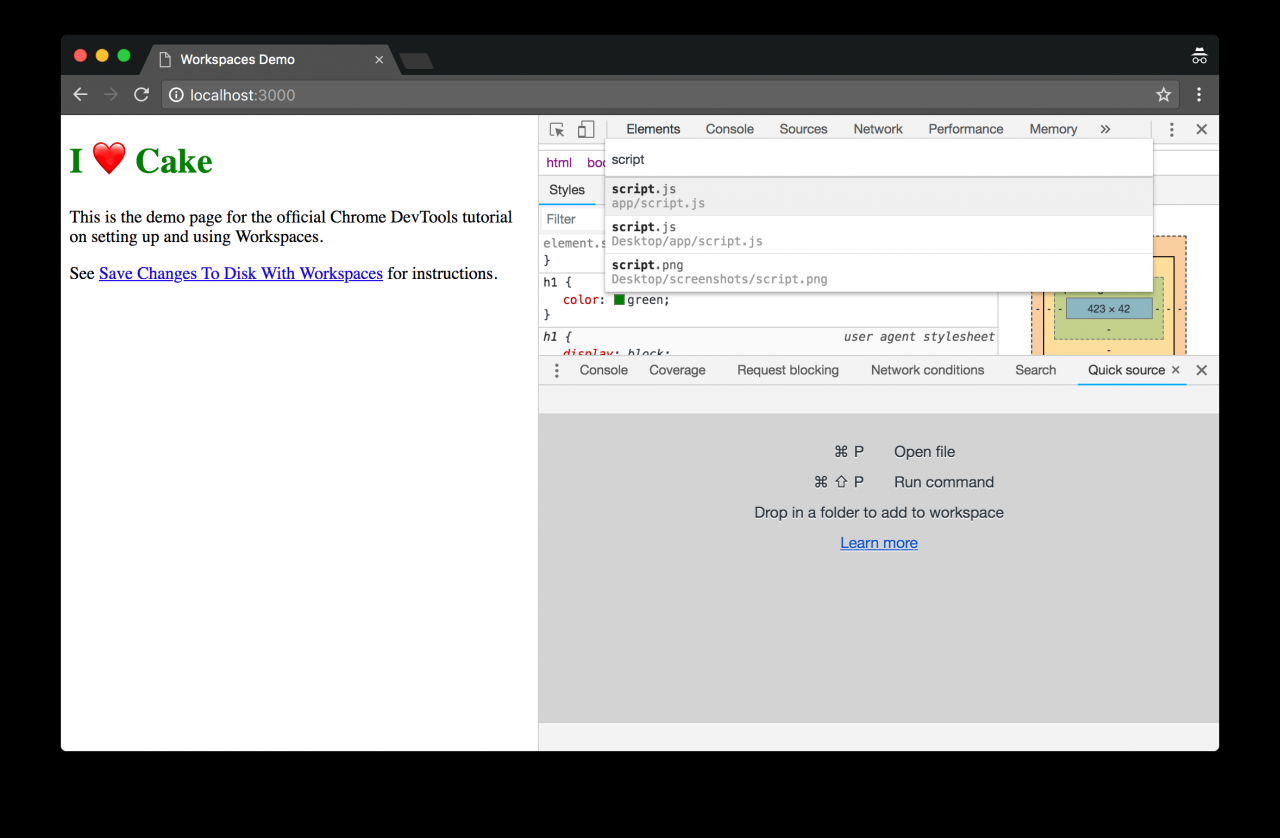 Figure 11. Line 12 has been set to
 Step 4: Save a JavaScript change to disk
The Sources panel is also the place to make changes to JavaScript. But sometimes you need to access other panels, such as the Elements panel or the Console panel, while making changes to your site. There's a way to have the Sources panel open alongside other panels.
-
Click the Elements tab.
-
Press Command+Shift+P (Mac) or Control+Shift+P (Windows, Linux, Chrome OS). The Command Menu opens.
-
Type
QS, then select Show Quick Source. At the bottom of your DevTools window there is now a Quick Source tab. The tab is displaying the contents ofindex.html, which is the last file you edited in the Sources panel. The Quick Source tab gives you the editor from the Sources panel, so that you can edit files while having other panels open.Figure 12. Opening the Quick Source tab via the Command Menu -
Press Command+P (Mac) or Control+P (Windows, Linux, Chrome OS) to open the Open File dialog. See Figure 13.
-
Type
script, then select app/script.js.Figure 13. Opening script.jsvia the Open File dialog -
Notice the
Save Changes To Disk With Workspaceslink in the demo. It's styled regularly. -
Add the following code to the bottom of script.js via the Quick Source tab.
console.log('greetings from script.js'); document.querySelector('a').style = 'font-style:italic'; -
Press Command+S (Mac) or Control+S (Windows, Linux, Chrome OS) to save the change.
-
Reload the page. The link on the page is now italic.
Figure 14. The link on the page is now italic
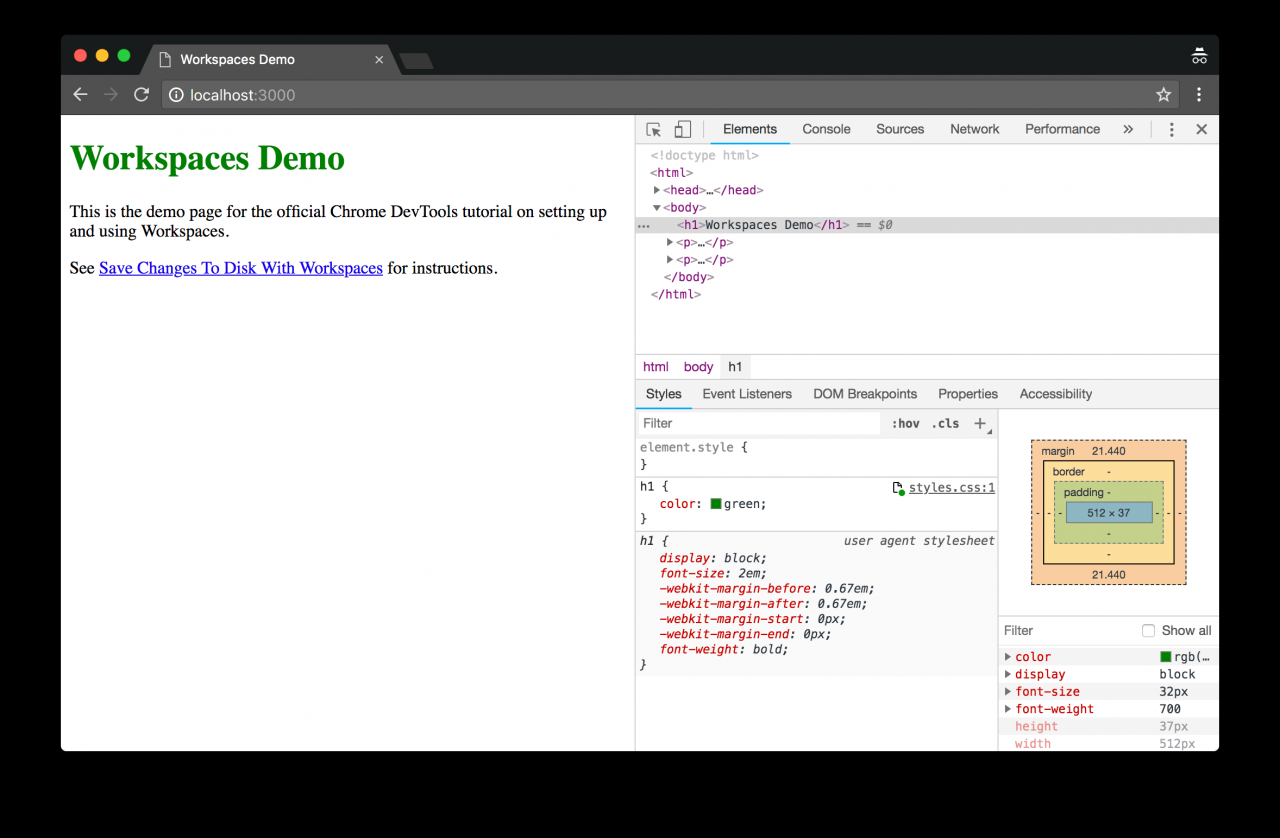 Figure 12. Opening the Quick Source tab via the Command Menu
 Figure 13. Opening
 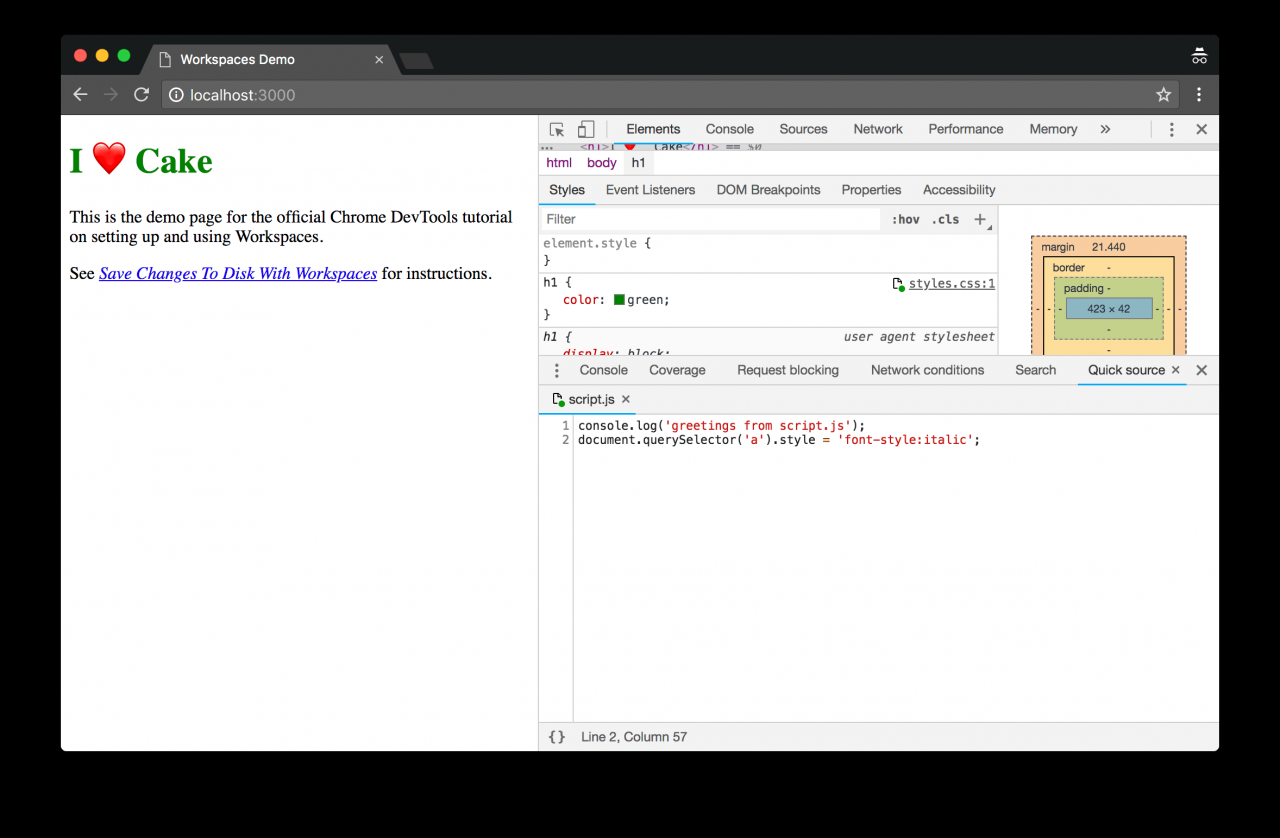 Figure 14. The link on the page is now italic
Next steps
Congratulations, you have completed the tutorial. Click the button below to receive your prize.
Use what you have learned in this tutorial to set up Workspaces in your own project. If you run into any issues or are able to get it working after some custom configuration, please start a thread in the mailing list or [ask a que
stion on Stack Overflow to share your knowledge with the rest of the DevTools community.