

RESOURCES
- GETTING STARTED
-
To get started using GatsbyJS, download the Gatsby CLI:
npm i -g gatsby. This command-line tool enables you to generate, run, and build a Gatsby application.To get up and running quickly, you can use the Gatsby default starter repository. After cloning this, run
npm installand thengatsby develop.
gatsby develop -p 4000
– push it to :4000 to keep it away from nas
This will generate a fully active Gatsby application running onhttp://localhost:4000.To confirm that pages have already been rendered, you can visit any of the pages and click View source. Note, though, that you can also click links and the page will update without a full refresh, as you would expect from a PWA.
To get off the ground, I used the Gatsby starter repository. I forked this from GitHub and renamed the repo. Then I cloned it and used the Gatsby CLI to build. In a very short time, I was up and running on localhost with a live and hot-reloading application.
- GETTING STARTEDV2
- Got a lot of erros – upgraded npm – ran updates on the project – reran – npm i -g gatsby
Got some
deprecated depenedencies – but no “WARN” like first time– will try with “official” starter from gatsby later on – but will stick with github starter for no
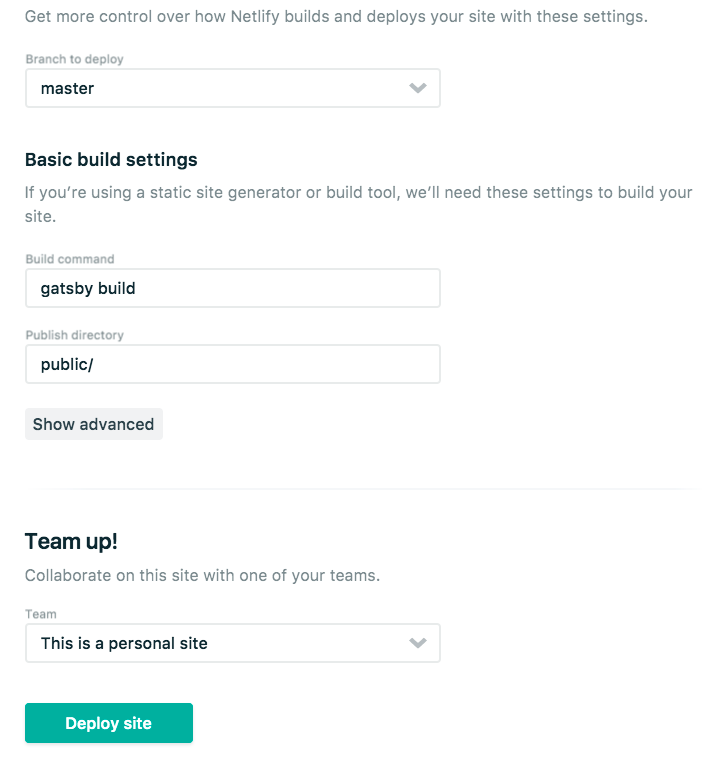
Deploying your GatsbyJS site to Netlify
Netlify https://www.netlify.com/ providescontinuous deployment (Git-triggered builds), a global CDN, full DNS, automated HTTPS, and a lot more.
Their free tier includes “unlimited personal and commercial projects, HTTPS, continuous deployment from public or private repos, and more.”
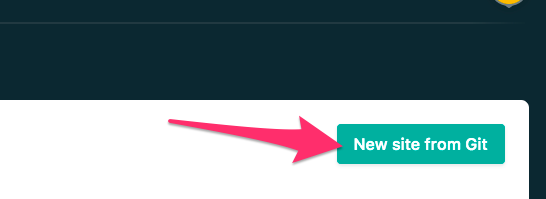
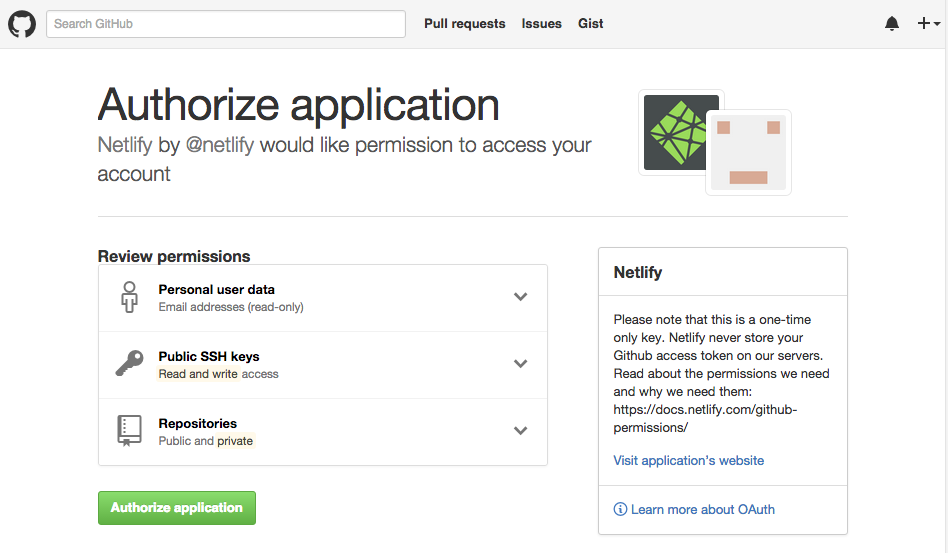
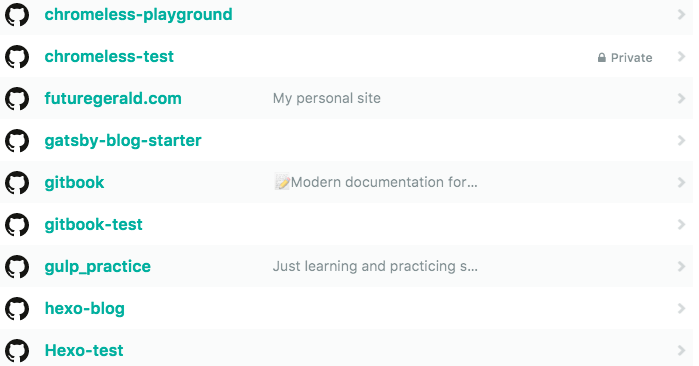
Adding your site to Netlify is as simple as creating an account, linking your GitHub, and clicking the Create site from git button.
-
- More Resources
- https://www.gatsbyjs.com/starters/
- https://github.com/gatsbyjs/gatsby-starter-default/
- https://www.gatsbyjs.com/docs/creating-a-starter/
- View GraphiQL, an in-browser IDE, to explore your site’s data and schema
⠀
http://localhost:8000/___graphql
- CHANGING GATSBY LOCAL PORT
gatsby develop -p 4000
orgatsby develop –port 4000


GatsbyJS: A complete tutorial with examples
https://blog.logrocket.com/is-gatsby-really-that-great-e7b19c4c1c05/
February 3, 2021 6 min read
*Editor’s note: This Gatsby tutorial was last updated on 17 February 2021.*
In this comprehensive GatsbyJS tutorial, we’ll tell you everything you need to know about the popular React-based framework, including what it is, how to use it, and what distinguishes GatsbyJS from other static site generators.
We’ll cover the following in detail:
- What is GatsbyJS?
- What are static sites?
- What makes GatsbyJS special?
- Do you need to know React and GraphQL to use Gatsby?
- Getting started with GatsbyJS
- Designing your site with GatsbyJS
- Developing your site with GatsbyJS
- Searching your GatsbyJS site
- Deploying your GatsbyJS site
- Should you use GatsbyJS?
What is GatsbyJS?
GatsbyJS is a free, open-source, React-based framework designed to help developers build performant websites and apps. Put simply, GatsbyJS is a static site generator that leverages React.
Why would you need a framework on top of a framework (or library)? Isn’t React supposed to help developers build websites and apps? This is a reasonable question that is often posed when discussing GatsbyJS and Next.js.
React is a library that is meant to provide a certain set of core functionality for developers to leverage. It is intended to be lightweight and broadly applicable. GatsbyJS, on the other hand, is a static progressive web app (PWA) generator that offers code and data splitting out of the box.
To boost performance, GatsbyJS loads only critical HTML, CSS, JavaScript, and other data. Once loaded, it prefetches resources for other pages you might navigate to. This way, your site loads as fast as possible and user interactions feel seamless.
What are static sites?
Static sites have been around for a very long time. In fact, they are probably the original website: just HTML, CSS, and JavaScript. They are not rendered during runtime; there is no server-side code, no database, etc.
A static site generator is a tool that generates static sites. With regard to JS frameworks and libraries, these usually generate HTML content on the client side during runtime. Static site generators generate this content during build time. Then, once loaded, React takes over, and you have a single-page application!
How is this different from server-side rendering? This is a great question. The main difference is that there is no server-side code. So, unlike a tool such as Next.js, Gatsby does not render anything on the server when a request is made. This is all done at build time of the application.
Some of the benefits of a static site are: speed, search engine optimization, and security. Not only are sites made with Gatsby blazing fast, but they have an implicit security since there is no database or server, and unlike standard React applications, they make SEO much easier since crawlers can find the content.

What makes Gatsby special?
Gatsby has some great features that differentiate it from other static site generators.
First and foremost, Gatsby leverages React, so it is a great choice for those who are comfortable with and love it.
Gatsby pairs really well with platforms like Netlify, and you can easily configure your site to build and deploy every time you commit and push to GitHub.
https://www.gatsbyjs.com/plugins – gatsby plugins
Gatsby also comes with a great ecosystem of plugins that serve various needs. These plugins can help you source data from CMSs like WordPress or Contentful, help you integrate with tools like Algolia, and manage your images by lazy-loading and optimizing them.
Gatsby also provides a wealth of APIs that make the development of static sites much easier — for example, the createPage API that makes it really easy to transform markdown files into static pages with a template at build time.
Finally, Gatsby has a bunch of great components that simplify things like routing, linking, and handling images, which are not included in the core React library.
Do you need to know React and GraphQL to use Gatsby?
GraphQL is a popular and powerful query language and server-side runtime for executing queries. It isn’t associated with any database or stage engine; instead, GraphQL is backed by your existing code. You can create a GraphQL service by defining types and fields on those types, then providing functions for each field on each type.
GatsbyJS uses GraphQL to manage data throughout the application. Although you can use Gatsby without GraphQL, using GraphQL really makes app development more declarative and intuitive.
Getting started with GatsbyJS
To get started using GatsbyJS, download the Gatsby CLI: npm i -g gatsby. This command-line tool enables you to generate, run, and build a Gatsby application.
To get up and running quickly, you can use the Gatsby default starter repository. After cloning this, run npm install and then gatsby develop. This will generate a fully active Gatsby application running on http://localhost:3000.
To confirm that pages have already been rendered, you can visit any of the pages and click View source. Note, though, that you can also click links and the page will update without a full refresh, as you would expect from a PWA.
Designing your site with GatsbyJS
Designing a look and feel was truthfully the most difficult part of the experience. I felt paralyzed by possibilities to some extent. A couple of things helped me move forward.
First, I looked at pages and pages of Awwward-winning portfolio websites to gather inspiration and get a sense of the great designs that are out there.
Second, I read a great article by Adham Dannaway about his process when designing and creating his own personal site.
I committed to designing a few of my own custom animations and SVGs. This was quite fun, and I cannot recommend Figma enough for this endeavor. If you are familiar with Sketch, it will be extremely simple to use.
Developing your site with GatsbyJS
To get off the ground, I used the Gatsby starter repository. I forked this from GitHub and renamed the repo. Then I cloned it and used the Gatsby CLI to build. In a very short time, I was up and running on localhost with a live and hot-reloading application.
The structure of the code is very simple. You have three folders inside the src directory: components, images, and pages.
The images directory contains a couple png’s that are used in the site.
The components directory contains several components of note. First, the layout.js component: it is a wrapper component designed to provide styling and functionality across the application. This kind of pattern is very popular in React. You will notice that there is a binding called {children} in the center of the component.
This represents the content to be passed inside the component. You can see this component at work in index.js in the pages directory:

The other noteworthy component is image.js:
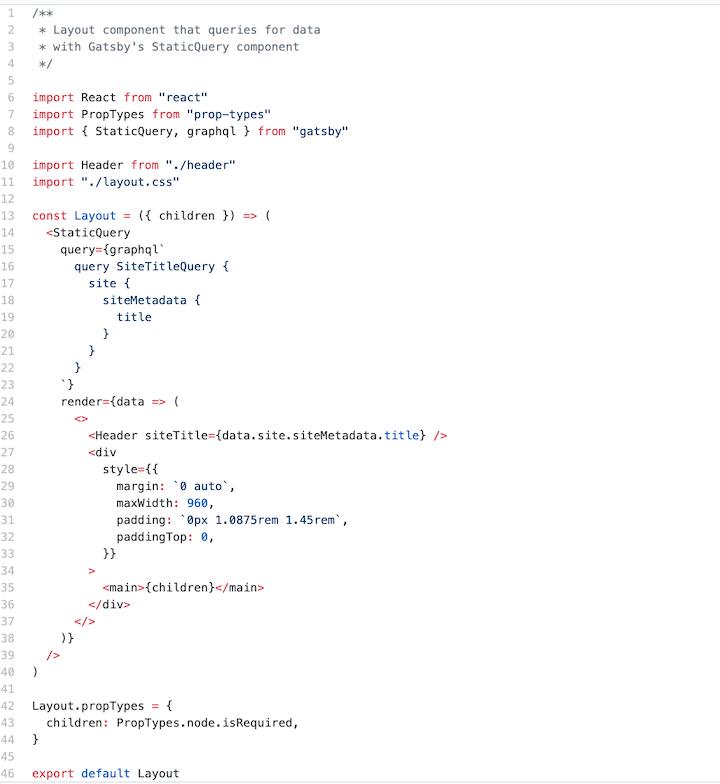
This component shows a couple interesting things. First, it gives a bit of visibility into how GraphQL is used within Gatsby. The StaticQuery at the bottom of the component is designed to pull in the image at build time and enumerate some of the image processing specifications (fluid with a max width of 300). It then passes this into the Gatsby Image component, which optimizes the image, creates several sized versions of it, and will lazy-load it at runtime.
Under pages, you have the main index.js, a secondary page, and a 404 page. In index.js, you can see how the layout component is put to work, and also how you can link to other pages such as page-2.js using Gatsby’s Link component. Anything in this folder will be transformed into static pages by Gatsby at build time.
This provides a lot of what you need out of the box. You can get to work building pages and components straightaway. However, if you want to dynamically create pages from, say markdown files, you can follow this simple tutorial on Gatsby’s website.
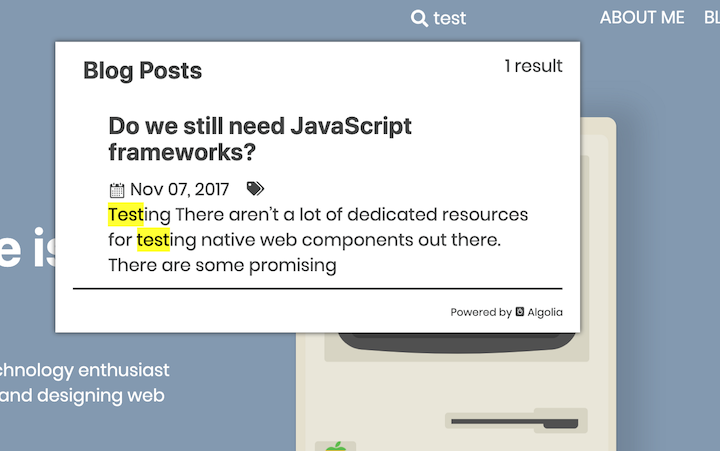
Searching your GatsbyJS site
One of the downsides of not having a server is that searching your site isn’t straightforward. This can be circumvented by using a tool like Algolia. Gatsby has some great guides to implementing this feature with Algolia or other tools like Lunr and ElasticSearch.
Deploying your GatsbyJS site
Once you’ve created a site, you need to think about how to host it. There are two great options that lead the pack: GitHub Pages and Netlify.
I went with Netlify because they provide continuous deployment (Git-triggered builds), a global CDN, full DNS, automated HTTPS, and a lot more.
Their free tier includes “unlimited personal and commercial projects, HTTPS, continuous deployment from public or private repos, and more.” I was also able to easily purchase the domain name I needed through Netlify. It was essentially a one-stop shop for everything I needed to get my site live.
Adding your site to Netlify is as simple as creating an account, linking your GitHub, and clicking the Create site from git button.
Should you use GatsbyJS?
Should I have gone with another generator? Should I have just built a site with React or Next.js? Gatsby has advantages and downsides. However, many of the downsides are minimized by certain use cases. For the creation of a personal site, Gatsby turned out to be the perfect choice for me.
The workflow is extremely simple: when I make changes and push them to GitHub, my site is redeployed. I don’t need to concern myself too much with infrastructure, etc. Netlify handles all that for me.
It maintains a great balance between allowing me to code and reducing boilerplate code.
I love the gatsby-image plugin, and the ability to use GraphQL really simplifies passing data into my components.
The only thing I didn’t love was that some of the configuration required in files like gatsby-node.js didn’t seem all that intuitive to me.
In conclusion, I would really recommend Gatsby to those looking for a candidate to develop smaller sites like portfolios and personal blogs . It really shines in these use cases.
GatsbyJS carries with it all the benefits of static websites, such as speed, security, and SEO, and it is especially wonderful for those who like to do a bit of coding and don’t want to just use WordPress or SquareSpace.
Gatsby Overview – and Gatsby with React
https://www.freecodecamp.org/news/why-you-should-use-gatsbyjs-to-build-static-sites-4f90eb6d1a7b/
Gatsby has been growing over time, and I’m glad to see it in use by a huge number of sites like marketing sites, blogs, and generated static pages.
What attracted me in the first place was the smooth development experience, incredible results, and the warm community. Going a bit in-depth into its workings, the ecosystem and also discussing its potential with more developers made me think about how powerful it is — much more than I had initially presumed.
This article seeks to make you see why it has gained popularity. If you’re already using it, you’ll get a better idea of the features that you could put to use for an even greater development experience.
Do note that this is what works for me, and I’m sharing just my views. I’m in no way telling you that your current setup that works for you is obsolete, but just trying to share how Gatsby has been great for me.
What is Gatsby?
It’s another static site generator like Hugo, Jekyll and so on. So what makes it special? Why are we talking specifically about it?
Gatsby can be used to build static sites that are Progressive Web Apps, follow the latest web standards, and are optimized to be highly performant. It makes use of the latest and popular technologies including ReactJS, Webpack, GraphQL, modern ES6+ JavaScript and CSS.
 GraphQL + React + Webpack = ❤
This means a lot of developers can jump in without much of a learning curve as they already know or have at least used one piece of this tech stack Gatsby is built on.
Furthermore, I’d like to add something I noticed working with developers who had no idea about the latest frameworks and libraries and were just used to the traditional HTML, JavaScript, CSS files way of building sites.
Approach to development
On one side, we have users expecting an app-like smooth experience on the web. The other side is developers, used to sites having pages with each being HTML files or maybe using some templating — at the very base — sites as pages with internal linking.
If you’re getting started with any of the latest frameworks, let’s take the case of React. You could have an app up and running with minimal configuration with create-react-app. But if you take a look at the project structure it may not make much sense to a newbie or even some developers coming in from other tech stacks. The pattern is pretty different from what you’ve ever seen before.
It’s because without additional setup they aim at building Single-Page Applications, SPAs. To add routing, pages or optimizing for SEO, it will require more tools and configuration.
That doesn’t seem very convenient when you want static sites, does it? So here we have Gatsby, optimized for this specific use case. This could be more intuitive for developers, as there are pages created from components that follow the root idea that sites are pages with internal linking.
Features
Components
Components are a key feature of React, and now they’re a commonly followed web design pattern. With the current level of complexity of user interfaces, it is almost impossible to write maintainable code in long pages of HTML or use templating engines and expect consistency.
So instead, we build reusable components and then use them to construct views. This way we have separate modules handling separate things, and it’s easier to manage and maintain. The component just contains all the information it requires, and Gatsby, since it uses React, follows the same pattern.
Atomic design is an approach that’s a good way of handling complex interfaces, and we could put it to use here with React components. Brad Frost has an amazing blog post describing what it is and how it works.
Webpack bundling and latest tooling
Webpack creates optimized, minified bundles of HTML, JavaScript, and CSS. When it’s pre-configured with Babel and more plugins, it allows you to use the latest ES6+ JavaScript and GraphQL.
Icing on the cake: we’ve got hot reloading and code splitting built-in, giving a better development experience and better site performance. This is aimed at making the developer write minimal tooling configuration and focus more on the actual site development.
Gatsby plugins, starters and React packages
You can use any of the packages you’ve already been using with NPM, particularly the React ones as it’s built on the same thing. But that’s not all: there’s a large number of ever-growing plugins, starters, and transformers by the Gatsby community.
You almost never come to the point where you actually have to build on your own tool or module, the community already offers a huge number to suit every need.
Using these, Gatsby can be extended with additional functionality. For instance, a couple of examples include responsive images, offline functionality, source data from CMS and data markup formats, adding third-party services (Google analytics etc), and so on.
Styling
Again, complex user interfaces mean complex styling patterns, and it’s only a matter of time before style-sheets get bloated. You get specificity issues, scroll through hundreds of lines of code trying to figure out things, and end up using !important to actually see the styling you added.
Gatsby has support for SCSS, CSS-in-JavaScript libraries, allowing you to manage styles better and with ease. Even the setup for this is fairly easy to handle with the installation of a plugin or package.
Responsive Images
Resizing images for responsiveness on different devices, lazy-loading, using srcsets and picture…Already sounds tedious when it is to be done manually.
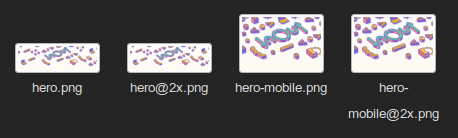 Different versions of the same image for responsiveness
Although it is a requirement for performance and app-like optimized interfaces these days, we don’t see many tools that we can directly jump into and use.
Meanwhile, in Gatsby with just a plugin, particularly the gatsby-plugin-sharp, you can directly generate fluid images, add filters, change formats, blur up on load and a lot more. This saves a lot of work and time manually resizing images and writing explicit boilerplate code for responsive images. It also gives you way better performance along with a smoother user experience.
App-like experience
With the performance boost and features to add to the smoothness of the user experience, Gatsby aims at a full app-like experience borrowing from full PWAs. There are no reloads between pages when using gatsby-link instead of hyperlinks, and the app still appears smooth and performant thanks to lazy-loading images and code-splitting.
For sites following standards that you also want to be performant, we’ve got tons of things to do and guides to follow: minification and bundling, browser caching and async loading scripts or files, and so on. When working with a framework like React, you have more things to worry about even though it solves a couple of problems: code-splitting, SEO, routing if required, responsive images, and the list goes on.
Gatsby aims to solve all these problems, with less time spent on tooling, configuration, and the environment and more time to actually design and develop the site.
The Gatsby Ecosystem
Plugins
Gatsby was built to be extensible and flexible — using plugins is one way to make it so. They can be directly installed and be used for a variety of functionality including making the site offline, adding Google analytics, adding support for inline SVGs, you name it — the list is almost endless.
Of the different types of Gatsby plugins, the gatsby-source plugins in particular fetch data from a local or remote source and allow it to be usable via GraphQL. These sources could be CMSs such as Wordpress, Drupal, Plone, local markdown, XML or such files, databases, APIs and data formats as JSON, CSV.
This implies that almost anything at all can be used as a source to work with Gatsby and generate static sites.
Note: GraphQL is a query language for APIs that works on the philosophy of just asking for exactly what you require. Unlike REST APIs, you don’t look for endpoints to provide your data and process them from the structure that’s given from it, but rather ask for what you want and directly use this data. Read more about how it works and how to use it in their docs.
After installation, some plugins can be used straight away by just listing them in gatsby-config.js and the others configured with an options object.
Go check out the Gatsby plugin library, it’s already got quite a large number of plugins and more are being added still by the active community.
Starters
These are basically boilerplate Gatsby sites which help you kick-start development quickly depending on what kind of site it is. They help you directly get onto working on the development of a site, configuration and basic features you need already taken care of. Which means, less time on the tooling, more time for development.
Gatsby plugins often have their corresponding starters which show or serve a quick way to get started with using it. They also act as a reference covering all the features and showcase configurations of the plugin in use.

Gatsby themes is a feature still in development which allows you to package and reuse these functionalities and patterns similar to what’s seen in starters. Read more about what’s brewing in the Gatsby blog.
Static Sites
Firstly, let’s take a look at how Gatsby works internally. Unlike the SPAs that make API requests as you run the app, Gatsby does all the data fetching, including data sourcing from local files, during build time. All this data is then used to generate static HTML, JavaScript, and CSS files. This static rendering is what makes things work faster.
 How Gatsby works
That was a lot about Gatsby, its ecosystem and how it helps you create amazing static sites. But why would we want static sites? Doesn’t it sound like a step back from dynamic ones?
- They do not require complex server setup with databases, maintenance, and don’t have any scaling issues.
- Data is fully secure. CMSs and APIs have private features but the data is still present in the server which can be exploited. Gatsby only takes the required data to display from the source and the private or secured data is not even present in the final build. Which is the safest it can possibly get.
- Rather than relying on servers to generate pages dynamically, pre-render all of them on build and use CDNs for a blazing fast and smooth experience for users all around the globe.
- Gatsby does static rendering. Which makes content available as HTML, and search engine optimized, no long initial load time.
Try it out!
That should have shed some light on what’s all the hype around it and why some major companies are choosing to use it on their sites. The Gatsby site showcase just seems to be growing with many amazing additions lately.
Maybe it’s time you dipped your hands and took a look around!
Thanks to CodeSandbox, we can do this right away, in the browser itself.
If you’d like to run it locally, you should check out the gatsby-cli. It is the quickest and easiest way to get started. They’ve also got amazing documentation and tutorials for you to dive into developing sites on gatsbyjs.org.
Hope you enjoyed this article and found it to be worthwhile. You can check out all my projects on Github or Dribbble and don’t hesitate to reach out to me on Twitter!
You also might like to take a look at my other articles:
Progressive Web Apps: Bridging the gap between web and mobile apps
Unless you’ve been living under a rock, you’ve probably heard of PWAs or Progressive Web Apps. It’s a hot topic right…medium.freecodecamp.orgHackathon Report: What can you code in 30 hours? Quite a lot!
What can you build in 30 hours straight? As a group of second year college students with a growing portfolio of work…medium.freecodecamp.orgACM Month Of Code 2k17: Building Moodify
March was a pretty productive month, all thanks to this major event hosted by Association for Computing Machinery, NIT…hackernoon.com
- Get Gatsby set up and running
- On Github – set up new repo with same name
- Change Origin (if cloned especially)
$ git remote rm origin
$ git remote add origin git@github.com:neworiginurlfromgithub/proj1.git
$ git remote set-url origin https://github.com/USERNAME/REPOSITORY.git
$ git config master.remote origin
$ git config master.merge refs/heads/master
$ git remote -v
# Verifies the new remote URL
- create a new branch – you need to know which branch you want to publish with pages
git checkout -b Spiffy-Default-Branch
- set up commit
git status
git add
git commit -a -m "message"
$ git push -u origin main (1st way)
# Pushes the changes in your local repository up to the remote repository you specified as the origin
git push origin:HEAD:Spiffy-Default-Branch (2nd way - pushes to branch)
GitHub Pages is a service offered by GitHub that allows hosting for websites configured straight from the repository. A Gatsby site can be hosted on GitHub Pages with a few configurations to the codebase and the repository’s settings.
You can publish your site on GitHub Pages several different ways:
- to a path like
username.github.io/reponame/or/docs - to a subdomain based on your username or organization name:
username.github.ioororgname.github.io - to the root subdomain at
username.github.io, and then configured to use a custom domain
Configuring the GitHub Pages source branch
You must select which branch will be deployed from your repository settings in GitHub for GitHub Pages to function. On GitHub:
- Navigate to your site’s repository.
- Under the repository name, click Settings.
- In the GitHub Pages section, use the Source drop-down to select
main(for publishing to the root subdomain) orgh-pages(for publishing to a path like/docs) as your GitHub Pages publishing source. - Click Save.
Installing the
gh-pagespackageThe easiest way to push a Gatsby app to GitHub Pages is by using a package called gh-pages //github.com/tschaub/gh-pages .
npm install gh-pages --save-dev
Basic Usage
var ghpages = require('gh-pages');

ghpages.publish('dist', function(err) {});
publish
ghpages.publish(dir, callback);
// or...
ghpages.publish(dir, options, callback);
Calling this function will create a temporary clone of the current repository, create a gh-pages branch if one doesn’t already exist, copy over all files from the base path, or only those that match patterns from the optional src configuration, commit all changes, and push to the origin remote.
If a gh-pages branch already exists, it will be updated with all commits from the remote before adding any commits from the provided src files.
Note that any files in the gh-pages branch that are not in the src files will be removed. See the add option if you don’t want any of the existing files removed.
ghpages – example usage
/**
 * Given the following directory structure:
 *
 *   dist/
 *     index.html
 *     js/
 *       site.js
 *
 * The usage below will create a `gh-pages` branch that looks like this:
 *
 *   index.html
 *   js/
 *     site.js
 *
 */
ghpages.publish('dist', callback);
https://alethal.github.io/gatsbykickoff/
- to a path like
Gatsby on Github
https://www.gatsbyjs.com/docs/how-to/previews-deploys-hosting/how-gatsby-works-with-github-pages/
MORE WAYS TO PUBLISH TO GITHUB
Installing the gh-pages package
The easiest way to push a Gatsby app to GitHub Pages is by using a package called gh-pages.
Copycopy code to clipboard
npm install gh-pages --save-dev
Using a deploy script
A custom script in your package.json makes it easier to build your site and move the contents of the built files to the proper branch for GitHub Pages, this helps automate that process.
Deploying to a path on GitHub Pages
For sites deployed at a path like username.github.io/reponame/, the --prefix-paths flag is used because your website will end up inside a folder like username.github.io/reponame/. You’ll need to add your /reponame path prefix as an option to gatsby-config.js:
gatsby-config.js
Copygatsby-config.js: copy code to clipboard
module.exports = {
  pathPrefix: "/reponame",
}
Then add a deploy script to package.json in your repository’s codebase:
package.json
Copypackage.json: copy code to clipboard
{
  "scripts": {
    "deploy": "gatsby build --prefix-paths && gh-pages -d public"
  }
}
When you run npm run deploy all contents of the public folder will be moved to your repository’s gh-pages branch. Make sure that your repository’s settings has the gh-pages branch set as the source to deploy from.
Note: To select main or gh-pages as your publishing source, you must have the branch present in your repository. If you don’t have a main or gh-pages branch, you can create them and then return to source settings to change your publishing source.
Deploying to a GitHub Pages subdomain at github.io
For a repository named like username.github.io, you don’t need to specify pathPrefix and your website needs to be pushed to the main branch.
⚠️ Keep in mind that GitHub Pages forces deployment of user/organization pages to the
mainbranch. So if you usemainfor development you need to do one of these:
Change the default branch from
mainto something else, and use
mainas a site deployment directory only:
- To create a new branch called
sourcerun this command:git checkout -b source main- Change the default branch in your repository settings (“Branches” menu item) from
maintosourceHave a separate repository for your source code (so
username.github.iois used only for deployment and not really for tracking your source code)
package.json
Copypackage.json: copy code to clipboard
{
  "scripts": {
    "deploy": "gatsby build && gh-pages -d public -b main"
  }
}
After running npm run deploy you should see your website at username.github.io
Deploying to the root subdomain and using a custom domain
If you use a custom domain, don’t add a pathPrefix as it will break navigation on your site. Path prefixing is only necessary when the site is not at the root of the domain like with repository sites.
Note: Don’t forget to add your CNAME file to the static directory.
Deploying to GitHub Pages from a CI server
It’s also possible to deploy your website to gh-pages through a CI server. This example uses Travis CI, a hosted Continuous Integration service, but other CI systems could work as well.
You can use the gh-pages npm module to deploy. But first, you need to configure it with proper credentials so that gh-pages is able to push a new branch.
Obtain a GitHub token for authenticating with CI
To push changes from the CI system to GitHub, you’ll need to authenticate. It’s recommended to use GitHub developer tokens.
In GitHub go to your Account settings -> Developer settings -> Personal access tokens, and create a new token that provides the repo access permissions.
In Travis’s settings for the repository, add a new secret environment variable of the name GH_TOKEN with the value of the token copied from GitHub. Make sure you DO NOT toggle the “display in build logs” setting to on as the token should remain secret. Otherwise, strangers would be able to push to your repository (a big security issue).
Add script to deploy to GitHub Pages via CI
Update the Gatsby project’s package.json to also include a deploy run script which invokes gh-pages with two important command-line arguments:
-d public– specifies the directory in which the built files exist and will be pushed as a source to GitHub Pages-r URL– the GitHub repository URL, including the use of the secret GitHub token (as a secret environment variable) to be able to push changes to thegh-pagesbranch, in the form ofhttps://$GH_TOKEN@github.com/<github username>/<github repository name>.git
Here’s an example (be sure to update the user and repo names to your own):
Copycopy code to clipboard
"scripts": {
    "deploy": "gatsby build --prefix-paths && gh-pages -d public -r https://$GH_TOKEN@github.com/lirantal/dockly.git"
  }
Update .travis.yml configuration
The following .travis.yml configuration provides a reference:
Copycopy code to clipboard
language: node_js
before_script:
  - npm install -g gatsby-cli
node_js:
  - "10"
deploy:
  provider: script
  # Note: change "docs" to the directory where your gatsby-site lives, if necessary
  script: cd docs/ && yarn install && yarn run deploy
  skip_cleanup: true
  on:
    branch: main
To break-down the important bits here for deploying the Gatsby website from Travis to GitHub Pages:
before_scriptis used to install the Gatsby CLI so it can be used in the project’s run script to build the Gatsby websitedeploywill only fire when the build runs on themainbranch, in which case it will fire off the deploy script. In the above example, the Gatsby site is located in adocs/directory. The script changes into that directory, installs all the website dependencies, and runs the deploy script as was set in the previous step.
Committing and pushing both the .travis.yml and package.json files to your base branch will be the final step in the process.