
selecting – label for="xyz"
label {
  display: block;
  width: 156px;
  cursor: pointer;
  padding-right: 6px;
  padding-bottom: 1px;
}
<label for="email">{t _your_email}:</label>
The selector would be label[for=email], so in CSS:
label[for=email]
{
    /* ...definitions here... */
}
…or in JavaScript using the DOM:
var element = document.querySelector("label[for=email]");
…or in JavaScript using jQuery:
var element = $("label[for=email]");
It's an attribute selector. Note that some browsers (versions of IE < 8, for instance) may not support attribute selectors, but more recent ones do. To support older browsers like IE6 and IE7, you'd have to use a class (well, or some other structural way), sadly.
(I'm assuming that the template {t _your_email} will fill in a field with id="email". If not, use a class instead.)
Note that if the value of the attribute you're selecting doesn't fit the rules for a CSS identifier (for instance, if it has spaces or brackets in it, or starts with a digit, etc.), you need quotes around the value:
label[for="field[]"]
{
    /* ...definitions here... */
}
They can be single or double quotes.
https://www.w3schools.com/cssref/css_selectors.asp
CSS Selectors
In CSS, selectors are patterns used to select the element(s) you want to style.
Use our CSS Selector Tester to demonstrate the different selectors.
| Selector | Example | Example description |
|---|---|---|
| .class | .intro | Selects all elements with class="intro" |
| .class1.class2 | .name1.name2 | Selects all elements with both name1 and name2 set within its class attribute |
| .class1 .class2 | .name1 .name2 | Selects all elements with name2 that is a descendant of an element with name1 |
| #id | #firstname | Selects the element with id="firstname" |
| * | * | Selects all elements |
| element | p | Selects all
elements |
| element.class | p.intro | Selects all
elements with class="intro" |
| element,element | div, p | Selects all
elements and all
elements |
| element element | div p | Selects all
elements inside elements |
| element>element | div > p | Selects all
elements where the parent is a element |
| element+element | div + p | Selects the first
element that is placed immediately after elements |
| element1~element2 | p ~ ul | Selects every
element |
| [attribute] | [target] | Selects all elements with a target attribute |
| [attribute=value] | [target=_blank] | Selects all elements with target="_blank" |
| [attribute~=value] | [title~=flower] | Selects all elements with a title attribute containing the word "flower" |
| [attribute|=value] | [lang|=en] | Selects all elements with a lang attribute value equal to "en" or starting with "en-" |
| [attribute^=value] | a[href^="https"] | Selects every element whose href attribute value begins with "https" |
| [attribute$=value] | a[href$=".pdf"] | Selects every element whose href attribute value ends with ".pdf" |
| [attribute**=value*] | a[href*="w3schools"] | Selects every element whose href attribute value contains the substring "w3schools" |
| :active | a:active | Selects the active link |
| ::after | p::after | Insert something after the content of each
element |
| ::before | p::before | Insert something before the content of each
element |
| :checked | input:checked | Selects every checked element |
| :default | input:default | Selects the default element |
| :disabled | input:disabled | Selects every disabled element |
| :empty | p:empty | Selects every
element that has no children (including text nodes) |
| :enabled | input:enabled | Selects every enabled element |
| :first-child | p:first-child | Selects every
element that is the first child of its parent |
| ::first-letter | p::first-letter | Selects the first letter of every
element |
| ::first-line | p::first-line | Selects the first line of every
element |
| :first-of-type | p:first-of-type | Selects every
element that is the first element of its parent |
| :focus | input:focus | Selects the input element which has focus |
| :fullscreen | :fullscreen | Selects the element that is in full-screen mode |
| :hover | a:hover | Selects links on mouse over |
| :in-range | input:in-range | Selects input elements with a value within a specified range |
| :indeterminate | input:indeterminate | Selects input elements that are in an indeterminate state |
| :invalid | input:invalid | Selects all input elements with an invalid value |
| :lang(language) | p:lang(it) | Selects every
element with a lang attribute equal to "it" (Italian) |
| :last-child | p:last-child | Selects every
element that is the last child of its parent |
| :last-of-type | p:last-of-type | Selects every
element that is the last element of its parent |
| :link | a:link | Selects all unvisited links |
| ::marker | ::marker | Selects the markers of list items |
| :not(selector) | :not(p) | Selects every element that is not a
element |
| :nth-child(n) | p:nth-child(2) | Selects every
element that is the second child of its parent |
| :nth-last-child(n) | p:nth-last-child(2) | Selects every
element that is the second child of its parent, counting from the last child |
| :nth-last-of-type(n) | p:nth-last-of-type(2) | Selects every
element that is the second element of its parent, counting from the last child |
| :nth-of-type(n) | p:nth-of-type(2) | Selects every
element that is the second element of its parent |
| :only-of-type | p:only-of-type | Selects every
element that is the only element of its parent |
| :only-child | p:only-child | Selects every
element that is the only child of its parent |
| :optional | input:optional | Selects input elements with no "required" attribute |
| :out-of-range | input:out-of-range | Selects input elements with a value outside a specified range |
| ::placeholder | input::placeholder | Selects input elements with the "placeholder" attribute specified |
| :read-only | input:read-only | Selects input elements with the "readonly" attribute specified |
| :read-write | input:read-write | Selects input elements with the "readonly" attribute NOT specified |
| :required | input:required | Selects input elements with the "required" attribute specified |
| :root | :root | Selects the document's root element |
| ::selection | ::selection | Selects the portion of an element that is selected by a user |
| :target | #news:target | Selects the current active #news element (clicked on a URL containing that anchor name) |
| :valid | input:valid | Selects all input elements with a valid value |
| :visited | a:visited | Selects all visited links |
The Seven Different Types
Attribute selectors are case-sensitive by default (see case-insensitive matching below), and are written inside brackets [].
There are seven different types of matches you can find with an attribute selector, and the syntax is different for each. Each of the more complex attribute selectors build on the syntax of the exact match selector — they all start with the attribute name and end with an equals sign followed by the attribute value(s), usually in quotes. What goes between the attribute name and equals sign is what makes the difference among the selectors.
[data-value] {
  /* Attribute exists */
}

[data-value="foo"] {
  /* Attribute has this exact value */
}

[data-value*="foo"] {
  /* Attribute value contains this value somewhere in it */
}

[data-value~="foo"] {
  /* Attribute has this value in a space-separated list somewhere */
}

[data-value^="foo"] {
  /* Attribute value starts with this */
}

[data-value|="foo"] {
  /* Attribute value starts with this in a dash-separated list */
}

[data-value$="foo"] {
  /* Attribute value ends with this */
}
Attribute Selector Breakdown
https://css-tricks.com/attribute-selectors/
CSS has the ability to target HTML elements based on any one of their attributes. You probably already know about classes and IDs. Check out this bit of HTML:
<h3 id="title" class="magic" rel="friend">David Walsh</h3>
This single element has three attributes: ID, class, and rel. To select the element in CSS, you could use an ID selector (#title) or a clasmagicalector (.magic). But did you know you can select it based on that rel attribute as well? That is what is known as an attribute selector:
h3[rel="friend"] {
   /* woohoo! */
}
There is a lot more to attribute selectors though, so let’s look closer at all the different options and try to cover some “real world” scenarios on when they might be useful.
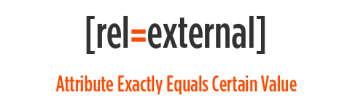
Attribute Exactly Equals Certain Value

In the example we used above, the attribute of the h3 element was “friend”. The CSS selector we wrote targeted that h3 element because it’s rel attribute was exactly “friend”. In other words, that equals sign means just just what you think it does… an exact match. See another basic example:
<h3 rel="external">Attribute Equals</h3>
h3[rel="external"] { color: red; }
A great real world example of this is styling a blogroll. Let’s say you had a list of links to friends sites like this:
<a href="http://perishablepress.com">Jeff Starr</a>
<a href="http://davidwalsh.name">David Walsh</a>
<a href="http://accidentalninja.net/">Richard Felix</a>
Then you wanted to style each link slightly differently. The traditional way would probably be to give each link a class name in which to target, but that requires additional markup which is always a nice thing to avoid (semantics and all). Another way might be to use :nth-child, but that requires their order to never change. This is the perfect use for attribute selectors… the links already have a unique attribute in which to target!
a[href="http://perishablepress.com"] { color: red; }
I believe the most common use of regular attribute selectors is on inputs. There are text, button, checkbox, file, hidden, image, password, radio, reset, and submit (did I miss any?). All of them are ’s, and all of them are very different. So doing something like input { padding: 10px; } is a bad idea most of the time. It’s very common to see things like:
input[type="text"] { padding: 3px; }
input[type="radio"] { float: left; }
It’s really the only way to get your hands on certain types of inputs without screwing up the others and without adding extra markup.
Note on Quotes: You can usually get away without using quotes in attribute selectors, like [type=radio], but the rules for omitting quotes are weird and inconsistent across actual browser implementations. So, best practice, just use quotes, like [type="radio"]. It’s safer and always works.
Attribute Contains Certain Value Somewhere

This is where it starts getting more interesting. The equals sign in attribute selectors may be prefaced by other characters which alter the meaning a bit. For example, “*=” means “match the following value anywhere in the attribute value.” Look at this example:
<h3 rel="xxxexternalxxx">Attribute Contains</h3>
h3[rel*="external"] { color: red; }
Remember that classes and ID’s are attributes too, and can be used with attribute selectors. So let’s say you were writing CSS for a site where you couldn’t control the markup and a sloppy developer had three DIVs you need to target:
<div id="post_1"></div>
<div id="post_two"></div>
<div id="third_post"></div>
You could select them all with:
div[id*="post"] { color: red; }
Attribute Begins with Certain Value
<h3 rel="external-link yep">Attribute Begins</h3>
h3[rel^="external"] { color: red; }
A real-world example of using this would be, say, that you wanted to style every single link to your friends site different than other links. Doesn’t matter if you are linking to their homepage or any subpage, any links to them you want to style up.
a[href^="http://perishablepress.com"] { color: red; }
That will match a link to their homepage, but also any other subpages as well.
Attribute Ends with Certain Value

We can select based on how attribute values begin, why not end?
<h3 rel="friend external">Attribute Ends</h3>
h3[rel$="external"] { color: red; }
A good use case for these is labeling file download anchor links with icons based on what type of file they are. For example, PDF’s get a PDF icon and Word Documents get a Word icon:
a[href$=".pdf"] { background: url(icon-pdf.png) left center no-repeat; padding-left: 30px; }
a[href$=".doc"] { background: url(icon-doc.png) left center no-repeat; padding-left: 30px; }
Attribute is within Space Separated List

You probably already knew that you could apply multiple classes to elements right? Well if you do that, you can still use .class-name in CSS to target any one of them. Attribute selectors aren’t that easy. If your rel attribute has multiple values (e.g. values in a space-separated list) you’ll need to use “~=“:
<h3 rel="friend external sandwich">Attribute Space Separated</h3>
h3[rel~="external"] { color: red; }
You might be thinking, why would I use this when *= would also match this and be more versatile? Indeed it is more versatile, but it can be too versatile. This selector requires the spaces around the value where as *= would not. So if you had two elements one with rel=home friend-link and one with rel=home friend link you are going to need the space-separated selector to target the second one properly.
Attribute is the start of a Dash Separated List

This will select if the start of a dash-separated list of attribute values matches the selector.
<h3 rel="friend-external-sandwich">Attribute Dash Separated</h3>
h3[rel|="friend"] { color: red; }
Note that even though it matches based on the start of the selector, the entire first part of the string before the first dash needs to match. So in the above example, if the rel attribute was friend2-external-sandwich, it would not be a match while the ^= attribute selector would have.
Multiple Attribute Matches
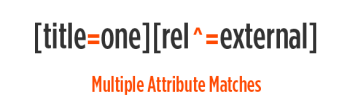
Vital to note is that you can use multiple attribute selectors in the same selector, which requires all of them to match for the selector itself to match.
<h3 rel="handsome" title="Important note">Multiple Attributes</h3>
h3[rel="handsome"][title^="Important"] { color: red; }
Case-Insensitve Attribute Selectors
By default, the strings inside attribute selectors are case sensitive, but rather than matching multiple permutations of case in the case that you need to, you can pass a value that makes it case-insensitve:
/* Will match
<div data-state="open"></div>
<div data-state="Open"></div>
<div data-state="OPEN"></div>
<div data-state="oPeN"></div>
*/
[data-state="open" i] { }
Using Attribute in CSS
You can not only select via attributes, but use attributes in CSS content, like…
.el::before {
  content: attr(data-prefix) ": ";
}
Hopefully someday we’ll get support for types and fallback in the attr() function in CSS, like:
.el {
  /* <div class="el" data-font-size="18"> */
  font-size: attr(data-font-size px);

  /* <div class="el"> */
  font-size: attr(data-font-size px, 18px);
}
Browser Support
Every single example above works in all modern browsers: Safari, Chrome, Firefox, Opera, and IE. Internet Explorer has perfect support for all of these down to version 7, but zero support in 6. To test in your browser, see the test page. If the line/selector style is in red, it works.
7 Attribute Selectors
https://css-tricks.com/almanac/selectors/a/attribute/
There are lots of ways you can select elements in CSS. The most basic selection is by tag name, like p { }. Almost anything more specific than a tag selector uses attributes — class and ID both select on those attributes on HTML elements. But class and ID aren’t the only attributes developers can select. We can use any of an element’s attributes as selectors.
Attribute selection has a special syntax. Here’s an example:
a[href="https://css-tricks.com"] {
  color: #E18728;
}
That’s an exact match selector that will only select links with the exact href attribute value of “https://css-tricks.com”.
The Seven Different Types
Attribute selectors are case-sensitive by default (see case-insensitive matching below), and are written inside brackets [].
There are seven different types of matches you can find with an attribute selector, and the syntax is different for each. Each of the more complex attribute selectors build on the syntax of the exact match selector — they all start with the attribute name and end with an equals sign followed by the attribute value(s), usually in quotes. What goes between the attribute name and equals sign is what makes the difference among the selectors.
[data-value] {
  /* Attribute exists */
}

[data-value="foo"] {
  /* Attribute has this exact value */
}

[data-value*="foo"] {
  /* Attribute value contains this value somewhere in it */
}

[data-value~="foo"] {
  /* Attribute has this value in a space-separated list somewhere */
}

[data-value^="foo"] {
  /* Attribute value starts with this */
}

[data-value|="foo"] {
  /* Attribute value starts with this in a dash-separated list */
}

[data-value$="foo"] {
  /* Attribute value ends with this */
}
Value contains: attribute value contains a term as the only value, a value in a list of values, or as part of another value. To use this selector, add an asterisk (*) before the equals sign. For example, img[alt*="art"] will select images with the alt text “abstract art” and “athlete starting a new sport”, because the value “art” is in the word “starting”.
Value is in a space-separated list: value is either the only attribute value, or is a whole value in a space-separated set of values. Unlike the “contains” selector, this selector will not look for the value as a word fragment. To use this selector, add a tilde (~) before the equals sign. For example, img[alt~="art"] will select images with the alt text “abstract art” and “art show”, but not “athlete starting a new sport” (which the “contains” selector would select).
Value starts with: attribute value starts with the selected term. To use this selector, add a caret (^) before the equals sign. Don’t forget, case-sensitivity matters. For example, img[alt^=”art”] will select images with the alt text “art show” and “artistic pattern”, but not an image with the alt text “Arthur Miller” because “Arthur” begins with a capital letter.
Value is first in a dash-separated list: This selector is very similar to the “starts with” selector. Here, the selector matches a value that is either the only value or is the first in a dash-separated list of values. To use this selector, add a pipe character (|) before the equals sign. For example, li[data-years|="1900"] will select list items with a data-years value of “1900-2000”, but not the list item with a data-years value of “1800-1900”.
Value ends with: attribute value ends with the selected term. To use this selector, add a dollar sign ($) before the equals sign. For example, a[href$="pdf"] selects every link that ends with .pdf.
A note about quotes: You can go without quotes around the value in some circumstances, but the rules for selecting without quotes are inconsistent cross-browser. Quotes always work, so if you stick to using them you can be sure your selector will work.
Fun fact: the values are treated as strings, so you don’t have to do any fancy escaping of characters to make them match, as you would if you used unusual characters in a class or ID selector.
[class="(╯°□°)╯︵ ┻━┻"]{
  color: red;
  font-weight: bold;
}
Case-insensitive matching
Case-insensitive attribute selectors are part of the CSS Working Group’s Selectors Level 4 specification. As mentioned above, attribute value strings are by default case-sensitive, but can be changed to case-insensitive by adding i just before the closing bracket:
[attribute="value" i] {
  /* Styles here will apply to elements with:
    attribute="value"
    attribute="VaLuE"
    attribute="VALUE"
    ...etc
  */
}
Case-insensitive matching could be really handy for targeting attributes holding unpredictable, human-written text. For example, suppose you were styling a speech bubble on a chat app and wanted to add a “waving hand” to any messages with the text “hello” in some form. You could do so with only CSS, using a case-insensitive matcher to catch all possible variations:
Combining them
You can combine an attribute selector with other selectors, like tag, class, or ID.
div[attribute="value"] {
  /* style rules here */
}

.module[attribute="value"] {
  /* style rules here */
}

#header[attribute="value"] {
  /* style rules here */
}
Or even combine multiple attribute selectors. This example selects images with alt text that includes the word “person” as the only value or a value in a space separated list, and a src value that includes the value “lorem”:
img[alt~="person"][src*="lorem"] {
  /* style rules here */
}
Attribute Selectors in JavaScript and jQuery
Attribute selectors can be used in jQuery just like any other CSS selector. In JavaScript, you can use attribute selectors with document.querySelector() and document.querySelectorAll().
Related
More Information
https://jenkov.com/tutorials/css/selectors.html
CSS Selectors
-
Attribute Selector
-
Pseudo Classes
-
Pseudo Elements
CSS selectors are the part of CSS rules that determine what HTML elements that are affected by the CSS rule. Here is an example CSS rule:
div {
    border: 1px solid black;
}
The CSS selector part of the above CSS rule is this:
div
This selector means that all div elements should be targeted by the CSS rule.
There are several different types of CSS selectors. Both CSS 1.0, CSS 2.1 and CSS 3.0 added selectors to the CSS standard. The rest of this text will go through these CSS selectors.
Universal Selector
The universal CSS selector is used to select all elements. It is marked with a *. Here is a universal CSS selector example:
* {
    font-size: 18px;
}
This example selects all HTML elements and set their font-size CSS property.
The universal CSS selector is not so often used alone. It is more often used with a child selector or descendant selector.
Element Selector
The element selector is the most basic CSS selector. It selects all the HTML elements of the same type. For instance, all div elements or p elements.
With the element CSS selector you simply write the element name of the elements to apply the CSS rule to. Here are three examples:
div {
    border: 1px solid black;
}
p {
    font-size: 18px;
}
input {
    border: 1px solid #cccccc;
}
These three CSS rules each have a selector that selects all of a certain type of HTML elements. The first CSS selector selects all div elements. The second CSS selector selects all p elements. The third CSS selector selector selects all input elements.
You can select any HTML element using the element selector. All elements of that type / name will be affected by the CSS rule having the element selector.
Class Selector
The class selector is another very commonly used CSS selector. The class selector selects all HTML elements which have the given CSS class set on them. You set a CSS class on an HTML element by giving the HTML element a class attribute. Here is an example:
<div class="green"> Text... </div>

<p class="green"> Paragraph... </p>
As you can see, you can give different types of HTML elements the same CSS class. That is fully valid (in case you need that).
You target these HTML elements by creating a CSS rule with the same name as the CSS class to select, and prefix with a dot (.). Here is a CSS rule example that selects the two HTML elements from the example above:
.green {
    border: 1px solid green;
}
The CSS rule example selects all HTML elements with the CSS class green set on them. Notice the . in the beginning CSS selector part (.green) of the CSS rule. This signals to the browser that this is a CSS class selector, and that the name after the . is the name of the CSS class to select.
You can use any name as a CSS class. There are no built-in CSS class names. Use CSS class names that start with letters – not numbers or other special characters. CSS class names are case sensitive, so GREEN is not the same CSS class as green or Green.
ID Selector
The ID selector selects the HTML element which has the given ID. The ID of an HTML element is set via the id attribute. Here is an example:
<div id="myElement"> My Element </div>
You can select this HTML element using an ID selector, by prefixing the CSS selector with a # and then write the ID of the HTML element. Here is an example that selects the above HTML element by its ID:
#myElement {
    border: 1px solid blue;
}
This example uses the # to signal that the selector is an ID selector, and then the ID myElement right after the # to mark what ID to select.
Attribute Selector
The CSS attribute selector is used to select HTML elements by their attributes. Look at this HTML:
<a href="http://tutorials.jenkov.com"> Java and Web Development Tutorials</a>

<a name="jump-here"></a>
Notice how the two a elements have different attributes. The first a element has a href attribute, and the second a element has a name attribute.
You can select these two a elements individually using an attribute selector. Here is a CSS attribute selector example:
[href] {
    font-size: 18px;
}
This example CSS rule selects all HTML elements that have an href attribute. That means the first a element in the HTML shown earlier will be targeted by the CSS rule, but the second a element will not.
It is the [attrName] that makes up the attribute selector. Inside the square brackets ([ ]) you write the name of the attribute to target.
You can also select HTML elements based on their attribute values. I will show you a few ways to do that in the following sections.
Attribute Equals
You can select an HTML element based on its attribute value like this:
[href="http://jenkov.com"]
You add a = after the attribute name, and then you write the desired attribute value. In this case I want to select all HTML elements that have an href attribute with the value http://jenkov.com.
Attribute Begins With
You can select HTML element based on what an attribute value starts with. Instead of using the = sign between attribute name and attribute value, you write ^=. Here is an example:
<a href="http://jenkov.com"></a>


<style>
    [href^="http://"] {
        font-size: 18px;
    }
</style>
This example will select all HTML elements that has an href attribute which value starts with http://.
Attribute Begins With Language Code
The CSS attribute begins with language code selector is used select HTML elements with a given language code. Look at this HTML:
<p lang="en"   > English text</p>
<p lang="en-UK"> UK English text</p>
<p lang="en-US"> US English text</p>
You can then use the CSS attribute begins with language code selector to select all HTML elements with a language code that starts with en-, like this:
[lang|="en"] {
    font-size: 18px;
}
Notice the |= part of the selector in the above CSS rule. That part signals that the attribute value should either be en or start with en- in the language code.
Attribute Ends With
You can also select HTML elements based on what an attribute value ends with. Instead of writing ^= you write $= between the attribute name and attribute value. Here is another example:
<a href="http://jenkov.com"></a>


<style>
    [href$=".png"] {
        font-size: 18px;
    }
</style>
This example CSS rule selects all HTML elements which have an href attribute which value ends in .png.
Attribute Contains
The CSS attribute contains selector is used to select all HTML elements with a given attribute which contains the specified substring. Here is a CSS attribute contains selector example:
[href*="jenkov.com"] {
    font-size: 18px;
}
This example CSS rule selects all HTML elements with an href attribute which contains the substring jenkov.com somewhere in its attribute value. Thus, it will select the two first of the below a elements, but not the third:
<a href="http://jenkov.com">Jenkov.com</a>
<a href="http://tutorials.jenkov.com">Tutorials</a>
<a href="http://google.com">Google</a>
Attribute Contains Word
The CSS attribute contains word selector can select HTML elements with attribute which value contains a given word. The difference between this selector and the attribute contains selector is, that for this selector the targeted substring must be surrounded by spaces in the attribute value. Put differently, it must appear as a word inside the attribute value, not just an arbitrary substring.
Look at these two HTML elements:
<div myattr="iamaprogrammer"></div>

<div myattr="i am a programmer"></div>
Both of these div elements contains the substring programmer inside their myattr attribute values, but only the second div element contains it as a whitespace separated word. Thus, the selector in this CSS rule:
[myattr~="programmer"] {

}
… will only select the second of the div elements shown above.
Group Selector
The CSS group selector is used to group together multiple selectors into one, big CSS selector. That means, that all elements targeted by any of the selectors will be affected by the CSS rule. Here is a CSS group selector example:
div, p {
    font-size : 18px;
}
This example CSS rule sets the font size of both div and p elements.
Notice how the example has two selectors separated by a comma (div and p). The comma makes this a group selector, meaning the CSS rule is applied to all elements matching one (or more) of the selectors that are grouped together.
Child Selector
The child CSS selector is used to select all elements that are immediate children of some other element. Here is a child CSS selector example:
li>a {
    font-size: 18px;
}
This example selects all a elements which are children of li elements. Thus, only the second a element would be selected in this HTML:
<a href="...">This will not be selected</a>

<ul>
    <li><a href="...">This WILL be selected</a></li>
</ul>
The first a element is not a child of a li element. Thus it is not selected by the child selector. The second a element on the other hand, is a child of a li element, so the CSS rule is applied to that element.
It is the > character which marks a selector as a child selector. Notice the > character between the li and a in the selector in the example above.
You can use more than one level of child selectors. Here is an example:
ol>li>a {
    font-size: 18px;
}
This example only selects the a elements which are children of li which are again children of ol elements. Thus, the CSS rule is not applied to a elements nested inside a ul (unordered list).
Descendant Selector
The descendant CSS selector is used to select elements that are descendants of other elements. The selected elements do not have to be immediate children of the specified ancestor. They just have to be nested inside the ancestor somewhere. That is how descendant selectors are different from child selectors. Look at this HTML:
Link 1
You can select all a elements nested inside the ol element using this CSS rule:
ol a {
    font-size : 18px;
}
The descendant selector is marked via the space character. Notice the space between the ol and the a in the selector in the above CSS rule. This space specifies that this selector is a descendant selector, and that it selects all a elements that are descendants of (nested inside) ol elements. It does not care how far down in the element hierarchy the a is nested, as long as it has a ol as an ancestor somewhere higher up in the hierarchy.
Adjacent Sibling Selector
The adjacent sibling CSS selector is used to select HTML elements that are adjacent siblings of some other HTML element. Look at this HTML:
<body>
    <h3>Headline</h3>

    <p>

    </p>

    <p>

    </p>

    <table>

    </table>

    <table>

    </table>
</body>
All of the HTML elements in this example are siblings, meaning the have the same parent HTML element (the body element). But they are not all adjacent siblings. By adjacent is meant that the elements are following each other immediately, with no other HTML elements in between.
You can select the first p element after the h3 using this adjacent sibling selector:
h3+p {

}
This selects all p elements which are have a h3 element preceding it as sibling. In the HTML above, that means the first p element after the h3 element, but not the following p elements, because they are preceded by a p element, not a h3 element.
Similarly you could select all table elements adjacent to a p element using this adjacent sibling selector:
p+table {

}
General Sibling Selector
The CSS general sibling selector is used to select HTML elements which have the same parent. Unlike with the adjacent sibling selector, the general sibling selector selects all elements that are preceded by another element (inside the same parent), even if the two elements are not directly adjacent.
Look at this HTML example:
<body>
    <h3>Headline</h3>

    <p>

    </p>

    <p>

    </p>

</body>
A CSS rule using a general sibling selector can be used to select all p elements which are preceded by another p element somewhere (inside the same parent), like this:
p~p {

}
Notice the ~ character between the two p's in the selector part of the CSS rule. The ~ character is what marks this as a general sibling selector.
Pseudo Classes
CSS has defined a set of pseudo classes which you can use in your CSS selectors. A CSS pseudo class is actually a state of an HTML element. Thus, you can assign different CSS styles to HTML elements depending on the HTML element state. CSS 3.0 added quite a few new CSS pseudo classes to the standard. I will cover each of these CSS pseudo classes in the following sections.
a:link, a:visted, a:hover, a:active
The a element (which represents a link) can be in four different states, each of which has an associated pseudo class:
| Pseudo Class | Description |
|---|---|
| a:link | Selects all links that have not yet been visited. |
| a:visited | Selects all links that have already been visited. |
| a:hover | Selects all links the mouse hovers over. |
| a:active | Selects all links that have been clicked – until the new page is loaded. |
The a:active pseudo class does not "live long". It is only applied in the short time between a user clicks a link (that thus becomes active), and until the browser loads the page the link points to.
Here are some a element pseudo class examples:
a:link    { color: #00ff00; }
a:visited { color: #009900; }
a:hover   { color: #66ff66; }
a:active  { color: #ffff00; }
These example set the colors of the link (a element) to different colors depending on the link state (pseudo class).
:first-child, :last-child
The :first-child CSS pseudo class selects all elements that are the first child of some parent HTML element. The :last-child CSS pseudo class selects all elements that are the last child of some parent HTML element. Here is an example:
<div>
    <p>First child</p>
    <p>Second child</p>
</div>

<style>
    p:first-child {
        background-color: #ff00ff;
    }
    p:last-child {
        background-color: #00ff00;
    }
</style>
This example's first CSS rule selects all p elements that are the first child of their parent elements. In this example that would be the p element with the body First Child. This HTML element has its background color set to #ff00ff.
The example's second CSS rule selects all p elements that are the last child of their parent elements. In this example that would be the p element with the body Second Child.
:nth-child()
The :nth:child() CSS pseudo class selects the nth elements of some parent. The n could be every element, every 2nd element, every 3rd element etc. Here is an example:
<div>
    <p>1st child</p>
    <p>2nd child</p>
    <p>3rd child</p>
    <p>4th child</p>
    <p>5th child</p>
    <p>6th child</p>
</div>

<style>
    p:nth-child(2n) {
        background-color: #ffff00;
    }
</style>
This example CSS rule selects every second p element inside their parent elements. This means the p elements with the bodies 2nd child, 4th child and 6th child.
It is the 2 in p:nth-child(2n) that specifies that it is every second p element that is to be selected. If you write p:nth-child(3n) instead, you would select every third p element of their parents.
:first-of-type, :last-of-type
The :first-of-type CSS pseudo class selects elements that are the first child of its type inside its parent element. The :last-of-type CSS pseudo class selects elements that are the last of its type inside its parent element. Here is an example:
<div>
    <h4>1st h4</h4>
    <p>1st p</p>

    <h4>2nd h4</h4>
    <p>2nd p</p>

    <h4>3rd h4</h4>
    <p>3rd p</p>
</div>

<style>
    p:first-of-type {
        background-color: #ffff00;
    }
    p:last-of-type {
        background-color: #00ff00;
    }
</style>
This example contains 2 CSS rules. The p:first-of-type will select the p elements that are the first p elements of their parents, regardless of what other elements the parent contains. In this example that is the p element with the body 1st p. The p:last-of-type will select the p elements that are the last p elements of their parents. In this example that would be the p element with the body 3rd p.
:nth-of-type()
The nth-of-type() CSS pseudo class selects all the elements that are the nth of their type inside their parents. Inside the parentheses you specify if they are to be every element, every second, every third etc. element of its type in its parent. Here is an CSS nth-of-type() example:
<div>
    <h4>1st h4</h4>

    <p>1st p</p>
    <p>2nd p</p>

    <p>3rd p</p>
    <p>4th p</p>

    <p>5th p</p>
    <p>6th p</p>
</div>

<style>
    p:nth-of-type(2n) {
        background-color: #ffff00;
    }
</style>
The CSS rule in this example selects every second p element inside their parent elements. Thus, the p elements with the bodies 2nd p, 4th p and 6th p. You could change the 2n to 3n and get every third element of its kind inside its parent.
:nth-last-child()
The :nth-last-child() CSS pseudo class selects the nth last child of its parent. It works similarly to the :nth-child() pseudo class, except it counts the elements backwards from the last towards the first.
:nth-last-of-type()
The :nth-last-of-type() CSS pseudo class selects the nth last child of its kind inside its parent. It works similarly to the :nth-of-type() pseudo class except it counts the elements backwards, from the last element and towards the first element inside each parent.
:only-child
The :only-child CSS pseudo class selects all elements that are the only child of their parent.
:only-of-type
The :only-of-type CSS pseudo class selects all elements that are the only child of its kind inside their parent.
:empty
The :empty CSS pseudo class selects all HTML elements that are empty, meaning they have no text or child elements inside their body. Here is an example :empty pseudo class example:
div:empty {

}
This CSS rule selects all div elements that are empty.
:not()
The :not() CSS pseudo class selects all of those HTML elements that do not match the CSS selector given as parameter (inside the parentheses) to the :not() pseudo class. Here is an example:
p:not(:last-child) {
    border-bottom: 1px solid #cccccc;
}
This CSS rule selects all p elements which are not the last child of their parents.
:checked
The :checked CSS pseudo class selects all input fields that are checked, meaning all checkboxes. Here is a :checked example:
input[type="checkbox"]:checked {

}
This CSS rule selects all input fields which have a type attribute with the value checkbox, and which are checked.
:enabled, :disabled
The :enabled and :disabled CSS pseudo classes selects HTML elements that are either enabled or disabled. This will typically be input fields. Here is an example:
input:enabled {
    border: 1px solid #6666ff;
}

input:disabled {
    border: 1px solid #666666;
}
This examples sets a blue border color on all enabled input elements, and a gray border on all disabled input fields.
Pseudo Elements
CSS pseudo elements are parts elements that can be styled, but which are not by themselves real HTML elements.
Pseudo elements are specified in the CSS selector using a double colon (::) and then the name of the pseudo element. That syntax is new from CSS 3.0. Here is a CSS 3.0 pseudo element example:
p::first-letter {
    font-size : 20px;
}
Before CSS 3.0 the standard was a single colon, like this:
p:first-letter {
    font-size : 20px;
}
For backwards compatibility, the single colon notation still works in most browsers, but you are encouraged to use the double colon notation.
There are several different pseudo elements you can use. The CSS pseudo elements are covered in the following sections.
::first-letter
The :first-letter CSS pseudo element can be used to select the first letter of HTML elements. For instance, to select the first letter of all p elements you would write:
p::first-letter {
    font-size: 20px;
}
This example sets the first letter inside all p elements to font size 20px.
::first-line
Like with :first-letter you can select the first line of an HTML element, and style that differently. The first line is not the first sentence. It is the first horizontal line of text, regardless of whether that constitutes a less than or more than a full sentence.
Here is a :first-line pseudo element example:
p::first-line {
    font-size: 19px;
}
This example sets the first line of all p elements to font size 19px.
::before, ::after
The :before and :after CSS pseudo elements matches a virtual first and last child of the selected HTML element. This is normally used to insert some extra content (text or HTML) before or after that virtual last child using the content CSS property. The content CSS property is used to generate content and insert into the DOM via CSS. Here is an example:
<div id="#theId">
    HTML Text
</div>

<style>
    #theId::after {
        content : " - Generated Content";
    }
</style>
This example inserts the content defined in the content CSS property after the last child (last content) of the element with the id theId (the div element.
If you had used the :before pseudo element instead, the generated content would have been inserted before the first content instead of after the last content.
::selection
The ::selection pseudo element refers to the selected content when the user selects e.g. a passage of text with the mouse. This pseudo element is supported in IE and Chrome, but not in Firefox. It was part of the CSS 3.0 propposal, but is no longer part of the specification.
Here is a ::selection CSS pseudo element example:
::selection {
    background-color: #ff00ff;
}
This example sets the background-color of the selected text to purple.