

+ DEV SERVER
RESOURCES
CanaKit Raspberry Pi 4 8GB EXTREME Kit – Aluminum (Silver and Black)
SKU: PI4-8GB-EXT128EW-C8-BLK
- https://www.raspberrypi.org/documentation/
- https://projects.raspberrypi.org/en/pathways/getting-started-with-raspberry-pi
- https://projects.raspberrypi.org/en
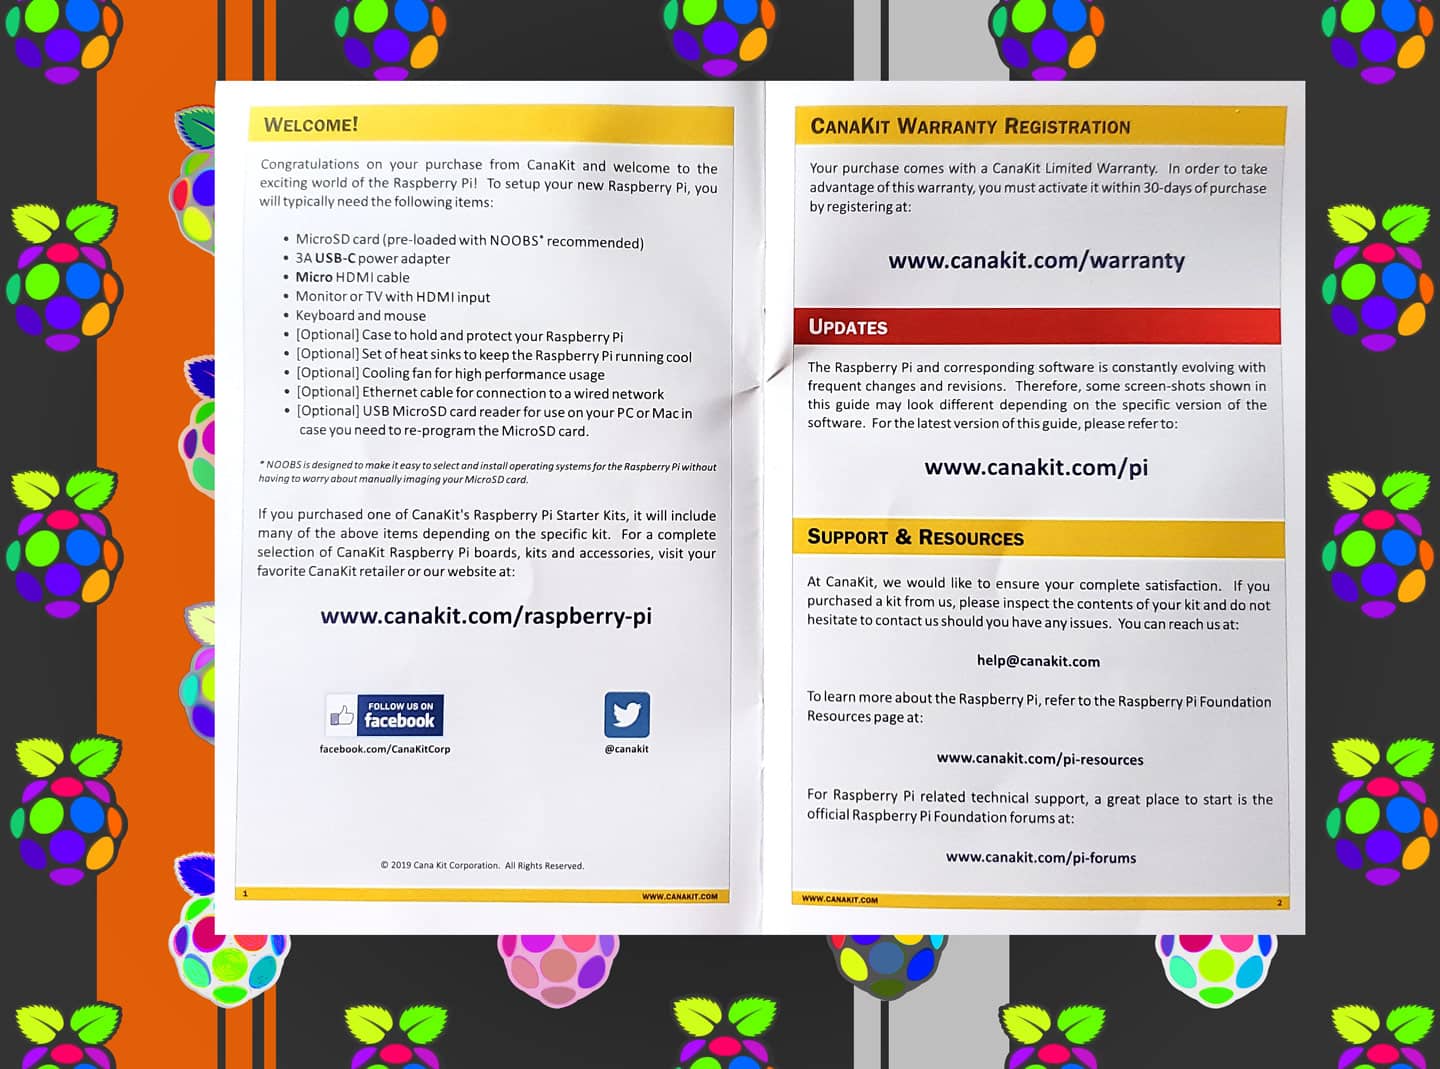
Installation
- VERY THOROUGH: https://www.youtube.com/watch?v=BpJCAafw2qE
- https://www.youtube.com/watch?v=vkLr08K0c1E
- pi-case: https://www.canakit.com/pi-case
- https://www.youtube.com/watch?v=n-4IxW9cgN4
Connect to Mac – REALVNC – https://manage.realvnc.com/en/ – WORKED BEST BY FAR!!
- Remote Desktop: https://www.youtube.com/watch?v=L2XaFmt9xsA
- https://www.raspberrypi.org/documentation/remote-access/ssh/unix.md
- https://www.dexterindustries.com/getting-started/using-the-pi/connect-to-your-raspberry-pi-from-a-mac/
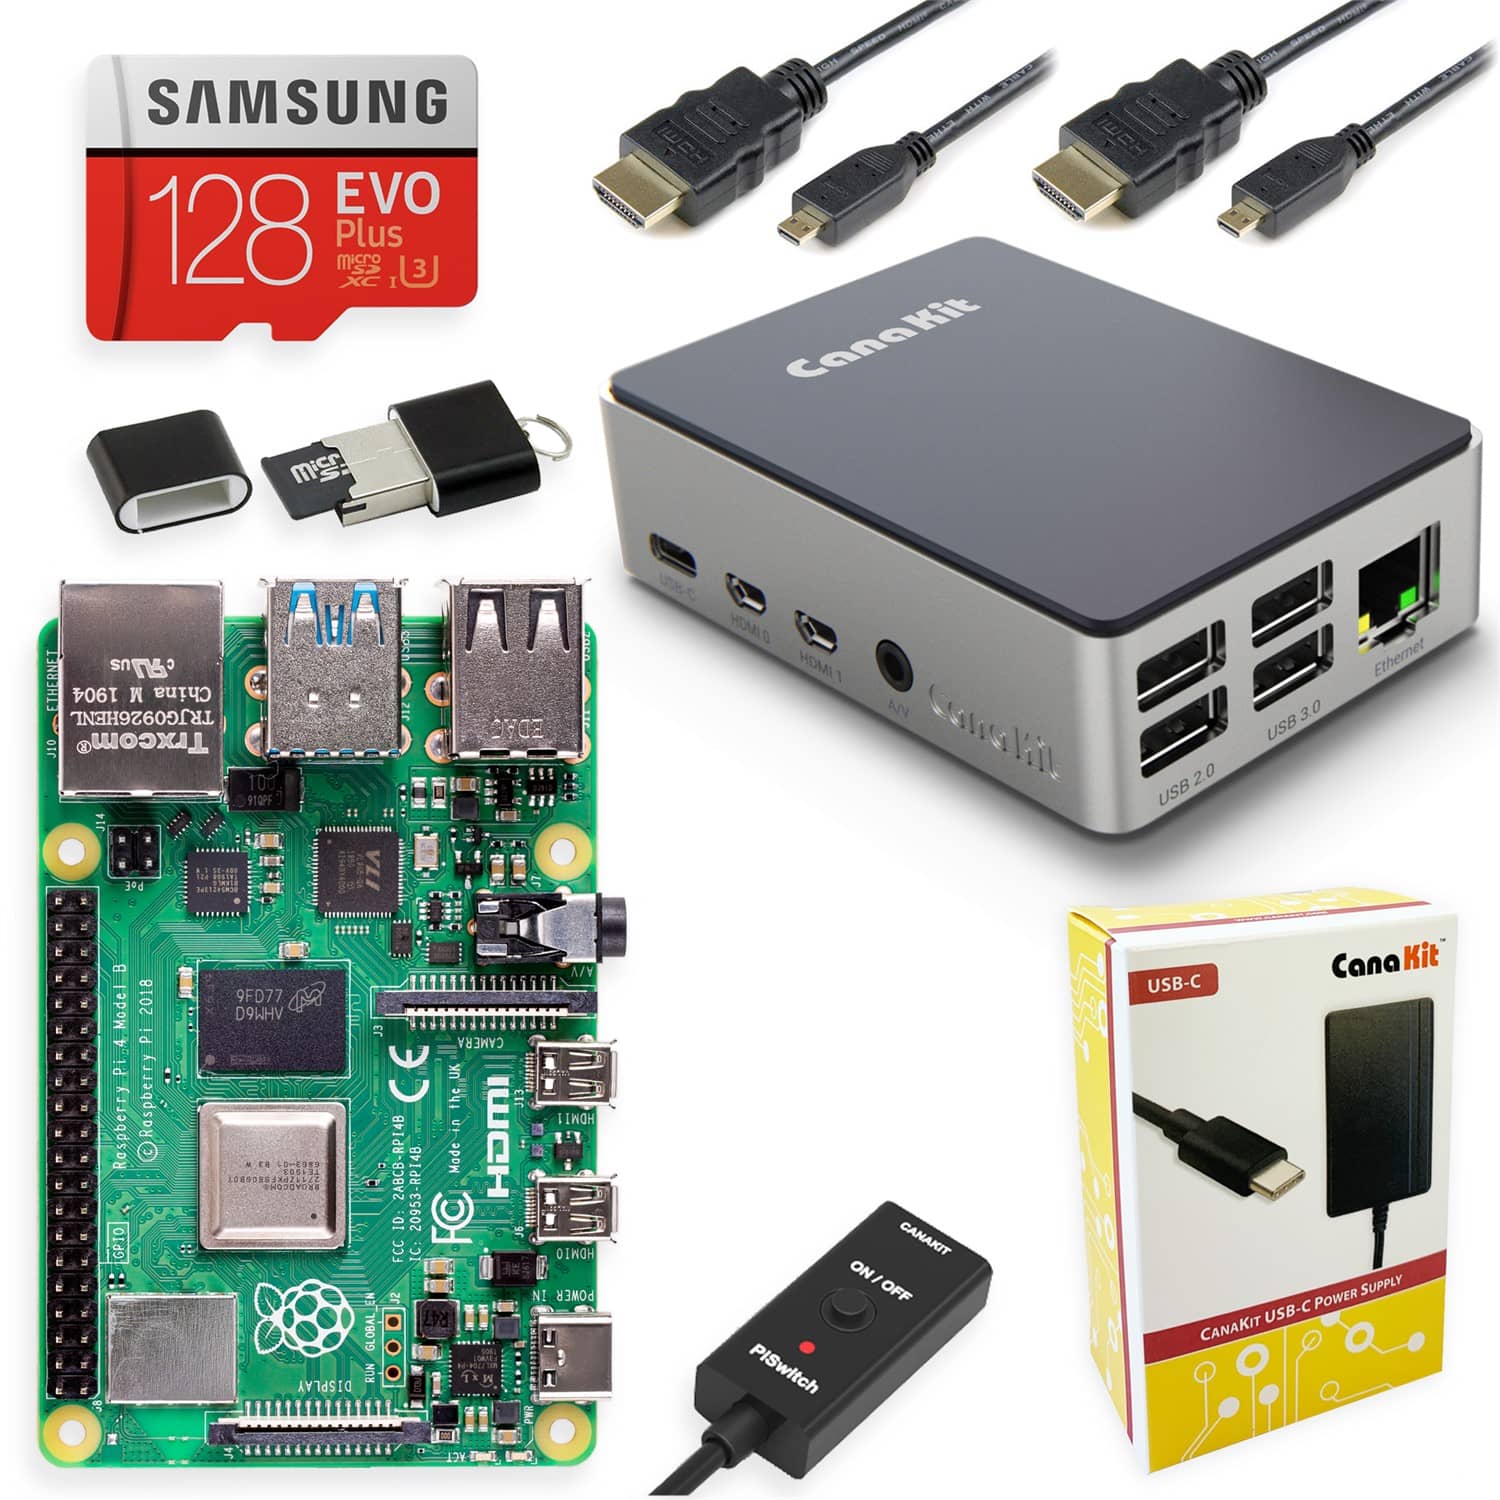
- Raspberry Pi 4 Model B with 1.5GHz 64-bit quad-core ARMv8 CPU
- 4GB RAM or 8GB RAM
- Samsung EVO+ 128GB Class 10 High Speed MicroSD Card Pre-loaded with NOOBS
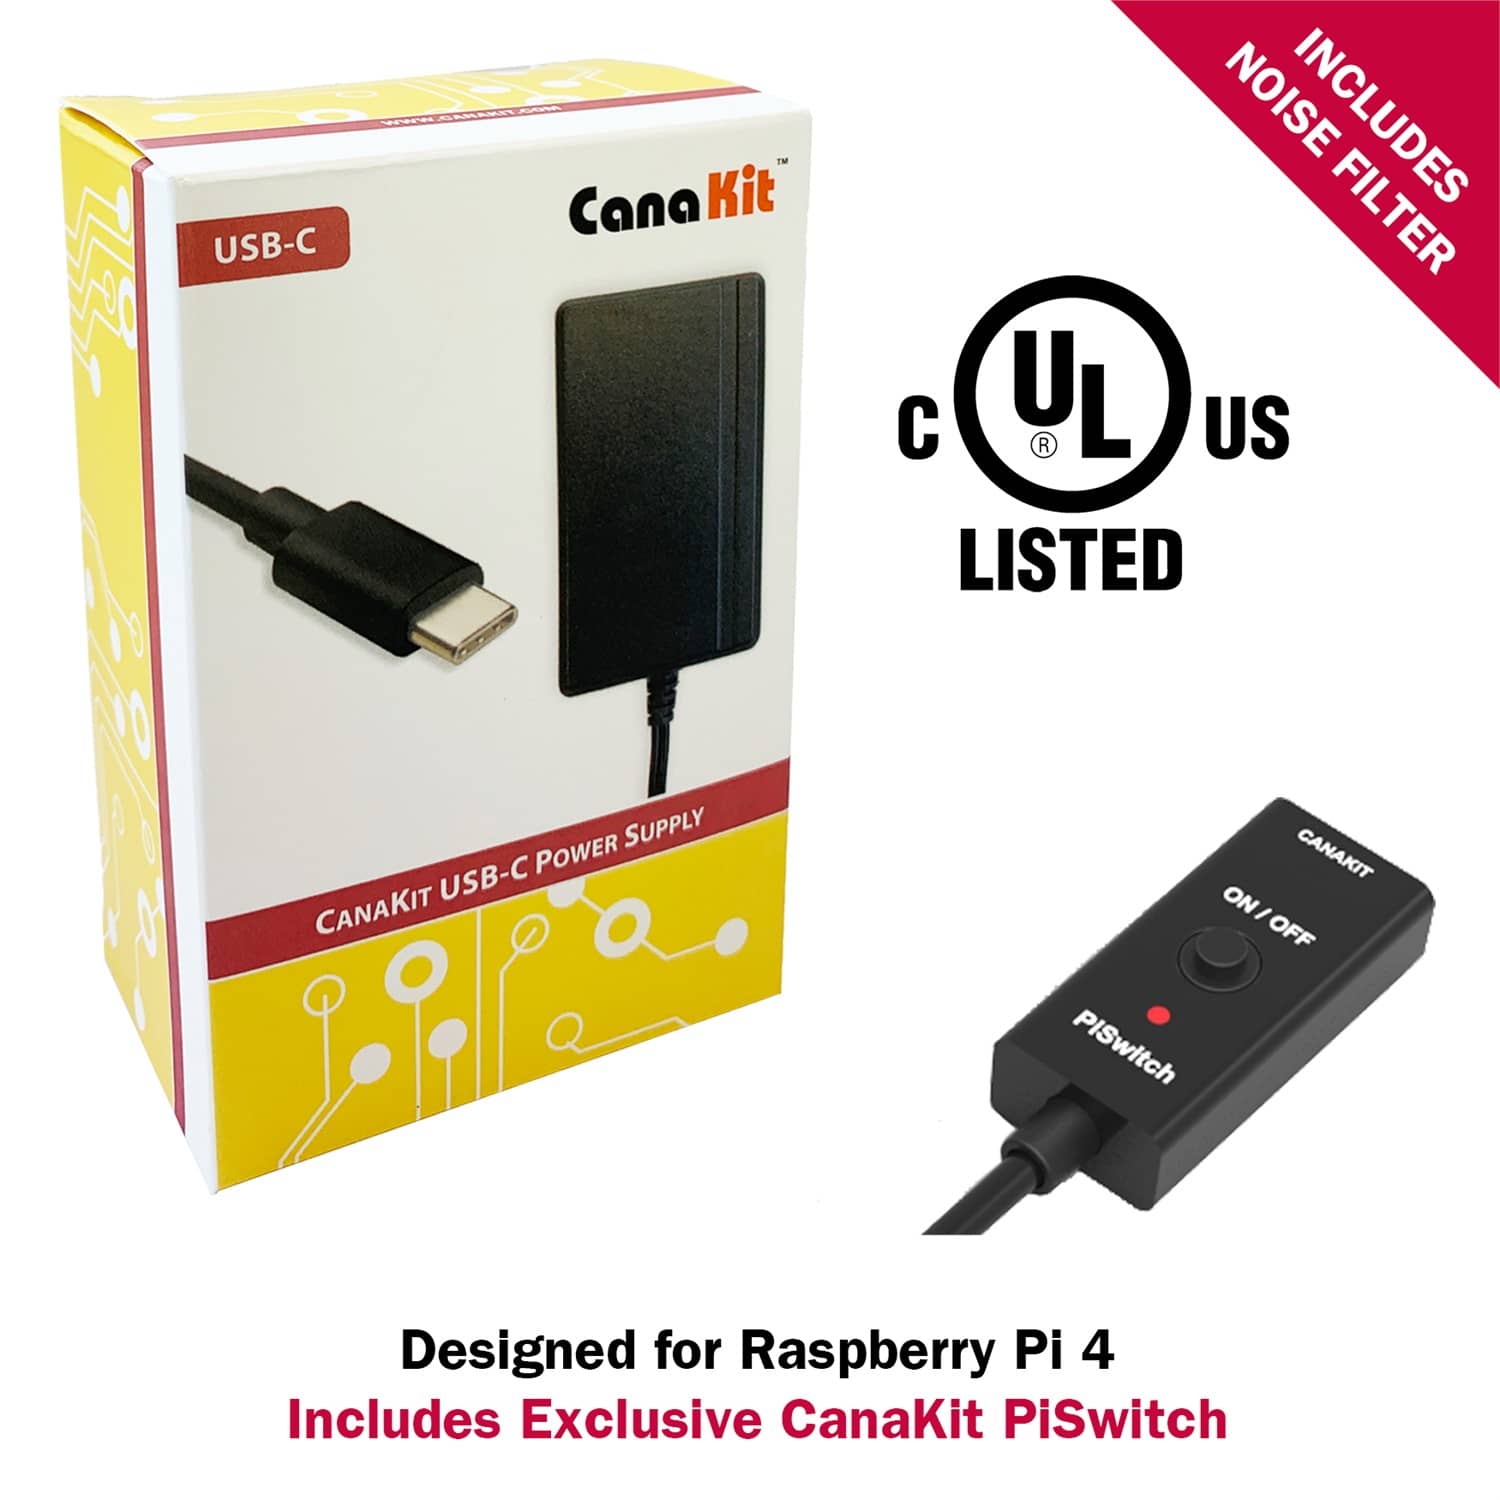
- CanaKit 3.5A USB-C Power Supply with Noise Filter (UL Listed) specially designed for the Raspberry Pi 4 (5-foot cable)
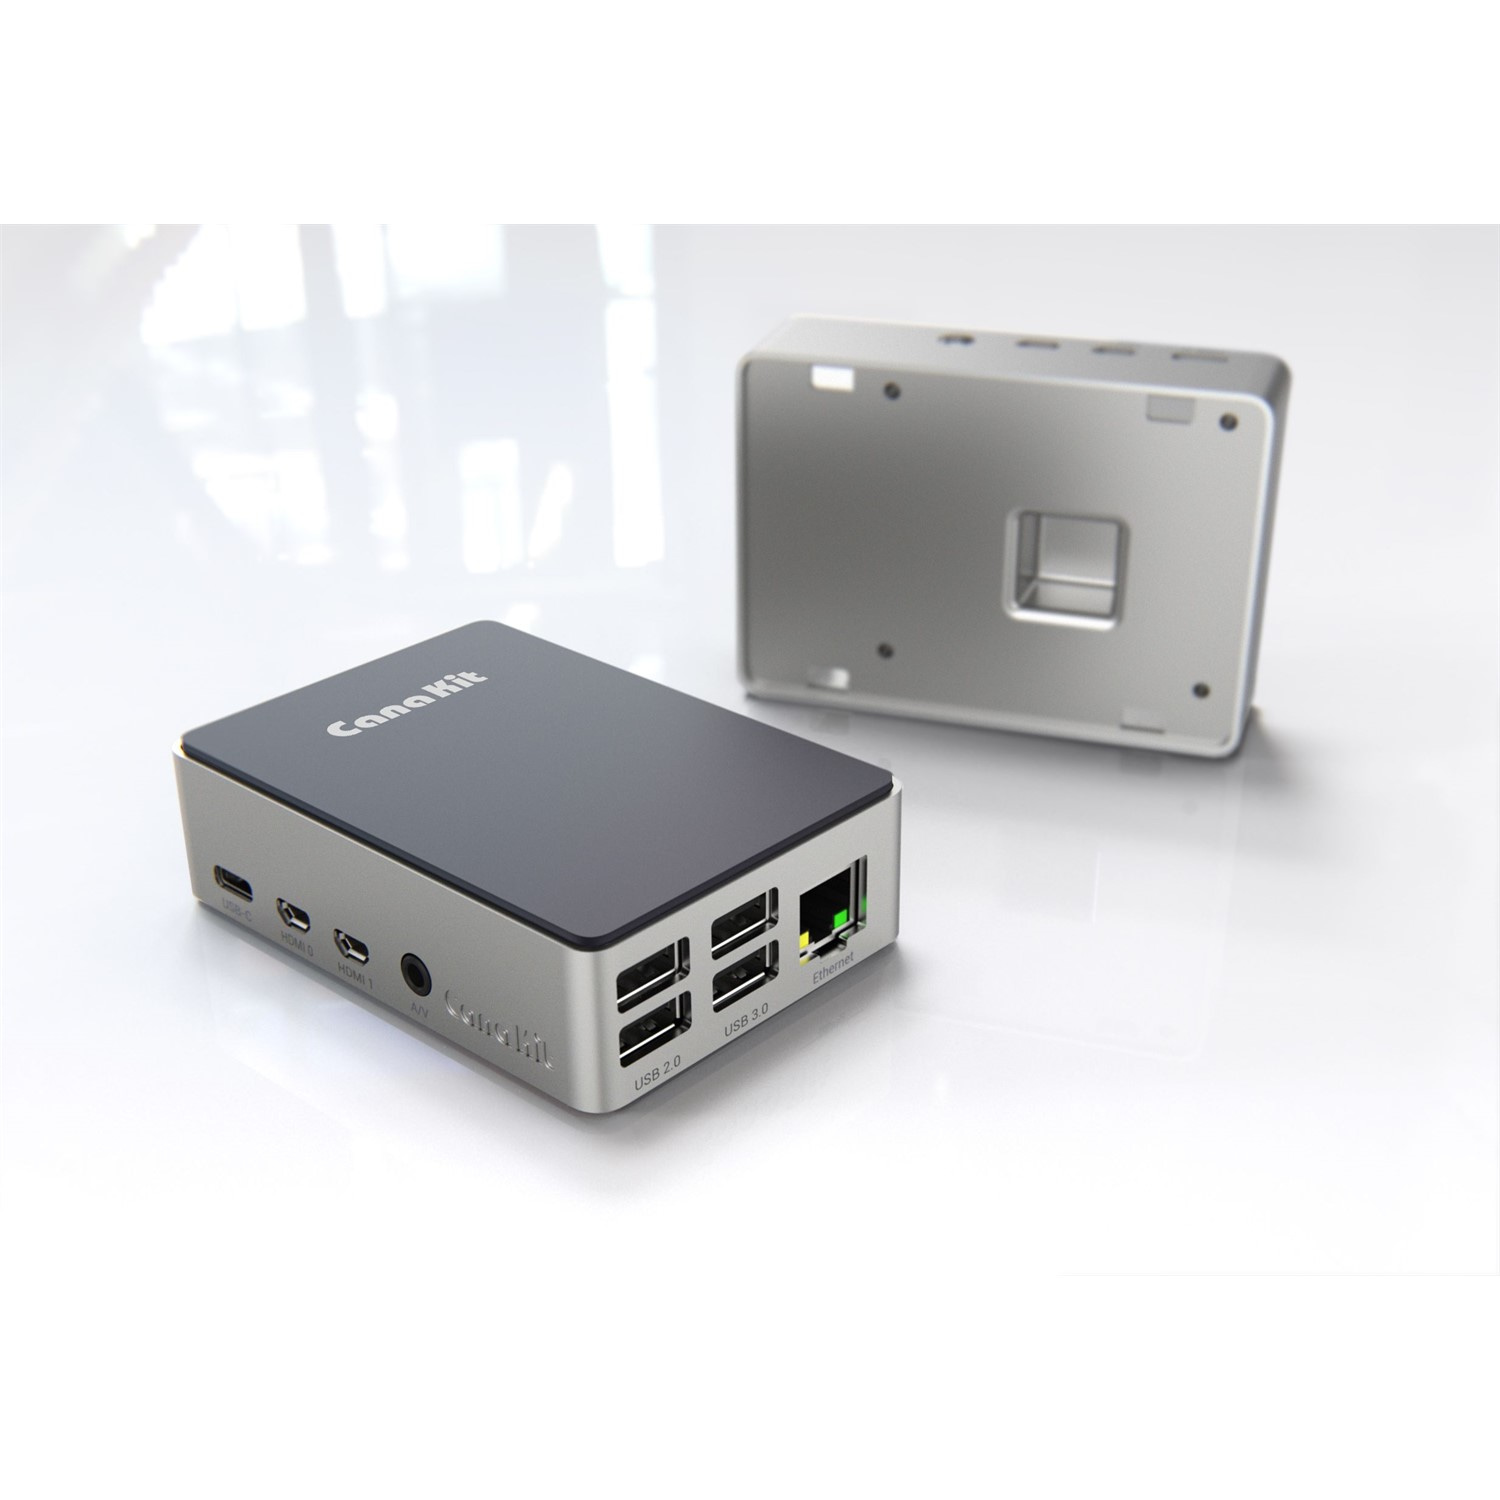
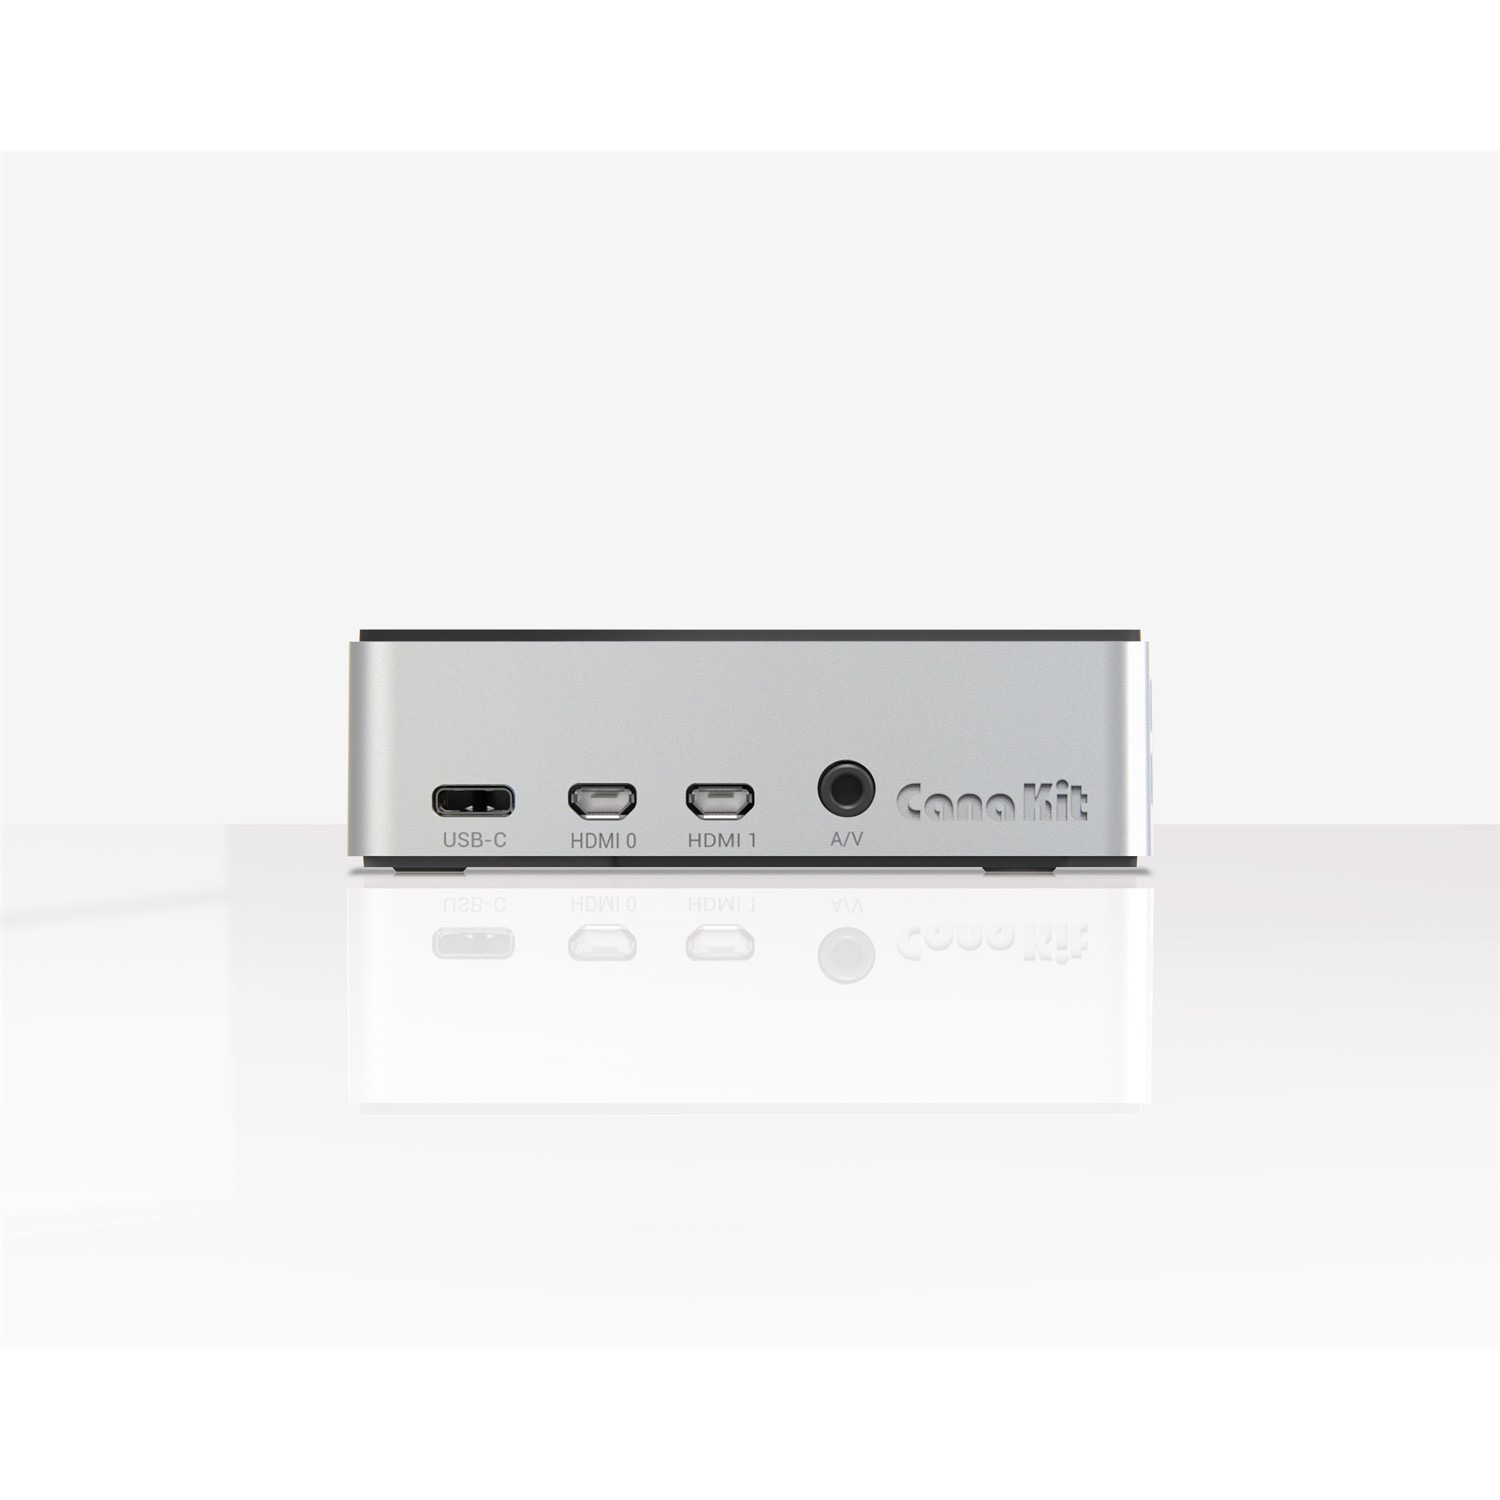
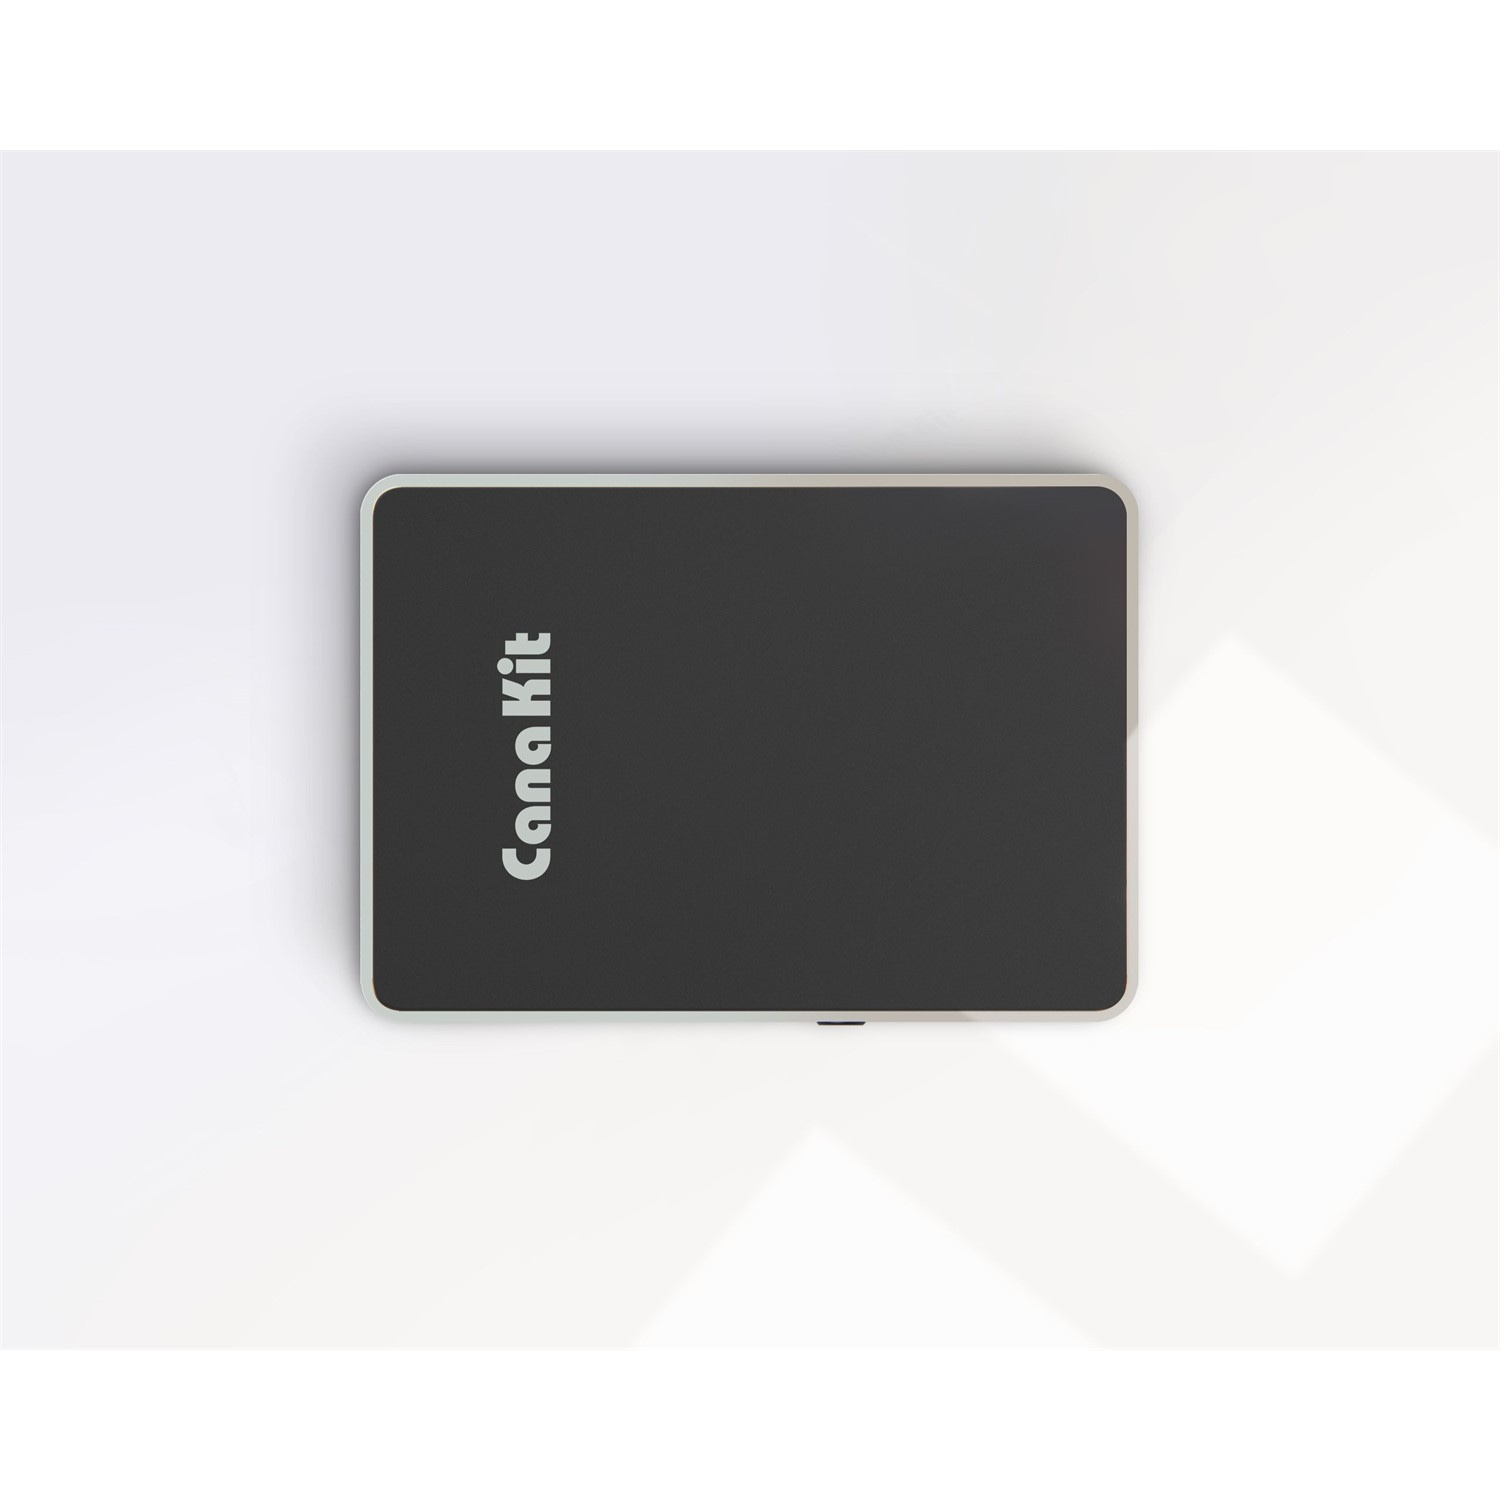
- CanaKit Premium Self-Cooling Silver Case with Soft Touch Black Lid
- Set of 2 Micro HDMI to HDMI Cables (6-foot cable)
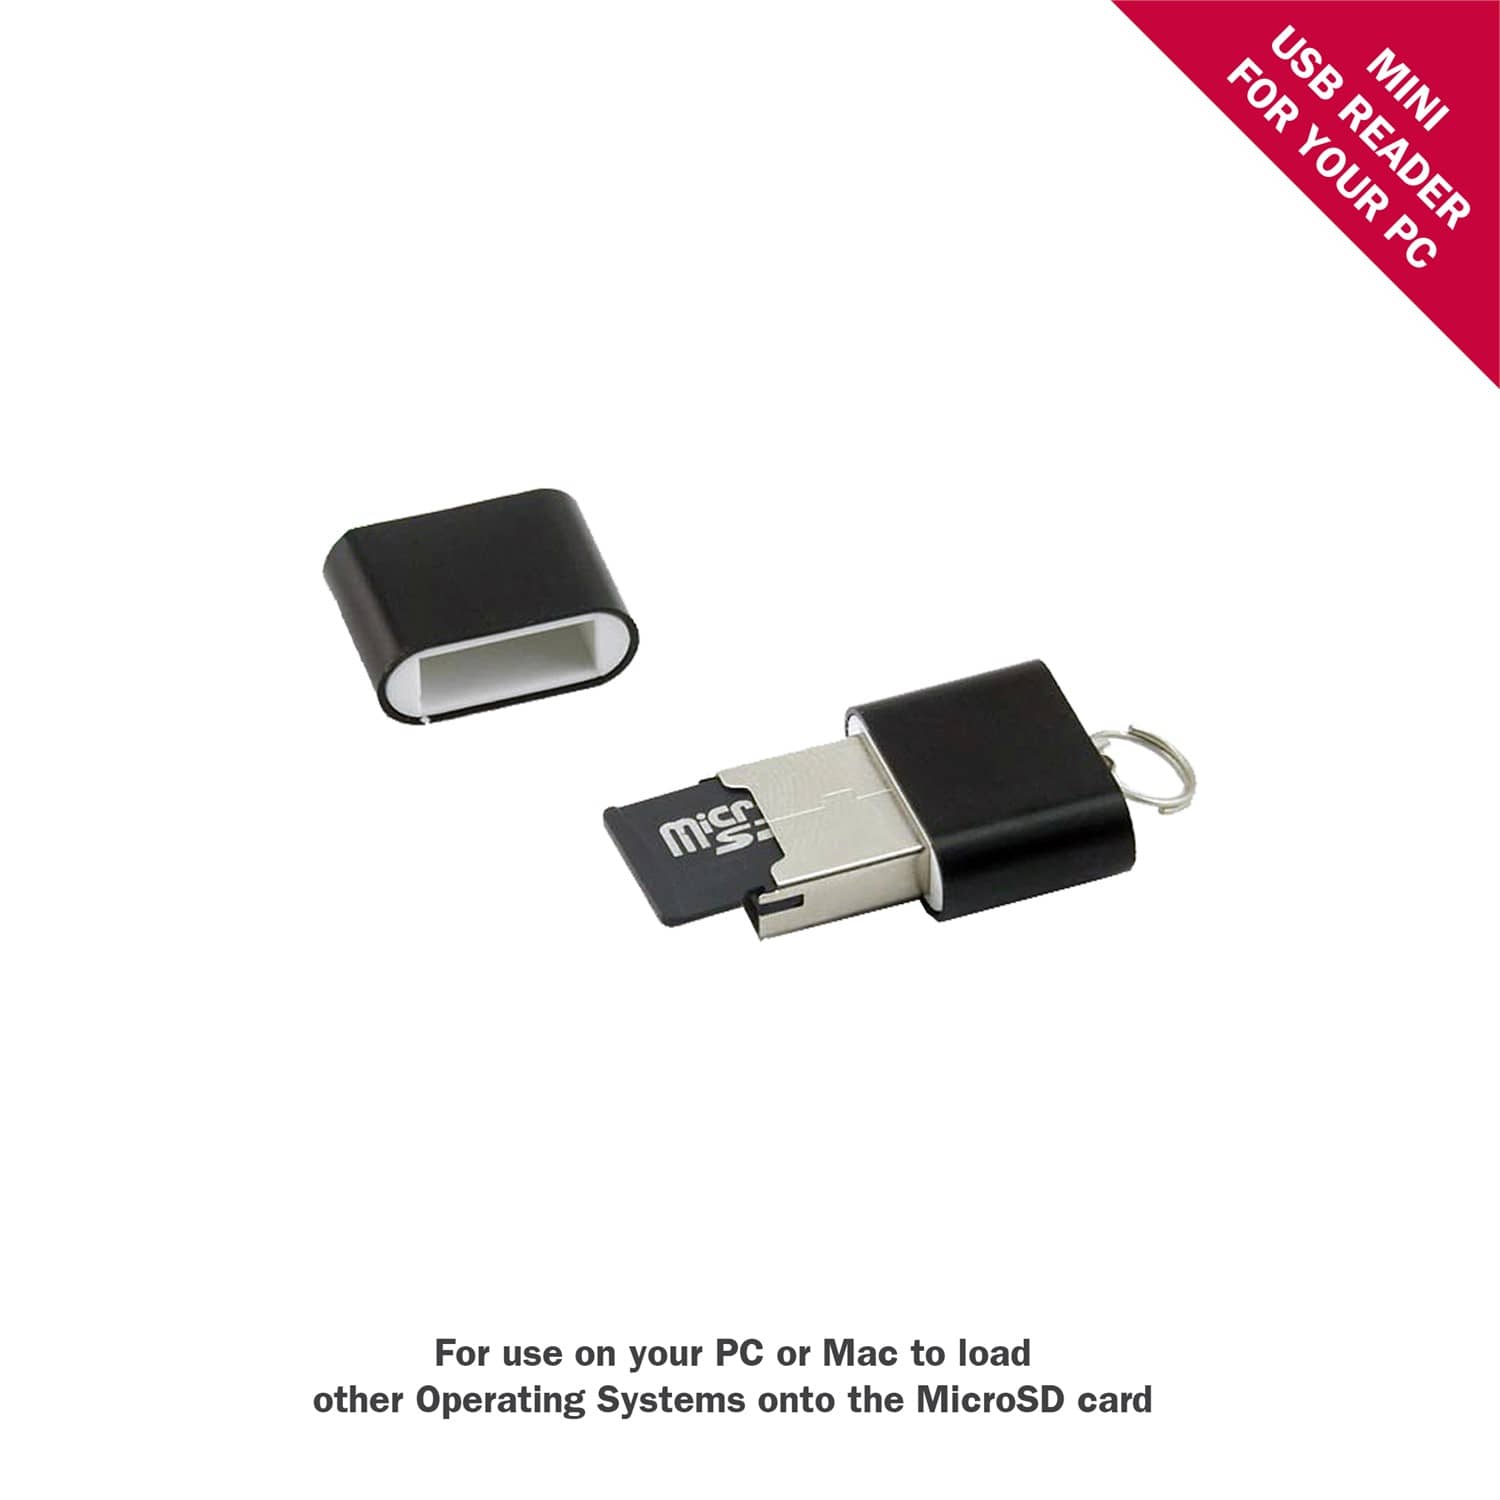
- USB Card Reader Dongle
- CanaKit Quick-Start Guide
<!–utm_source: Identify the advertiser, site, publication, etc. that is sending traffic to your property, for example: google, newsletter4, billboard.utm_medium: The advertising or marketing medium, for example: cpc, banner, email newsletter.
–>
Product Shots
Product Description
An exclusive Starter Kit for Raspberry Pi 4 from CanaKit, that includes the popular Raspberry Pi 4 and the highest-level components – so high that we had to name it Extreme – such as the high-speed Samsung EVO Plus 128 GB MicroSD card, and a beautiful self-cooling silver enclosure, with a unique black soft-touch lid that feels extraordinary and premium in your hands.
With the CanaKit Raspberry Pi 4 Extreme Kit, you can rely on the compatibility, quality, consistency and service that comes with all of the CanaKit brand Raspberry Pi 4 kits.
The kit includes the Raspberry Pi 4 Model B and everything you need to get up and running within minutes in the exciting world of Raspberry Pi! Simply attach a keyboard/mouse to the device and connect it to HDMI TV or Monitor.
The Raspberry Pi 4 offers ground-breaking increases in processor speed, multimedia performance, memory, and connectivity compared to the prior-generation boards, while retaining backwards compatibility and similar power consumption. The Raspberry Pi 4 provides desktop performance comparable to entry-level x86 PC systems.
The CanaKit Raspberry Pi 4 Extreme kit comes in either the 4GB or 8GB RAM variations – the higher end of the Raspberry Pi 4 range, and 128 GB of storage capacity in the included Samsung EVO Plus high performance MicroSD card that is pre-loaded with NOOBS.
A beautiful self-cooling silver enclosure, with a unique black soft-touch lid that feels extraordinarily premium in your hands. The case is self-cooling, and the included thermal pad transfers the Raspberry Pi 4 CPU thermal heat to the case that results in the entire case acting as a passive extra large heat sink (as large as the case itself), but without the noise and the mechanical nature of a fan and is excellent case for continuous long-term usage. The case includes 4 screws and an ARCTIC thermal pad.
Due to the higher power requirements, the Raspberry Pi 4 requires at least a 3.0A USB-C power supply. The CanaKit 3.5A USB-C power supply (UL Listed) that is included in this kit is specially designed and tested for the Raspberry Pi 4. This power supply incorporates a noise filter to provide the highest stability, along with a CanaKit PiSwitch – an in-line and handy On-Off power switch with LED indicator.
The CanaKit Raspberry Pi 4 Extreme Kit includes a set of 2 high quality 4K60P Micro HDMI to HDMI cable (6 feet each) to provide best output display resolution support and dual monitor support with the two included cables.
Kit Includes:
– Raspberry Pi 4 Model B
– 4GB or 8GB RAM
– Samsung EVO+ 128GB MicroSD Pre-loaded with NOOBS
– CanaKit Premium Self-Cooling Silver Case with Soft Touch Black Lid
– CanaKit USB-C Power Supply
– Set of 2 Micro HDMI Cables
– USB Card Reader
– CanaKit Quick-Start Guide
– CanaKit GPIO Reference Card
Quickstart Guide

“Monitor” for initial install
Macs are not friendly at sharing their monitors – and I don’t have any other things. Except . . .


